Building a Roman Road (Via Strata) — The Layered Highway That Connected an Empire
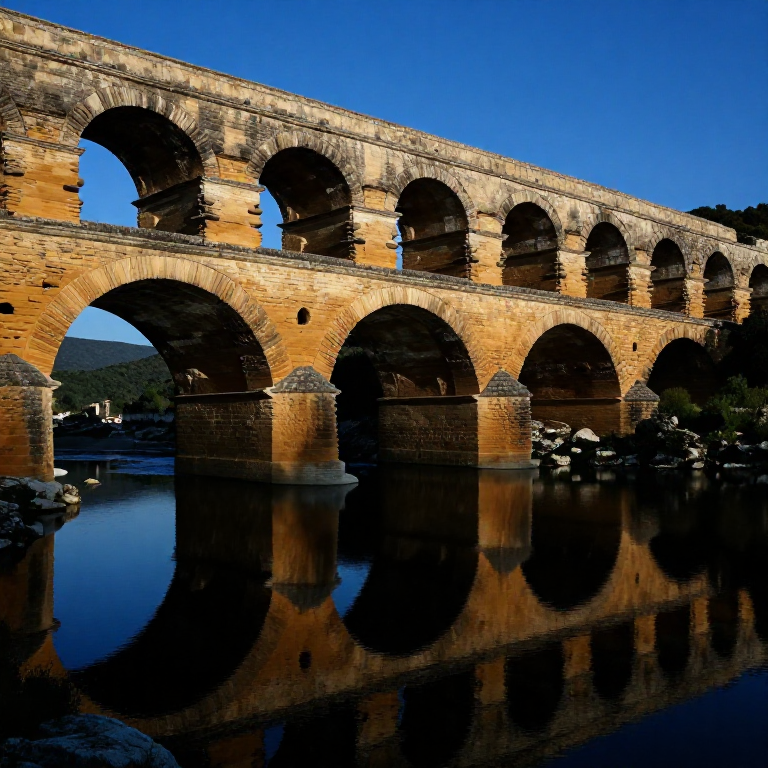
Roman roads are among the most remarkable engineering achievements of the ancient world. At their peak, the Roman road network (viae publicae) stretched over 400,000 km across three continents, connecting Britain to Mesopotamia. Many routes are still in use today — modern highways in Europe often follow Roman alignments because the Romans chose the best routes through terrain with such precision that later engineers could not improve on them.
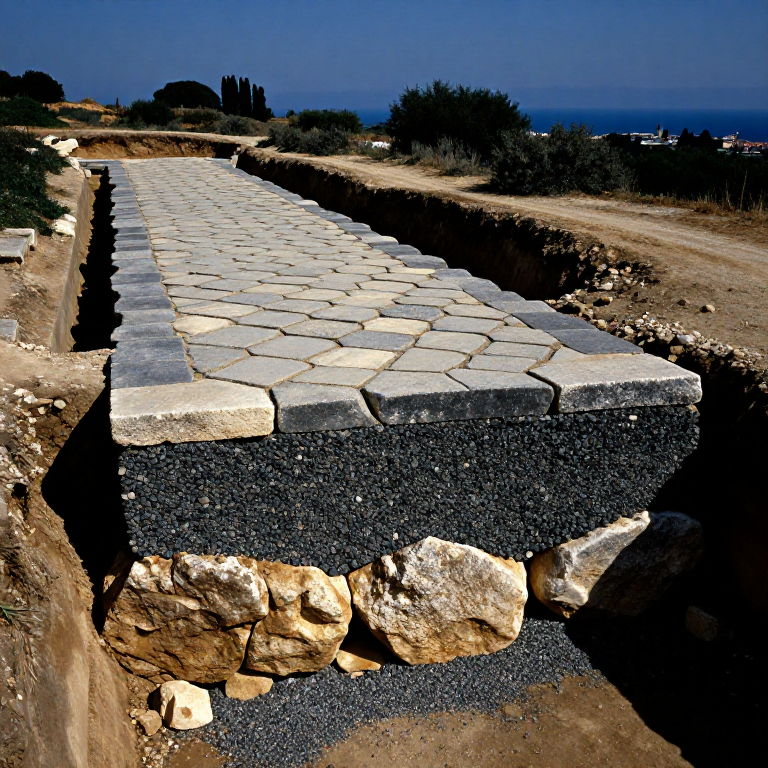
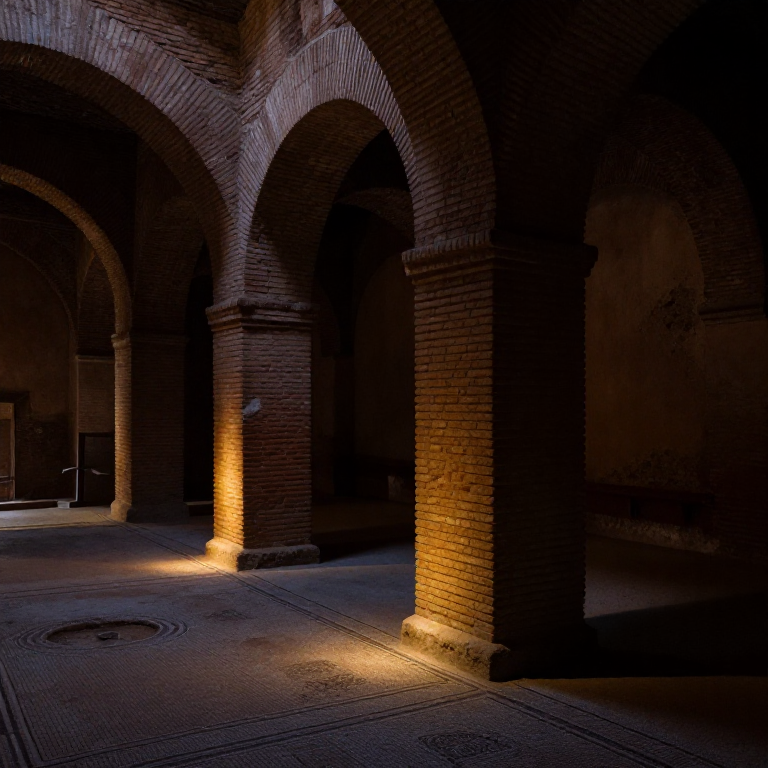
The characteristic Roman road is not just a flat surface — it is a layered construction system called via strata (literally 'layered road'). The typical structure has four layers: the statumen (foundation stones), the rudus (rubble), the nucleus (gravel and sand), and the summa crusta (paving stones). The total depth could be 1–1.5 metres. The road was built with a pronounced camber (crown) so that rainwater drained to ditches on both sides. This drainage engineering is why Roman roads survived for centuries while medieval dirt tracks turned to mud every winter.
Roman road building was primarily military engineering — roads enabled the rapid movement of legions, supplies, and information across the empire. A legion of 5,000 men could cover 30 km per day on a paved road but only 15–20 km on unpaved tracks. The cursus publicus (imperial post) could relay messages at 80 km per day using relays of mounted couriers on paved roads. The roads made the empire possible — without them, Rome could not have governed territory spanning 5 million square kilometres.
নির্দেশ
Survey the route alignment with a groma
Survey the route alignment with a groma
Roman surveyors (agrimensores) used a groma — a vertical staff with a horizontal cross mounted at the top, with plumb lines hanging from each arm — to establish straight alignments over long distances. Sight along two opposite plumb lines to set the direction, then have an assistant place marker stakes at regular intervals. Roman roads are famously straight because the groma enabled accurate sighting over kilometres. The route should follow high ground where possible to improve drainage and visibility, avoiding valley bottoms where water collects.
Mark the road width with string lines
Mark the road width with string lines
Set out the full width of the road using string lines stretched between wooden pegs. A standard Roman military road (via militaris) was approximately 4–6 metres wide between kerbs — enough for two carts to pass. Mark the drainage ditches (fossae) on each side, about 1 metre wide and 0.5 metres deep. The total cleared corridor including ditches was typically 8–10 metres wide. Drive pegs at regular intervals along both edges and connect with taut string to guide excavation.
Excavate the road bed to a depth of one metre
Excavate the road bed to a depth of one metre
Dig out the entire road bed to a depth of approximately 1 metre, removing topsoil, roots, and soft subsoil until you reach firm ground. Pile the excavated earth to the sides — it will be used to build up the road shoulders. The excavated trench should have sloping sides and a flat bottom. If the subsoil is clay or poorly drained, dig deeper and lay a bed of brushwood fascines at the bottom to provide drainage beneath the foundation. Roman engineers were pragmatic about depth — in rocky terrain they dug shallower; in boggy ground, deeper.
Dig drainage ditches on both sides
Dig drainage ditches on both sides
Dig V-shaped drainage ditches (fossae) along both sides of the excavated road bed. Each ditch should be about 1 metre wide at the top, 0.5 metres deep, and slope slightly in the direction of the nearest stream or outfall. These ditches intercept surface water before it can reach the road structure and carry it away. Roman roads survived for centuries primarily because of this drainage system — water is the enemy of every road, and the Romans understood this better than any civilisation until the modern era.
Lay the statumen (foundation layer)
Lay the statumen (foundation layer)
Fill the bottom 30–40 cm of the excavated bed with large flat stones (statumen). Use stones 15–30 cm across, laid by hand in a single layer with the flat faces down. This layer serves as the foundation — it distributes the load from traffic across the subsoil and prevents the upper layers from sinking into soft ground. Pack the stones tightly together. The statumen works like a raft: individual stones lock against their neighbours, creating a rigid platform that resists deformation even under heavy cart traffic.
ইস চরণ কে লিএ সামগ্রী:
 Sandstone Block50 টুকরা
Fill the rudus layer (rubble and mortar)
Fill the rudus layer (rubble and mortar)
Over the statumen, pack a 20–30 cm layer of smaller broken stones, gravel, crushed pottery fragments, and old brick — the rudus. In quality Roman roads, this layer was mixed with lime mortar to bind it into a solid mass similar to crude concrete. Pack and ram this layer firmly with a wooden rammer or heavy stone. The rudus fills the gaps left between the statumen stones and creates a smoother base for the upper layers. On major military roads, Roman engineers used opus caementicium (volcanic ash concrete) in this layer, creating an almost indestructible foundation.
ইস চরণ কে লিএ সামগ্রী:
 Calcium Carbonate (Crushed Limestone)10 কেজি
 Coarse Sand5 কেজি
Add the nucleus layer (compacted gravel)
Add the nucleus layer (compacted gravel)
Over the rudus, spread a 15–20 cm layer of fine gravel, sand, and crushed stone — the nucleus. This layer provides a smooth, level base for the paving stones. Mix the gravel with lime mortar and ram thoroughly until the surface is hard and level. Check for levelness with a straight edge. The nucleus must have a slight crown (camber) — about 3–5 cm higher in the centre than at the edges over a 5-metre width. This camber ensures rainwater runs off to the sides rather than pooling on the road surface.
ইস চরণ কে লিএ সামগ্রী:
 Fine Sand (silica)5 কেজি
আবশ্যক উপকরণ:
 Grinding Stone
Set the curbstones (margines)
Set the curbstones (margines)
Set large, dressed curbstones (margines) along both edges of the road, bedded firmly in the nucleus layer. The curbstones define the road edge, contain the paving, and prevent the road structure from spreading laterally under traffic. Each curbstone should be approximately 30 cm tall, 15 cm wide, and 40–60 cm long, set vertically with the top edge flush with the intended paving level. Pack gravel tightly behind the curbstones to hold them in place. Roman curbstones were often carved from the hardest available local stone — granite, basalt, or dense limestone.
Lay the paving stones (summa crusta)
Lay the paving stones (summa crusta)
Lay the surface paving stones (summa crusta or pavimentum) over the nucleus. Roman paving stones were typically large, irregular polygonal blocks of hard stone — basalt (silex) was preferred because of its extreme hardness and wear resistance. Each stone is roughly 30–50 cm across and 15–20 cm deep, with the flat face up and the wider base down. Fit them tightly together like a jigsaw puzzle — the irregular shapes lock against each other, preventing individual stones from rocking under traffic. The top surface should follow the camber profile established in the nucleus layer.
Fill the joints between paving stones
Fill the joints between paving stones
Sweep fine sand and gravel into the joints between the paving stones to lock them in place. In high-quality roads, the joints were filled with lime mortar for permanence. The filled joints prevent the stones from shifting laterally under the sideways forces of turning wheels and hooves. Rain gradually washes fine material deeper into the joints over time, actually improving the interlock. Roman roads that have survived 2000 years show joints packed with centuries of accumulated fine sediment that has ceite the stones into a virtually monolithic surface.
ইস চরণ কে লিএ সামগ্রী:
 Clean Dry Sand5 কেজি
Build up the road shoulders (agger)
Build up the road shoulders (agger)
Use the earth excavated in step 3 to build up the road shoulders (agger) on both sides between the curbstones and the drainage ditches. Ram the earth firmly and slope it away from the road surface toward the ditches. The shoulders protect the road edge from erosion, provide a soft verge for pedestrians, and channel surface water into the ditches. On raised embankments (which Roman roads often were, especially in flat or marshy terrain), the agger could be a metre or more above the surrounding ground level — giving the road surface excellent drainage and visibility.
Place milestones (milliaria)
Place milestones (milliaria)
Set cylindrical stone milestones (milliaria) at intervals of one Roman mile (mille passuum = 1,480 metres, approximately 1,000 double paces). Each milestone was typically 1.5–2 metres tall, 50 cm in diameter, and inscribed with the distance to the nearest major city, the name of the emperor or magistrate who funded the road, and sometimes the road's name. Milestones served as navigation aids, propaganda (displaying imperial authority), and reference points for calculating distances and journey times. The Romans standardised distance measurement across the entire empire through this system.
সামগ্রী
5- 50 টুকরাপ্লেসহোল্ডর
- প্লেসহোল্ডর
- প্লেসহোল্ডর
- 5 কেজিপ্লেসহোল্ডর
- 5 কেজিপ্লেসহোল্ডর
আবশ্যক উপকরণ
1- প্লেসহোল্ডর
কনেক্টেড ব্লূপ্রিংট সামগ্রী
সম্পর্কিত ব্লুপ্রিন্ট
এই ব্লুপ্রিন্টগুলি জ্ঞান ভাগ করে — কৌশল, উপকরণ বা নীতি
Related blueprints
Other builds that share materials, tools, or techniques with this one.


CC0 পব্লিক ডোমেন
যহ ব্লূপ্রিংট CC0 কে তহত জারী কিযা গযা হৈ। আপ বিনা অনুমতি মাঁগে ইস কার্য কো কিসী ভী উদ্দেশ্য কে লিএ কॉপী, সংশোধিত, বিতরিত ঔর উপযোগ করনে কে লিএ স্বতংত্র হৈং।
উনকে ব্লূপ্রিংট কে মাধ্যম সে উত্পাদ খরীদকর মেকর কা সমর্থন করেং জহাঁ বে মেকর কমীশন কমাতে হৈং জো বিক্রেতাওং দ্বারা নির্ধারিত হোতা হৈ, যা ইস ব্লূপ্রিংট কা নযা সংস্করণ বনাএঁ ঔর রাজস্ব সাঝা করনে কে লিএ ইসে অপনে ব্লূপ্রিংট মেং কনেক্শন কে রূপ মেং শামিল করেং।