কলা
সৌন্দর্য এবং সুস্থতা
ক্রাফট
সংস্কৃতি ও ইতিহাস
বিনোদন
পরিবেশ
খাদ্য ও পানীয়
রিভার্স ইঞ্জিনিয়ারিং
বিজ্ঞান
খেলাধুলা
টেকনোলজি
পরিধানযোগ্য
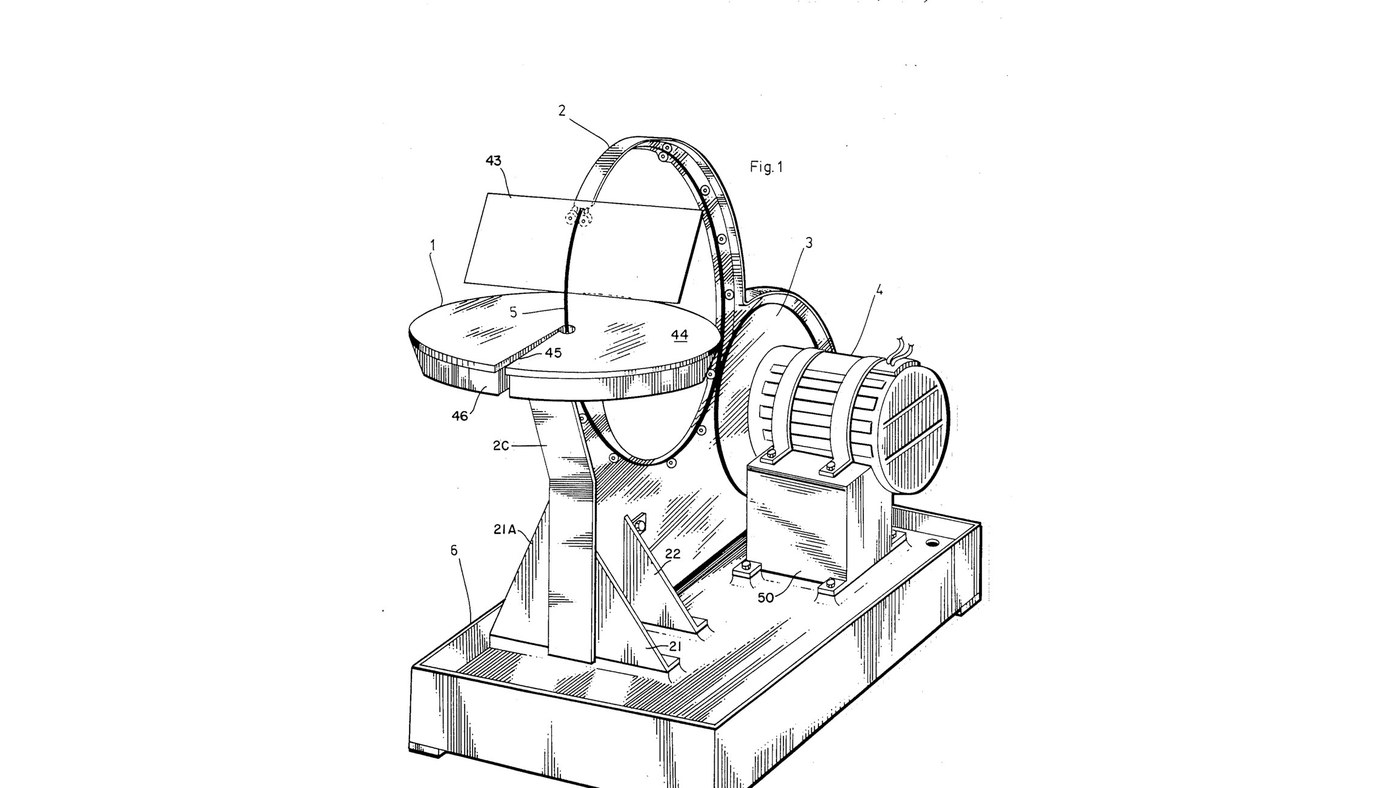


Glass Saw: Rigid Diamond Wire Ring Driven by Its Rim
Jesse Cogswell's ring saw (US 4,576,139, 1986) for glass, ceramics and stone. The blade is a rigid circle of wire coated with bonded diamond, standing upright through a cutting table. A rubber-tyred wheel on the motor drives it by friction round its own rim at 3000 ft/min or more, and twelve guide wheels on slots round an aluminium back-plate hold it true. Because it cuts with any part of its rim, the work can be turned freely for curves and inside shapes; a sponge in a water tray wets the wire.
The patent sizes the ring from the thickest work to be cut (8 in ring for 3/16 in); the notebook does the sums. The picture: the patent's Fig. 1.
উন্নত
3 days
নির্দেশাবলি
1
1
Cut and brace the back-plate
Cut and brace the back-plate
Cut the back-plate (2A) from aluminium plate, its upper part curved as an arc to shield the saw, stiffened by an angle (2B) along the top and a flat splatter strip (2C) at the front. Bolt on two front struts (21, 21A) and two side struts (22) and bolt them to the base. Ours: drill press.
এই ধাপের উপকরণ:
 অ্যালুমিনিয়ামের পাত1 টুকরা
 অ্যালুমিনিয়ামের কোণা1 টুকরা
 ষড়ভুজ মাথার বোল্ট - শ্রেণি 8.81 টুকরা
প্রয়োজনীয় সরঞ্জাম:
 স্তম্ভযুক্ত তুরপুন যন্ত্র
 রেঞ্চ (সমন্বয়যোগ্য)
2
2
Cut the wheel-slider apertures
Cut the wheel-slider apertures
Cut slots (32) through the back-plate's arc at 0, 30, 60, 90, 120, 210, 240, 270, 300 and 330° round the ring's centre: two slots at 90° and 210° for the guide pairs, one at each of the others. The slots let each guide wheel slide to the ring.
প্রয়োজনীয় সরঞ্জাম:
স্তম্ভযুক্ত তুরপুন যন্ত্র3
3
Assemble the guide wheels
Assemble the guide wheels
For each of the twelve guide wheels, stretch two rubber O-rings (27) into the grooves of a bearing wheel (26) with sealed roller bearings, and mount it on a shoulder bolt (28) with a washer, lockwasher and nut.
এই ধাপের উপকরণ:
 গাইড রোলার12 টুকরা
 ও-রিং24 টুকরা
 শোল্ডার বোল্ট12 টুকরা
 সমতল ওয়াশার12 টুকরা
 Spring Washer12 টুকরা
 ষড়ভুজ বাদাম12 টুকরা
প্রয়োজনীয় সরঞ্জাম:
রেঞ্চ (সমন্বয়যোগ্য)4
4
Turn the drive wheel
Turn the drive wheel
Turn an aluminium disk with a hub, a bored axle hole and a deep groove round its rim, and seat a large rubber O-ring (23) in the groove as its driving tyre. Ours: lathe.
এই ধাপের উপকরণ:
অ্যালুমিনিয়ামের পাত1 টুকরাও-রিং1 টুকরাপ্রয়োজনীয় সরঞ্জাম:
 ধাতুর খরাদ যন্ত্র
5
5
Mount the motor and drive axle
Mount the motor and drive axle
Strap the electric motor (51) onto its pillow block (50) with fastening bands (52) and bolt the block to the base. Fix the drive wheel on the motor's axle (24) and carry the axle's end in an axle pillow block (24A, 24B).
এই ধাপের উপকরণ:
 বৈদ্যুতিক মোটর1 টুকরা
 মোটর আটকানোর ফিতা2 টুকরা
 বেয়ারিং ব্লক2 টুকরা
 ইস্পাতের শ্যাফট1 টুকরাষড়ভুজ মাথার বোল্ট - শ্রেণি 8.81 টুকরা
প্রয়োজনীয় সরঞ্জাম:
রেঞ্চ (সমন্বয়যোগ্য)6
6
Fit the ring and its guides
Fit the ring and its guides
Stand the ring saw on the drive wheel's tyre. Bolt the guide wheels through their slots: each pair with a tension spring between its two wheels, each single with a spring to the back-plate's lower rim, the one at 330° pressing the ring onto the drive wheel. Set them against the ring, then tighten the nuts. Fit two horizontal roller-guides (17) at 150°, sprung together, just before the cut.
এই ধাপের উপকরণ:
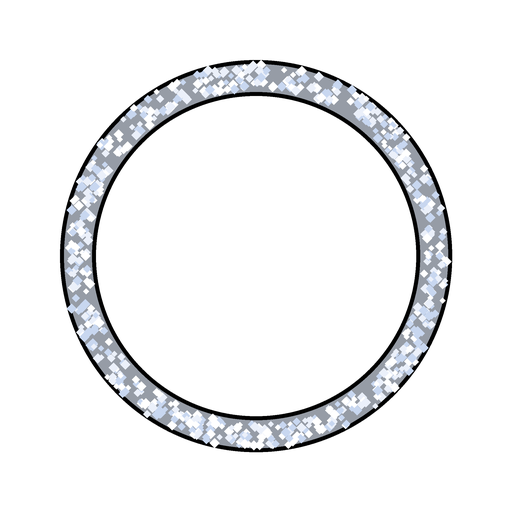 হীরা-আবৃত রিং করাত ব্লেড1 টুকরা
 টান-স্প্রিং11 টুকরাগাইড রোলার2 টুকরা
প্রয়োজনীয় সরঞ্জাম:
রেঞ্চ (সমন্বয়যোগ্য)7
7
Fit the table, tray and sponge
Fit the table, tray and sponge
Bolt the water tray (46) on four bracket supports (19, 20) by its four studs; put a ring-shaped sponge (47) in it and the cutting table (44) over it, the ring passing through centre holes reached by slots offset half an inch from a radius. Set the table top below the ring's centre line by the thickest work you will cut. Add water to the tray.
এই ধাপের উপকরণ:
 থালা1 টুকরা
 স্পঞ্জ1 টুকরাঅ্যালুমিনিয়ামের পাত1 টুকরা
 জল1 batch
প্রয়োজনীয় সরঞ্জাম:
রেঞ্চ (সমন্বয়যোগ্য)8
8
Fit the face shield and drip pan
Fit the face shield and drip pan
Bolt the shield arm (41) to the back-plate and pivot a clear acrylic face shield (43) in its holder (42) on a locking screw. The base is a catchment for the coolant with a drain hole in one corner.
এই ধাপের উপকরণ:
 অ্যাক্রিলিক পাত1 টুকরাঅ্যালুমিনিয়ামের পাত1 টুকরা
 ড্রিপ ট্রে1 টুকরা
প্রয়োজনীয় সরঞ্জাম:
রেঞ্চ (সমন্বয়যোগ্য)9
9
Ring size and drive speed
Ring size and drive speed
Jupyter নোটবুক লোড হচ্ছে…
উপকরণ
20- 1 টুকরাপ্লেসহোল্ডার
- 1 টুকরাপ্লেসহোল্ডার
- প্লেসহোল্ডার
- 12 টুকরাপ্লেসহোল্ডার
- 25 টুকরাপ্লেসহোল্ডার
- 12 টুকরাপ্লেসহোল্ডার
- 12 টুকরাপ্লেসহোল্ডার
- 12 টুকরাপ্লেসহোল্ডার
- 12 টুকরাপ্লেসহোল্ডার
- 1 টুকরাপ্লেসহোল্ডার
- 2 টুকরাপ্লেসহোল্ডার
- 2 টুকরাপ্লেসহোল্ডার
- 1 টুকরাপ্লেসহোল্ডার
- 1 টুকরাপ্লেসহোল্ডার
- 11 টুকরাপ্লেসহোল্ডার
- 1 টুকরাপ্লেসহোল্ডার
- 1 টুকরাপ্লেসহোল্ডার
- 1 batchপ্লেসহোল্ডার
- 1 টুকরাপ্লেসহোল্ডার
- 1 টুকরাপ্লেসহোল্ডার
এই ব্লুপ্রিন্ট যা তৈরি করে

CC0 পাবলিক ডোমেন
এই ব্লুপ্রিন্ট CC0-এর অধীনে প্রকাশিত। আপনি অনুমতি ছাড়াই যেকোনো উদ্দেশ্যে এটি অনুলিপি, পরিবর্তন, বিতরণ ও ব্যবহার করতে পারেন।
মেকারের ব্লুপ্রিন্টের মাধ্যমে পণ্য কিনে তাঁকে সমর্থন করুন, যেখানে তিনি আয় করেন মেকার কমিশন বিক্রেতাদের নির্ধারিত, অথবা এই ব্লুপ্রিন্টের একটি নতুন সংস্করণ তৈরি করে নিজের ব্লুপ্রিন্টে সংযোগ হিসেবে যুক্ত করে আয় ভাগ করুন।