Building a Roman Cofferdam — Pumping Water to Build Below the Waterline
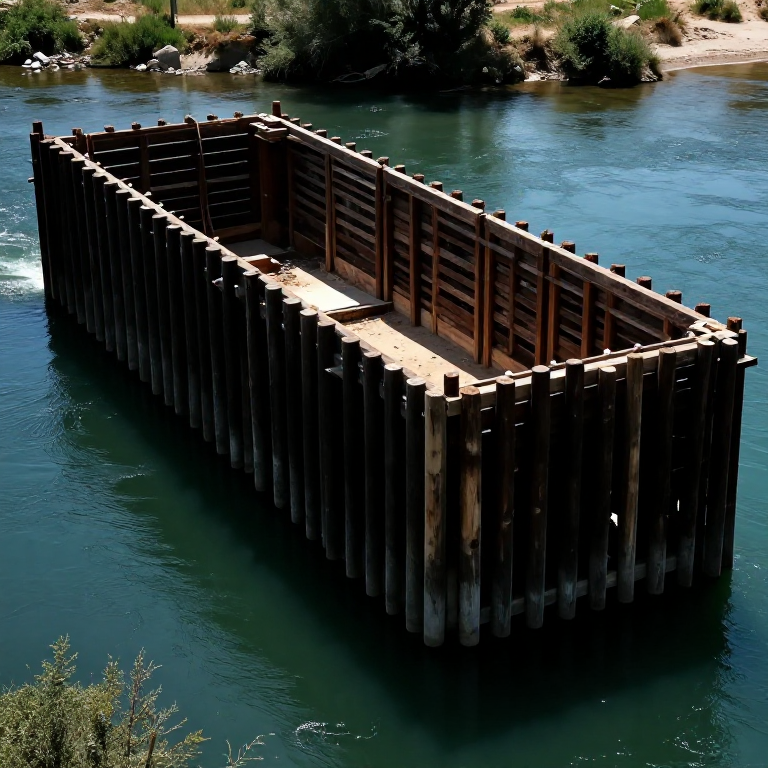
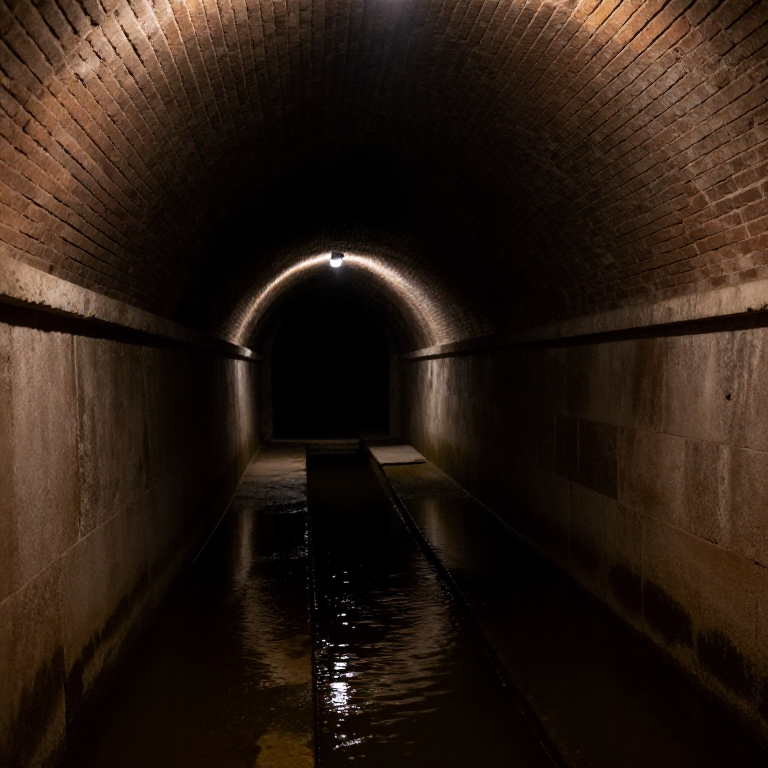
The cofferdam is one of the most important yet least celebrated technologies of the ancient world. Without it, the Romans could not have built their stone arch bridges across wide rivers, founded their harbour moles in the sea, or constructed their massive bridge piers below the waterline. The principle is elegantly simple: create a watertight enclosure in water, pump it dry, and build in the dry space inside. But executing it in a fast-flowing river or coastal environment, using only timber, clay, and human-powered pumps, is an extraordinary engineering achievement.
The Roman cofferdam (the Romans had no single term for it, describing it as a temporary enclosure — the Greek technicians who often led such projects called it a kistē, a box) consisted of two rows of driven timber piles with a clay fill between them forming the walls, and a concrete base that sealed the bottom against seepage. The Archimedean screw pump (cochlea) — a helical wooden screw in a cylindrical wooden tube, rotated by slaves on a treadwheel — could lift large volumes of water continuously. For very deep cofferdams, multiple pumps were arranged in series, each lifting water to the intake of the next.
Vitruvius (De Architectura, Book V) describes the use of cofferdams for harbour construction, noting that the enclosure walls must be sealed with puddled clay and that the concrete foundation must be placed quickly after dewatering, as the clay seals gradually fail. Pliny the Elder records the use of cofferdam technology for bridge and harbour works throughout the empire. Julius Caesar's siege engineering corps was proficient in rapid cofferdam construction — they used temporary coffer structures during the siege of Massilia (Marseille) in 49 BCE to allow engineers to work at the base of the city's walls.
ལམ་སྟོན
Survey the waterway and probe the bed for pile-driving depth
Survey the waterway and probe the bed for pile-driving depth
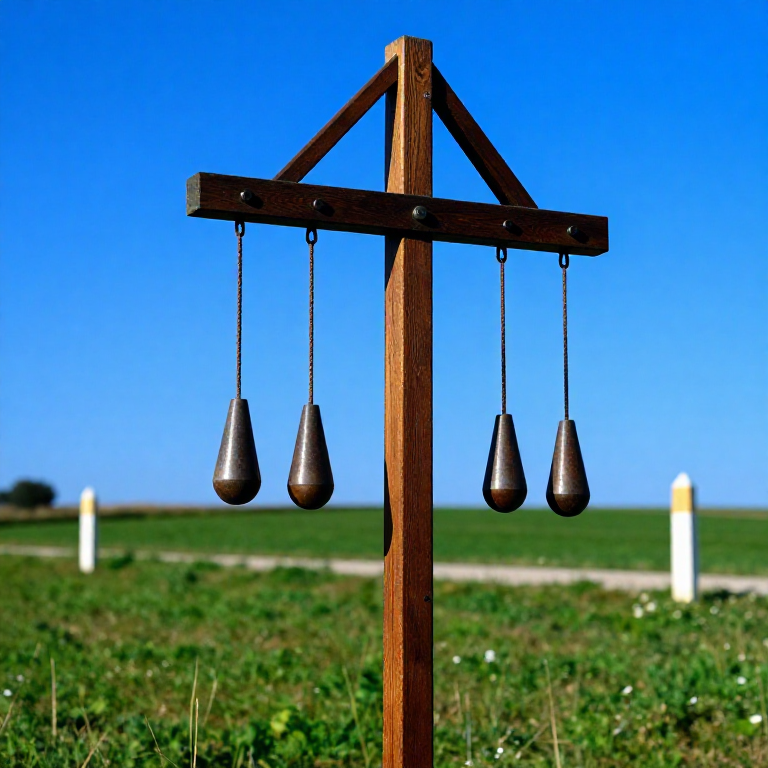
Before any piling begins, probe the riverbed or harbour floor systematically to determine the depth to bedrock or firm ground. Use an iron-shod wooden probe rod, marked in Roman feet (approximately 29.6 cm per foot), plunged vertically to the resistance point. Record depth readings at a grid of points across the planned cofferdam footprint — the foundation below must reach the same firm bearing stratum at all points, or differential settlement will crack the pier above. Also probe outside the planned perimeter to identify any scour channels or soft spots that might undermine the pile walls. In a tidal environment, take readings at low tide and plan all pile-driving operations for the low-water window.
གོམ་པ་འདིའི་རྫས་རིགས:
 Hemp Cord20 meter
Set out the cofferdam perimeter with marker stakes
Set out the cofferdam perimeter with marker stakes
Mark the cofferdam perimeter on the water surface using floating marker buoys anchored to the bed with weighted ropes. The cofferdam footprint should be the planned pier plan dimensions plus 1.5 metres on each side — the additional width allows workers to move around inside the dry cofferdam without risk of contact with the pile walls, and provides working space for formwork and concrete placing. Drive marker stakes into the bank or into the bed at each corner of the inner and outer pile rows, connected with taut cord lines. For a pier measuring 4 × 6 metres, the cofferdam inner row perimeter is approximately 4.5 × 6.5 metres and the outer row is approximately 5.5 × 7.5 metres, creating a 0.5-metre-wide clay-fill annulus between them.
Build the pile-driving frame (pile engine) on a floating raft
Build the pile-driving frame (pile engine) on a floating raft
Construct a simple pile-driving frame on a timber raft or flat-bottomed barge that can be positioned over each pile location. The frame consists of two vertical guide posts (leads) approximately 5 metres tall, connected at the top by a crossbeam from which a heavy drop weight (a stone or iron-shod timber block, 200–500 kg) is raised by a rope-and-pulley system and dropped onto the pile head. Twelve to twenty workers on a treadwheel or haul rope can lift the drop weight and release it in rapid succession. Position the raft over each pile location using anchor ropes from the bank or from stakes already driven. The guide posts ensure the pile stays vertical during driving — a tilted pile reduces the cofferdam's sealing effectiveness significantly.
གོམ་པ་འདིའི་རྫས་རིགས:
 Hardwood Block20 piece
 Iron Nails100 pieceHemp Cord30 meter
Drive the inner pile row at 20 cm centres
Drive the inner pile row at 20 cm centres
Begin driving the inner ring of piles — straight oak or alder trunks, 12–18 cm diameter and 4–6 metres long. Sharpen the pile butt to a four-sided point using an axe and protect the pile head from splitting during driving by fitting a iron ring (the pile ferrule) around the top. Lower each pile into the water and position it vertically in the guide leads. Begin driving: lift the drop weight and release it to fall freely. Each blow drives the pile a few centimetres. Continue until the pile reaches refusal — when each blow produces less than 5 mm of penetration, the pile tip has reached bearing stratum. Space piles at 20 cm centre-to-centre — close enough that the clay fill in step 5 cannot be lost between piles.
གོམ་པ་འདིའི་རྫས་རིགས:
Hardwood Block40 pieceལག་ཆས་དགོས་མཁོ:
 Hammer (2 kg)
Drive the outer pile row parallel to the inner row
Drive the outer pile row parallel to the inner row
After completing the inner ring, drive a second outer ring of piles with the same spacing and to the same penetration, positioned 0.5 metres outside the inner ring. The 0.5-metre gap between the two rings is the space that will receive the clay seal. The outer ring serves two purposes: it contains the clay fill under water pressure, and it adds structural resistance to the horizontal water pressure trying to push the cofferdam walls inward. Check the alignment of both rows regularly using the marker cords set in step 2 — any deviations greater than 5 cm should be corrected by adding additional piles. After driving, trim all pile heads to the same elevation above water using a carpenter's saw, working from the raft platform.
གོམ་པ་འདིའི་རྫས་རིགས:
Hardwood Block40 pieceFill the pile annulus with puddled clay
Fill the pile annulus with puddled clay
Puddled clay is the sealing material between the inner and outer pile rows. Prepare puddled clay on the bank by kneading raw clay with water until it is a smooth, dense, plastic mass with no air pockets — the kneading drives out air and ensures complete water saturation, making the clay nearly impermeable. Lower the puddled clay into the annular space between the two pile rows in buckets, pressing it firmly into place with long poles so it fills every gap between the piles and the spaces between pile rows. Work from the bottom of the pile annulus upward, adding clay in 20 cm layers and tamping each layer before adding the next. Continue until the clay fill reaches above the water surface level.
གོམ་པ་འདིའི་རྫས་རིགས:
 Clay800 kg
Install horizontal waling timbers to brace the pile walls
Install horizontal waling timbers to brace the pile walls
Install horizontal timber waling beams connecting the pile tops around the inner perimeter — these walings tie the individual piles together into a rigid structural ring that collectively resists the inward water pressure. Notch a flat seat into each pile head and bolt a continuous waling beam (approximately 15 × 20 cm section) around the entire perimeter using iron bolts. Add diagonal raker struts inside the cofferdam from the waling down to the bed, angled at 45–60 degrees, to carry the inward water pressure force to the base — particularly important in strong river currents where dynamic water pressure significantly exceeds static head pressure. The completed waling and raker system turns the individual piles from isolated posts into a unified retaining structure.
གོམ་པ་འདིའི་རྫས་རིགས:
Hardwood Block15 pieceIron Nails60 pieceBegin pumping with Archimedean screw pumps
Begin pumping with Archimedean screw pumps
Deploy one or more cochleae (Archimedean screw pumps) inside the cofferdam to lower the water level. A Roman cochlea consists of a wooden helix (the screw) encased in a close-fitting cylindrical wooden tube, inclined at 30–45 degrees to the horizontal. A man or ox walking on the outer cylinder turns the screw; each rotation advances a trapped volume of water up the helix and out the top. A single cochlea of 30 cm diameter and 3 metres inclined length, operated by one man, lifts approximately 2–3 litres per second — approximately 7–10 m³ per hour. For a 5 × 7 metre cofferdam with 2 metres of water to remove (70 m³ total), one pump will dewater in 7–10 hours, assuming the seepage inflow is modest.
Seal residual leaks with additional clay tamping
Seal residual leaks with additional clay tamping
As the water level inside drops, observe the pile walls carefully for leaks — jets of water forcing through gaps between piles or beneath the clay fill. Mark each leak location and send a diver (in ancient practice, breath-hold divers were employed for shallow underwater work) or deploy clay from inside using a long-handled tamping tool to press additional puddled clay against the leak from the outside face of the inner pile row. For persistent small leaks below reach, lower sandbags filled with clay to the leak point — the water pressure itself will drive the clay into the gap. Reduce pump crews when the seepage inflow stabilises at a manageable level (less than 20% of pump capacity).
གོམ་པ་འདིའི་རྫས་རིགས:
Clay100 kgExcavate the exposed riverbed to the foundation level
Excavate the exposed riverbed to the foundation level
Once the cofferdam interior is pumped to a working level, workers enter and excavate the exposed riverbed down to bedrock or firm bearing stratum. Use iron picks and shovels, lifting the material in baskets that are hauled out through the cofferdam top by rope. Work continuously — the pumping must continue throughout to prevent water rising in the bottom of the excavation (the 'bottom blow' condition, where water pressure at the base exceeds the weight of the excavated material and water breaks up through the floor, destroying the foundation). On reaching bedrock, clean the surface with stiff brushes and water, removing all loose material so the subsequent concrete bonds directly to clean rock.
ལག་ཆས་དགོས་མཁོ:
 Shovel
Pour the foundation concrete in rapid continuous pours
Pour the foundation concrete in rapid continuous pours
Place the pozzolanic foundation concrete immediately after reaching the foundation level — time is critical because the clay seals deteriorate over days as water pressure forces through micro-channels. Mix opus caementicium in batches on the bank (lime putty, pozzolana ash, and rubble aggregate at 1:2:3 proportions) and lower it in large buckets inside the cofferdam. Place concrete in horizontal layers of 20 cm, tamping each layer firmly. Work continuously (day and night shifts) until the concrete rises above the water table level. The pozzolanic concrete will begin to set within hours and reaches full early strength within 7 days, at which point it is self-sustaining even if the cofferdam fails. Continue pumping throughout the pour.
གོམ་པ་འདིའི་རྫས་རིགས:
 Calcium Carbonate (Crushed Limestone)150 kg
 Coarse Sand100 kg
Build the pier masonry above the concrete base inside the dry cofferdam
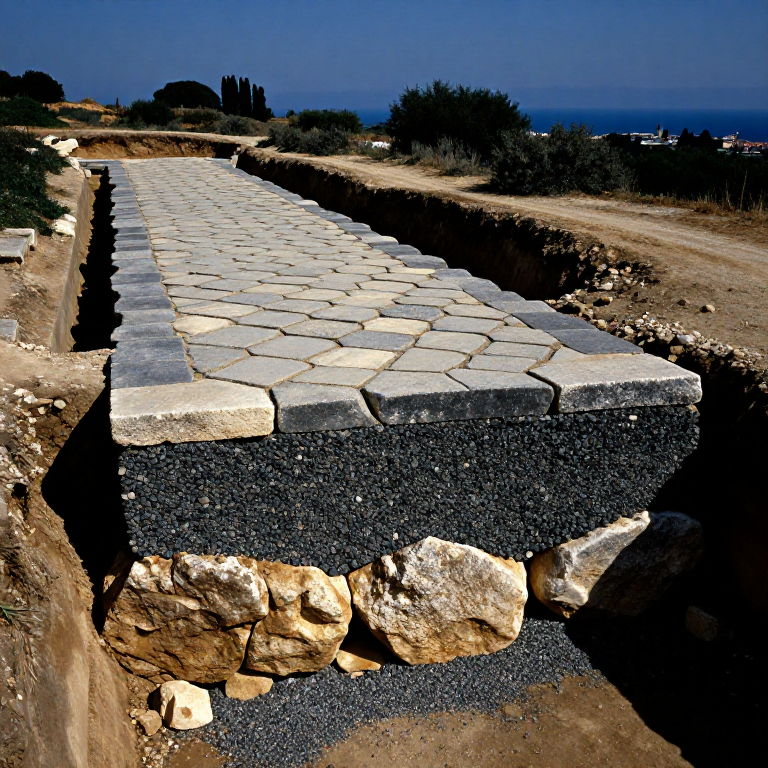
Build the pier masonry above the concrete base inside the dry cofferdam
Once the foundation concrete has cured for 7 days and risen above the working water level, build the pier masonry in the dry cofferdam environment. Lay dressed stone in regular opus quadratum courses (large rectangular ashlar blocks without mortar, using only gravity and their weight for stability), or use Roman concrete with brick facing in opus mixtum style. The dry working environment inside the cofferdam is what makes quality masonry possible — underwater mortared stone is inferior to dry-laid mortared stone because the lime mortar is diluted by water before it can set. Continue building until the pier rises above the flood level, at which point the cofferdam walls can be safely removed.
Dismantle the cofferdam after the pier is above flood level
Dismantle the cofferdam after the pier is above flood level
Once the pier masonry is above the highest anticipated flood level and has cured for at least 14 days, the cofferdam can be removed. Stop pumping and allow the cofferdam interior to flood gradually — this must be done slowly to avoid a sudden inrush that could hydraulically undermine the fresh concrete or displace un-cured masonry. Pull the inner pile row using a gin pole and rope purchase, working systematically around the perimeter. Remove the waling timbers and raker struts as the piles come out. The outer pile row can be left in place below the anticipated scour level — cutting the piles off at the bed using an underwater saw. Remove all floating timber debris from the river to prevent downstream obstruction hazards.
རྫས་རིགས
6- 115 pieceས་ཆ་འཛིན
- 160 pieceས་ཆ་འཛིན
- ས་ཆ་འཛིན
- ས་ཆ་འཛིན
མཐུད་སྦྲེལ་བིལུ་པིརིན་ཊི་རྫས་རིགས
འབྲེལ་ཡོད་བིལུ་པིརིན་ཊི
བིལུ་པིརིན་ཊི་འདི་ཚུ་ཐབས་ལམ་དང་རྫས་རིགས། སྤྱི་ཆོས་བགོ་བཤའ་བྱེད
Related blueprints
Other builds that share materials, tools, or techniques with this one.


CC0 སྤྱི་དབང
བིལུ་པིརིན་ཊི་འདི་CC0 འོག་བཀྲམས་ཡོད། ཁྱེད་རང་གིས་ཆོག་མཆན་མ་བཞེས་པར་ཕབ་ལེན་དང་བཟོ་བཅོས། བགོ་བཤའ། དགོས་མཁོ་གང་ལའང་བཀོལ་སྤྱོད་བྱས་ཆོག
བཟོ་མཁན་ལ་རྒྱབ་སྐྱོར་བྱེད་པའི་ཆེད་ཁོང་ཚོའི་བིལུ་པིརིན་ཊི་བརྒྱུད་ཐོན་སྐྱེད་ཉོ། བཟོ་མཁན་གྱིས བཟོ་མཁན་གྱི་ཁེ་ཕོགས ཚོང་པས་གཏན་འཁེལ་བྱས་པ། ཡང་ན་བིལུ་པིརིན་ཊི་འདིའི་པར་གསར་བཟོས་ཏེ་ཁྱེད་རང་གི་བིལུ་པིརིན་ཊི་ནང་མཐུད་སྦྲེལ་བྱས་ཏེ་ཡོང་སྒོ་བགོ་བཤའ་བྱེད།