སྒྱུ་རྩལ
མཛེས་སྡུག་དང་བདེ་ཐང
བཟོ་རིག
རིག་གནས་དང་ལོ་རྒྱུས
དགའ་སྟོན
ཁོར་ཡུག
ཟས་དང་བཏུང་རྫས
ཕྱིར་འཕྲུལ་རིག
ཚན་རིག
རྩེད་འགྲན
རིག་རྩལ
གྱོན་རུང
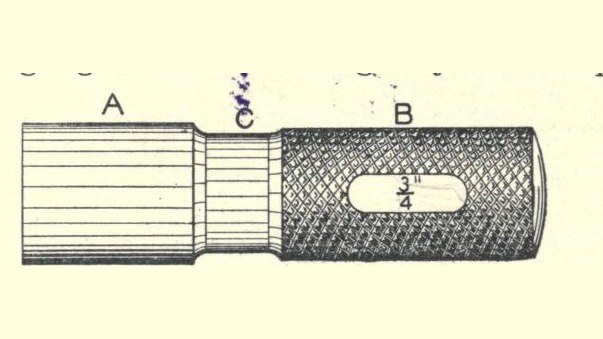


Plug Gauge: Tool Steel Turned, Hardened, Ground and Lapped (Markham, 1908)
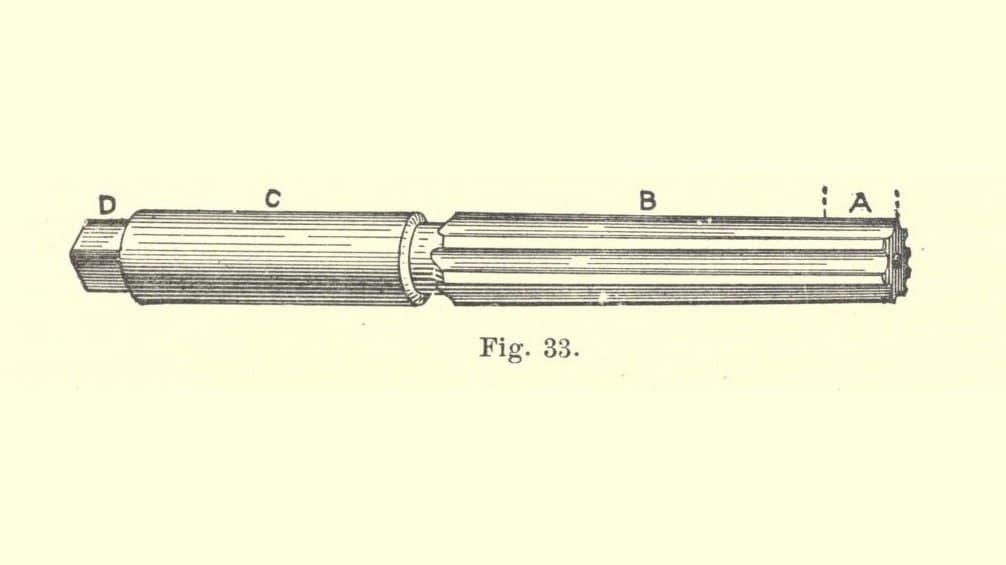
A plug gauge is a hardened, accurately sized pin with a knurled handle, pushed into a hole to check its size. A set has one for each size gauged.
E. R. Markham's Tool Making (1908) shows how to make one of tool steel: turn and stamp it, harden it at as low a heat as will do, grind it with water running on it to just over size, and lap it to size with flour emery and oil in a split cast-iron lap. Tool steel can creep in size after hardening, so for great accuracy he seasons it first.
His figure is a 3/4 in gauge. He does not name the hardening bath. A case-hardened machinery-steel gauge is a separate blueprint.
Source: E. R. Markham, Tool Making (American School of Correspondence, 1908), pp. 178-182. Picture: his Fig. 293.
མཐོ་རིམ
Two days, plus seasoning if wanted
ལམ་སྟོན
1
1
Read Markham
Read Markham
"Plug gauges are used to gauge the size of a hole, while a ring gauge is for measuring a cylindrical piece of work."
2
2
Rough out and anneal
Rough out and anneal
Take tool steel a little larger than the finished gauge (square bar, turned round, is our choice of stock). Remove all the outside skin and block the gauge out close to shape, then anneal it thoroughly.
གོམ་པ་འདིའི་རྫས་རིགས:
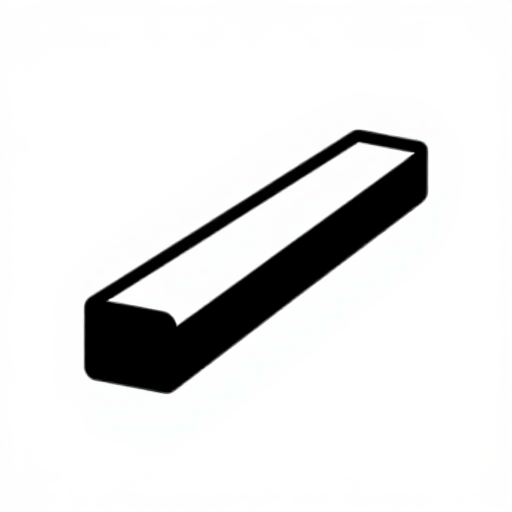 ལག་ཆས་ལྕགས་ཁར་གྱི་ཡུ་བ་གྲུ་བཞི།1 bar
ལག་ཆས་དགོས་མཁོ:
 ལྕགས་ཀྱི་འཁྲུལ་འཁོར།
 བསྐོར་འཕྲུལ་གྱི་གཏུབ་ཆས
 མཱཕལ་ཐབ
 ཉེན་སྲུང་མིག་ཤེལ།
3
3
Turn, knurl and stamp
Turn, knurl and stamp
Rough out the bar, allowing enough to turn off the decarbonised skin. Turn the handle (B in Fig. 293) to size and knurl it, and turn and finish the neck (C). Mill a flat spot in the middle of the handle and stamp on it the size of the gauge and the name or mark of the part it gauges (some shops stamp on C instead). Stamp before finishing any gauging surface, as driving stamps stretches the steel. Then turn the gauging end (A) .010 to .015 in over the finished size to allow for grinding.
ལག་ཆས་དགོས་མཁོ:
ལྕགས་ཀྱི་འཁྲུལ་འཁོར།བསྐོར་འཕྲུལ་གྱི་གཏུབ་ཆས ནར་ལིང་ལག་ཆས།
 གཤག་གཏུབ་འཁྲུལ་འཁོར།
 ལྕགས་ཀྱི་ ཡིག་འབྲུ་ དང་ ཨང་གི་ ཐམ་
 ཐོ་བ།
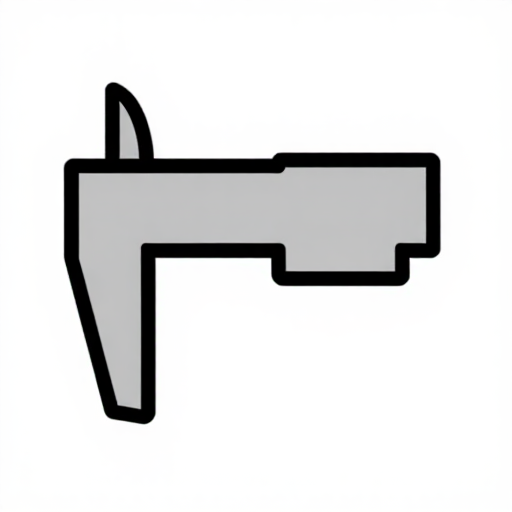 ཕྲ་འཇལ་ཆས།
4
4
Harden
Harden
Heat the gauge very carefully for hardening: the lower the heat, the finer and more compact the grain, and a fine grain wears better. Quench it; Markham does not name the bath here. For great accuracy, leave the gauging end .0025 to .003 in over size and let it season, laid aside for a few months or a year, before finishing. Where there is no time, many shops draw the temper to a straw colour and let it cool slowly, several times over, brightening the steel each time so the colour shows; this softens the gauge, so it wears out sooner.
ལག་ཆས་དགོས་མཁོ:
 མགར་ཐབ།
 ངོ་མ་ཤེས་པའི་རྒྱུ་ཆ།ཉེན་སྲུང་མིག་ཤེལ།
5
5
Grind
Grind
Grind on dead centres if you can (a worn lathe spindle copies its own error onto the work), with water running on the work to keep it cool; otherwise heat it as little as possible. Use a coarse wheel free from glaze to within .004 in of size, then a finer wheel to .001 in over. Always measure the gauge cold, since a gauge ground to size while warm will be small when it cools.
ལག་ཆས་དགོས་མཁོ:
 ཀོར་ཐིག་གི་སྣུར་འཕྲུལ།ཕྲ་འཇལ་ཆས།ཉེན་སྲུང་མིག་ཤེལ།
6
6
Lap to size
Lap to size
Make a lap: a piece of cast iron with a hole bored a trifle larger than the gauge, split, and closed by a screw (Fig. 294); for much gauge work, a holder with split ring laps held by a pointed screw (Fig. 295). Lap the gauge to finished size with flour emery mixed with oil. Lapping warms it too much to caliper, so cool it in a dish of water at the temperature of the room where it will be used (about 70 F), not cold water, before each measurement.
ལག་ཆས་དགོས་མཁོ:
 བླུགས་ལྕགས་ཀྱི་དབྱུག་གུ།
 ཨེ་མ་རི་ ཕྱེ་མ་
 འཁོར་ལམ་ཞག
 ཤེལ་གྱི་བི་ཀར།
 བཙོ་བཏོན་ཆུ།
 ཞིབ་དཔྱད་ཁང་གི་ཚ་གྲང་འཇལ་ཆས།ཕྲ་འཇལ་ཆས།
7
7
History and honest limits
History and honest limits
Markham wrote for shops working on the interchangeable plan, where parts made years apart must still fit, so every piece is checked against gauges. He warns against needless accuracy: a gauge for work that may vary .005 in need not be made to .0001 in.
He does not name the hardening bath or the heat; the 3/4 in size is his Fig. 293, and the heat source is ours.
རྫས་རིགས
1- ས་ཆ་འཛིན
ལག་ཆས་དགོས་མཁོ
18- ས་ཆ་འཛིན
- ས་ཆ་འཛིན
- ས་ཆ་འཛིན
- ས་ཆ་འཛིན
- ས་ཆ་འཛིན
- ས་ཆ་འཛིན
- ས་ཆ་འཛིན
- ས་ཆ་འཛིན
- ས་ཆ་འཛིན
- ས་ཆ་འཛིན
- ས་ཆ་འཛིན
- ས་ཆ་འཛིན
- ས་ཆ་འཛིན
- ས་ཆ་འཛིན
- ས་ཆ་འཛིན
- ས་ཆ་འཛིན
- ས་ཆ་འཛིན
བིལུ་པིརིན་ཊི་འདི་གིས་བཟོ་མི
འབྲེལ་ཡོད་བིལུ་པིརིན་ཊི
བིལུ་པིརིན་ཊི་འདི་ཚུ་ཐབས་ལམ་དང་རྫས་རིགས། སྤྱི་ཆོས་བགོ་བཤའ་བྱེད
CC0 སྤྱི་དབང
བིལུ་པིརིན་ཊི་འདི་CC0 འོག་བཀྲམས་ཡོད། ཁྱེད་རང་གིས་ཆོག་མཆན་མ་བཞེས་པར་ཕབ་ལེན་དང་བཟོ་བཅོས། བགོ་བཤའ། དགོས་མཁོ་གང་ལའང་བཀོལ་སྤྱོད་བྱས་ཆོག
བཟོ་མཁན་ལ་རྒྱབ་སྐྱོར་བྱེད་པའི་ཆེད་ཁོང་ཚོའི་བིལུ་པིརིན་ཊི་བརྒྱུད་ཐོན་སྐྱེད་ཉོ། བཟོ་མཁན་གྱིས བཟོ་མཁན་གྱི་ཁེ་ཕོགས ཚོང་པས་གཏན་འཁེལ་བྱས་པ། ཡང་ན་བིལུ་པིརིན་ཊི་འདིའི་པར་གསར་བཟོས་ཏེ་ཁྱེད་རང་གི་བིལུ་པིརིན་ཊི་ནང་མཐུད་སྦྲེལ་བྱས་ཏེ་ཡོང་སྒོ་བགོ་བཤའ་བྱེད།