艺术
美容与健康
工艺
文化与历史
娱乐
环境
食品与饮料
逆向工程
科学
体育
技术
可穿戴设备
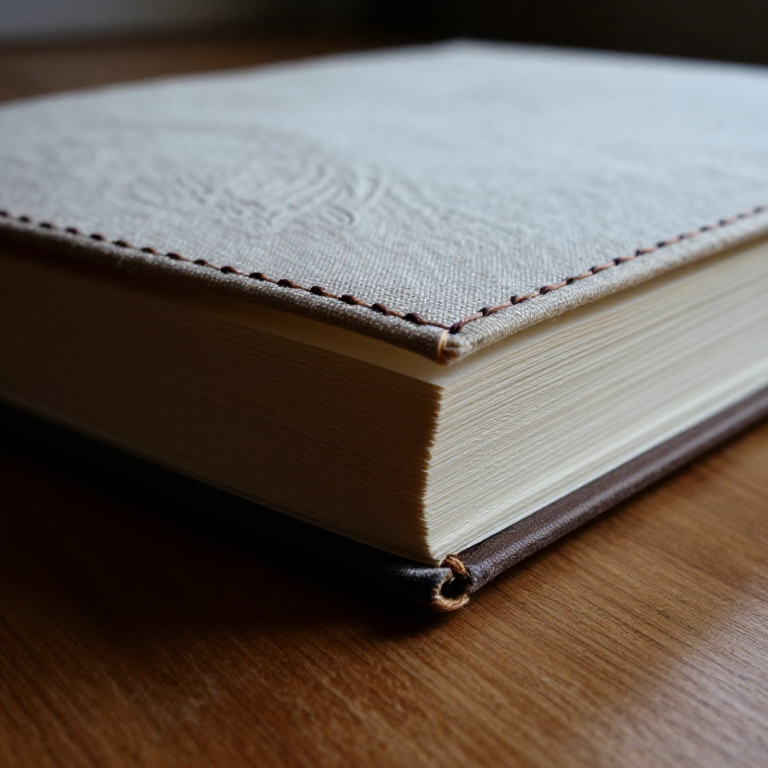


Binding a Coptic Stitch Journal — Exposed-Spine Chain Stitch Bookbinding
The Coptic stitch is the oldest form of book binding that uses a structure recognisable as a modern book — separate sections (signatures) of folded pages, sewn together through their spines. Developed by early Christians in Egypt around the 2nd-4th century CE, it requires no glue and no cover spine, leaving the stitching fully exposed as a decorative element. The chain stitch links each signature to the next and to the cover boards, creating a book that opens completely flat. This blueprint covers the basic two-needle Coptic link stitch — the foundation of all exposed-spine binding.
初学者
2-3 hours
说明
1
1
Cut and fold the signatures
Cut and fold the signatures
Cut paper sheets to twice the desired page width. Fold each sheet in half with a bone folder for a crisp crease. Nest 4-5 folded sheets inside each other to form a signature. Prepare 5-6 signatures for a standard journal.
2
2
Prepare the cover boards
Prepare the cover boards
Cut two pieces of bookboard or heavy cardboard slightly larger than the folded page size — about 3 mm overhang on the top, bottom, and fore-edge. This overhang protects the pages.
此步骤所需材料:
 装订纸板2 个
3
3
Mark the sewing stations
Mark the sewing stations
Using a ruler and pencil, mark 3-5 evenly spaced points along the spine edge of one signature, about 1.5 cm from top and bottom edges. Transfer these marks to all signatures by stacking them and marking through. Mark the same positions on both cover boards along the spine edge.
4
4
Punch the sewing holes
Punch the sewing holes
Open each signature to the centre fold and punch holes through from inside at each marked station using an awl. For the cover boards, punch holes about 5 mm from the spine edge at each station.
所需工具:
 锥子
锥子5
5
Cut and wax the thread
Cut and wax the thread
Cut a length of linen or waxed thread approximately 3 times the spine height multiplied by the number of signatures. Thread a bookbinding needle. If using unwaxed linen thread, draw it through a block of beeswax to reduce tangling and add grip.
此步骤所需材料:
 上蜡亚麻线3 米
所需工具:
 缝衣针
缝衣针6
6
Attach the first signature to the back cover
Attach the first signature to the back cover
Place the back cover board with the first signature on top, aligning the sewing holes. Sew from inside the signature out through the first hole, then through the corresponding cover hole from outside to inside, loop around the board edge, and return through the same cover hole. Continue to the next station. This kettle stitch anchors the signature to the board.
7
7
Add the second signature with chain stitch
Add the second signature with chain stitch
Place the second signature on top of the first, aligned. Sew into the second signature at the last station, then back out at the next station. Before entering the first signature below, pass the needle under the stitch linking the first signature to the cover, creating a chain link. Pull snug. Continue across all stations.
8
8
Continue adding signatures
Continue adding signatures
Repeat the chain stitch pattern for each new signature. At each station, the needle goes out of the current signature, hooks under the stitch of the previous signature, then re-enters the current signature at the next station. Keep consistent tension — tight enough to hold but not so tight that the paper tears.
9
9
Attach the front cover board
Attach the front cover board
After sewing the last signature, place the front cover board on top. Sew through the cover holes with the same looping technique used for the back cover — out through the signature, through the cover hole, around the board edge, back through the cover hole, and into the next signature station.
10
10
Tie off the thread
Tie off the thread
After completing the last station on the front cover, pass the needle under a nearby stitch and tie a square knot. Pass the needle through the signature one more time, pull the knot inside the fold, and trim the excess thread. The knot is hidden inside the spine.
11
11
Cover the boards (optional)
Cover the boards (optional)
For a finished look, glue decorative paper or bookcloth to the outside of each cover board. Wrap the material around the edges by about 2 cm and glue to the inside. Paste a lining sheet inside each cover to hide the turn-ins. Allow to dry under light pressure.
12
12
Press and finish
Press and finish
Place the completed journal under a weighted board overnight to set the shape. The Coptic stitch binding allows the book to open completely flat at any page — the exposed chain stitching along the spine is both structural and decorative.
已连接蓝图材料






相关蓝图
这些蓝图共享知识——技术、材料或原理

CC0 公共领域
此蓝图以 CC0 协议发布。你可以自由复制、修改、分发和使用此作品,无需征得许可。
通过购买蓝图中的产品支持创客,他们将获得 创客佣金 (由供应商设定),或创建此蓝图的新版本并将其作为连接包含在你自己的蓝图中以分享收入。