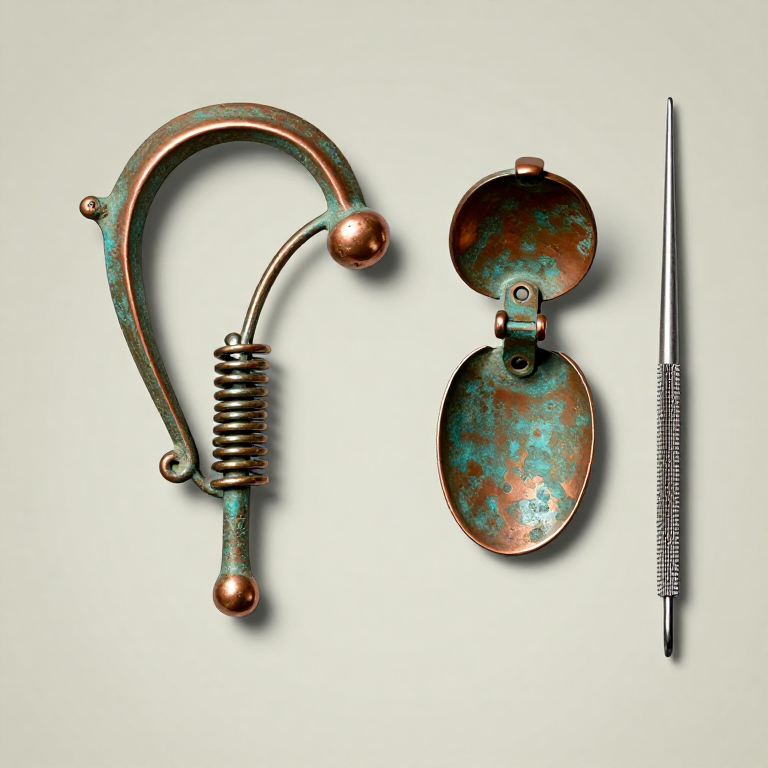
Greek Bronze Fibula — Bending a Bronze Fibula Brooch
说明
Anneal and Straighten the Bronze Wire
Anneal and Straighten the Bronze Wire
Begin with a length of bronze wire approximately 25-35 cm long and 1.5-2.5 mm in diameter. Anneal the wire by heating to dull red (500-600 degrees Celsius) and quenching in water — this softens the bronze and makes it pliable for bending. Straighten any kinks by rolling the wire on a flat surface under a flat board. The wire must be smooth and free of nicks or scratches, which would create stress concentration points that could cause the pin to break in use. Greek fibulae evolved from simple arched pins in the Geometric period (900-700 BCE) to elaborate decorated forms in the Archaic period, with regional styles distinctive to different parts of the Greek world.
此步骤所需材料:
 Phosphor Bronze Sheet1x2 cm 个
Form the Spring Coil
Form the Spring Coil
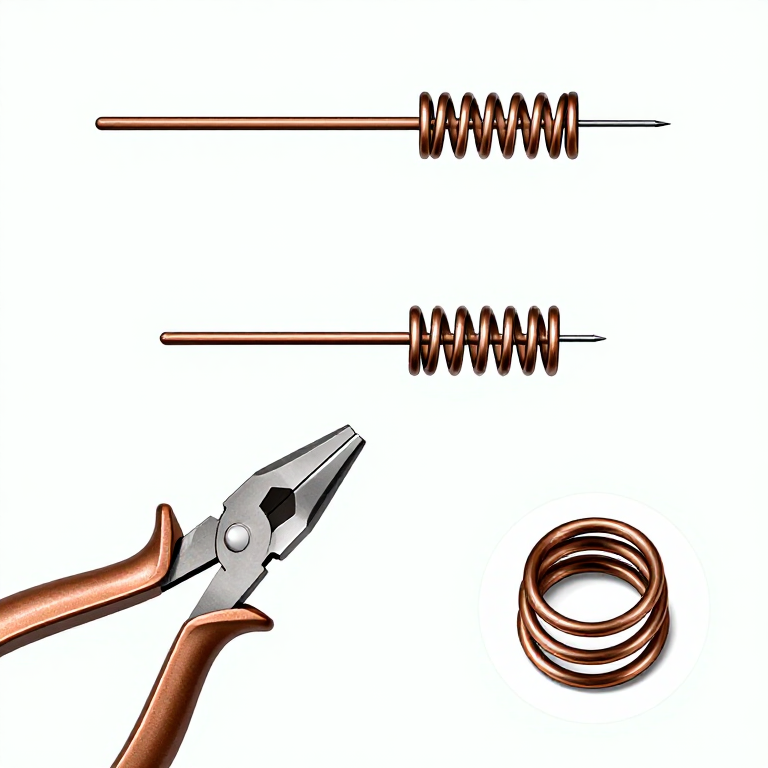
At one end of the wire, use round-nose pliers to wind a tight coil of 2-4 turns — this is the spring that provides the tension to hold the pin closed. Wind the coil around a mandrel (a small rod or the plier jaws) to create uniform, tight turns approximately 4-5 mm in diameter. The spring is the functional heart of the fibula — it stores elastic energy that pushes the pin point into the catch plate when the fibula is closed. After winding the spring, the wire should exit tangentially from the coil, forming the beginning of the pin shaft. The remaining longer section of wire will form the bow (arch) and catch plate.
Bend the Bow Arch
Bend the Bow Arch
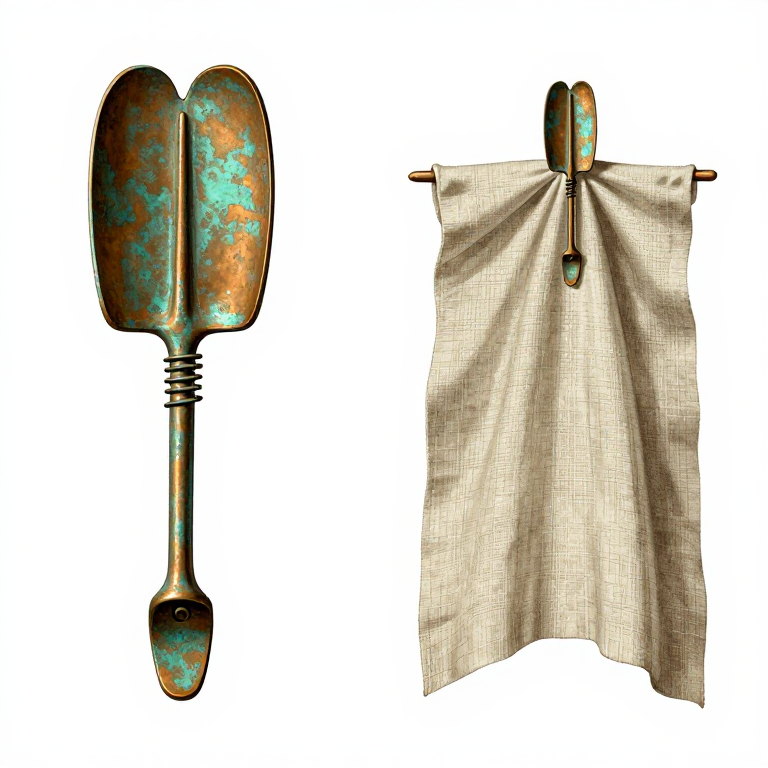
From the spring coil, the longer section of wire extends upward to form the decorative bow (arch) of the fibula. Bend this wire into a graceful arc using pliers and your fingers — the bow shape can be a simple semicircle, an angular elbow, or an elaborate serpentine curve depending on the regional style being replicated. Boeotian fibulae had large flat bows decorated with incised designs; Thessalian types had spectacle-shaped double spirals; Attic forms were simpler arched bows. The bow should be high enough to gather a fold of fabric (typically 2-4 cm clearance between the pin and the bow apex). Work-harden the bow slightly by gentle hammering on an anvil to increase its rigidity.
Form the Catch Plate
Form the Catch Plate
At the end of the bow, bend the wire back along itself to create the catch plate — a flat or U-shaped channel that receives and holds the pin point when the fibula is closed. Use flat-nose pliers to fold the wire end back sharply, creating a narrow trough approximately 1-1.5 cm long. The catch plate must align precisely with the pin point so the pin slides smoothly into the catch and is held securely by the spring tension. For a more robust catch, solder or rivet a small piece of flat bronze sheet to form a wider catch plate. File the inside of the catch smooth so the pin point is not damaged each time the fibula is opened and closed.
Sharpen the Pin and Test the Mechanism
Sharpen the Pin and Test the Mechanism
File the pin end (the short wire extending from the spring) to a sharp point that can easily pierce fabric. The point should be fine enough to penetrate linen or wool without tearing but not so needle-sharp that it is fragile. Test the spring mechanism by opening and closing the fibula repeatedly — the pin should snap firmly into the catch plate with positive spring tension. If the spring is too weak, tighten the coil turns; if too strong, anneal the spring area slightly. The finished fibula should be comfortable to wear and secure enough to hold a garment fold without opening accidentally. Polish the entire piece with fine abrasive for an attractive finish. The fibula was such a ubiquitous personal item in the Greek world that distinctive regional styles serve as reliable archaeological dating and provenance markers.
材料
2- 25-35 cm, 1.5-2.5 mm dia 个占位符
- 1x2 cm piece 个占位符
所需工具
6Related blueprints
Other builds that share materials, tools, or techniques with this one.
CC0 公共领域
此蓝图以 CC0 协议发布。你可以自由复制、修改、分发和使用此作品,无需征得许可。
通过购买蓝图中的产品支持创客,他们将获得 创客佣金 (由供应商设定),或创建此蓝图的新版本并将其作为连接包含在你自己的蓝图中以分享收入。