Greek Water Pipe — Joining Terracotta Water Pipes
说明
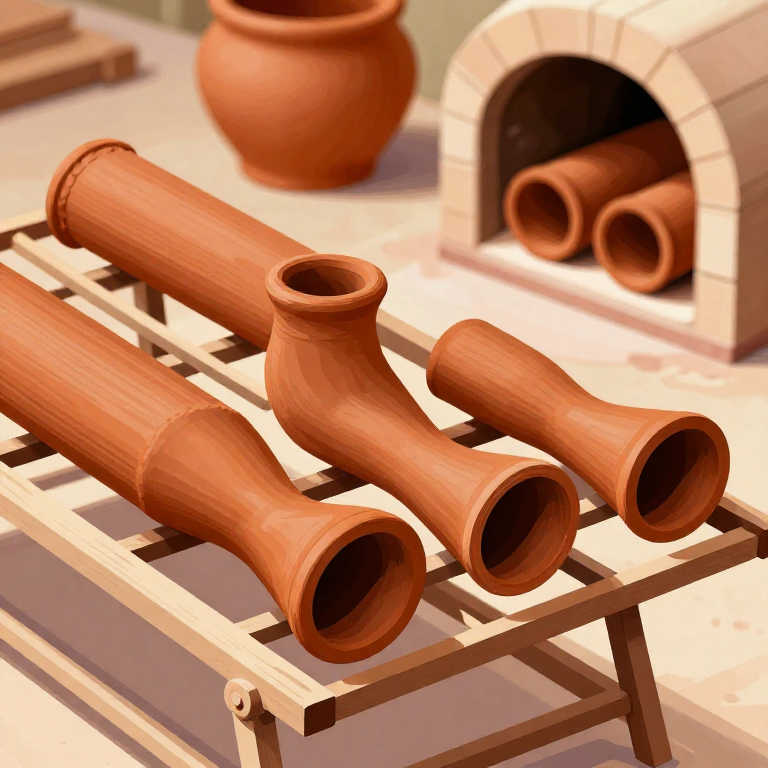
Throw the Pipe Sections on the Wheel
Throw the Pipe Sections on the Wheel
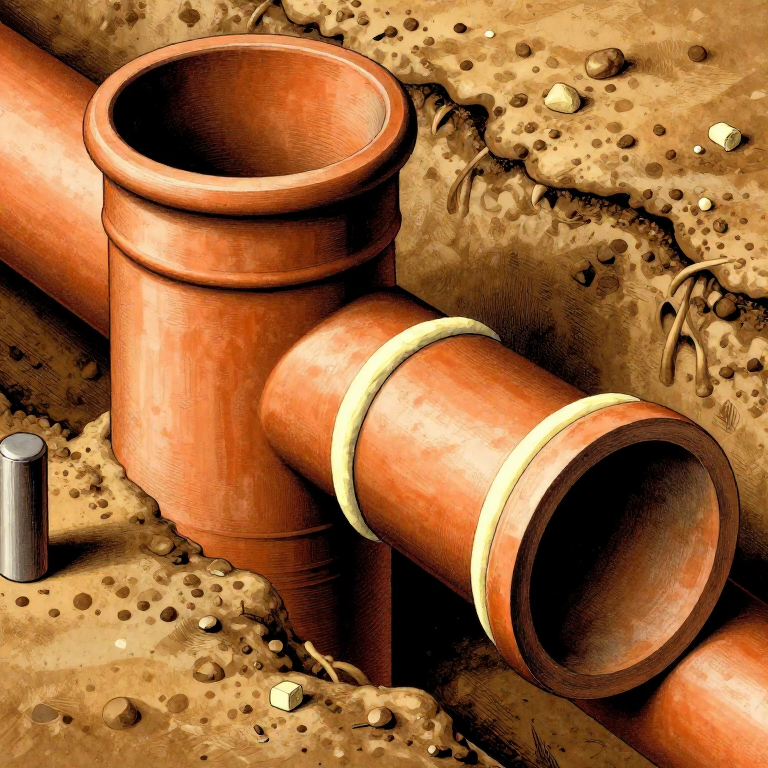
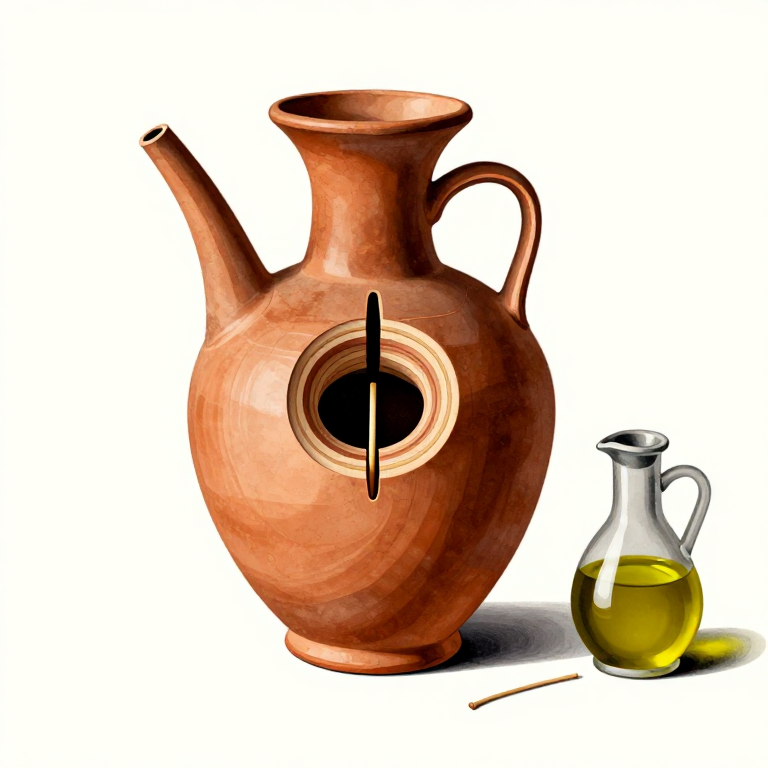
Throw a cylindrical pipe section on the potter's wheel, approximately 40-60 cm long with an internal diameter of 8-12 cm and wall thickness of 1-1.5 cm. At one end, flare the rim outward to create a socket (female end) approximately 3-4 cm wider than the pipe body. At the other end, shape the rim to a slightly tapered spigot (male end) that fits snugly inside the socket of the next pipe section. This socket-and-spigot design allows pipe sections to interlock while accommodating the slight thermal expansion and ground settling that would crack a rigid continuous pipe. Greek water pipes from the Peisistratid aqueduct in Athens (6th century BCE) show this standardized joint design, with pipe sections remarkably uniform in diameter and length.
此步骤所需材料:
 Lime (Calcium Hydroxide)small amount per joint 个
 Gravelfor trench base 个
所需工具:
 Potter's wheel
 Kiln
KilnDry and Fire the Pipe Sections
Dry and Fire the Pipe Sections
Allow the thrown pipe sections to dry slowly for 1-2 weeks, rotating them regularly to prevent warping. The pipes must dry evenly or they will crack during firing or warp out of round, preventing proper joint sealing. Once bone-dry, fire in a kiln at 900-1050 degrees Celsius in an oxidizing atmosphere. Higher firing temperatures produce a denser, more water-resistant ceramic. Test the fired pipes for water tightness by filling a section and checking for seepage — some porosity is acceptable as the lime mortar joint seal and the water pressure will force fine clay particles into the pores, gradually sealing them (a process called autogenous healing). Reject any pipes with cracks, warps, or significantly out-of-round cross-sections.
Prepare the Pipe Trench
Prepare the Pipe Trench
Dig a trench along the planned pipeline route, deep enough to protect the pipes from surface loads (at least 30-50 cm of cover). The trench bottom must have a consistent downward slope in the direction of water flow — Greek water supply systems relied on gravity flow, requiring a continuous gradient from source to destination. A typical gradient was 0.5-2% (0.5-2 cm drop per meter of length). Line the trench bottom with a bed of fine sand or gravel, 5-10 cm thick, compacted to the correct slope. This bedding supports the pipes evenly and prevents stress concentrations from stones or irregularities in the trench floor.
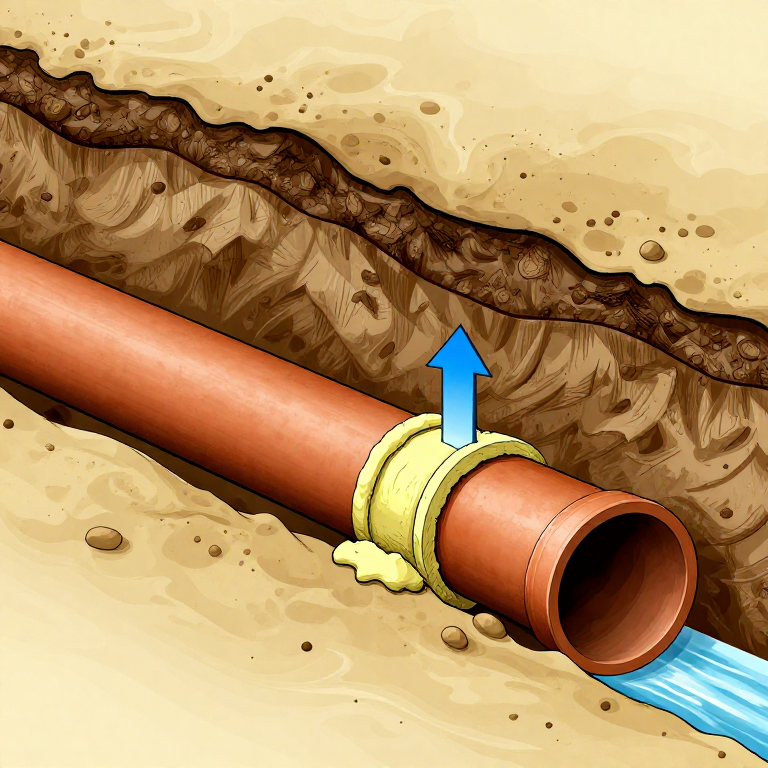
Join the Pipe Sections with Mortar
Join the Pipe Sections with Mortar
Starting at the upper (source) end of the pipeline, lay the first pipe section on the sand bedding with the socket end facing downhill (toward the destination). Apply lime mortar around the inside of the socket and the outside of the spigot of the next pipe section. Push the spigot firmly into the socket until it seats fully, with mortar squeezing out around the joint. Smooth the excess mortar around the exterior of the joint to create a continuous seal. Continue laying pipes downhill, section by section. The overlapping socket-and-spigot orientation (socket facing downhill) ensures that any joint leakage drips outward rather than allowing soil to enter the pipe. This practical joint orientation principle was standardized across Greek water systems.
Backfill and Test the Pipeline
Backfill and Test the Pipeline
Allow the mortar joints to cure for several days before testing. Carefully backfill the trench with fine soil, compacting in layers to avoid displacing the pipes. Leave inspection points accessible at critical joints. Test the pipeline by allowing water to flow from the source through the complete system. Check all visible joints for leaks and repair any with additional mortar. The Greek piped water system at Samos, built by the engineer Eupalinos in the 6th century BCE, included a 1,036-meter tunnel through a mountain — one of the greatest engineering achievements of the ancient world. Greek pipe systems also incorporated settling basins to remove sediment, inspection chambers for maintenance access, and distribution manifolds (castellum divisorium) to split a single supply into multiple branch lines serving different parts of a city.
材料
3- 3-5 kg per pipe section 个占位符
- small amount per joint 个占位符
所需工具
4Related blueprints
Other builds that share materials, tools, or techniques with this one.
CC0 公共领域
此蓝图以 CC0 协议发布。你可以自由复制、修改、分发和使用此作品,无需征得许可。
通过购买蓝图中的产品支持创客,他们将获得 创客佣金 (由供应商设定),或创建此蓝图的新版本并将其作为连接包含在你自己的蓝图中以分享收入。