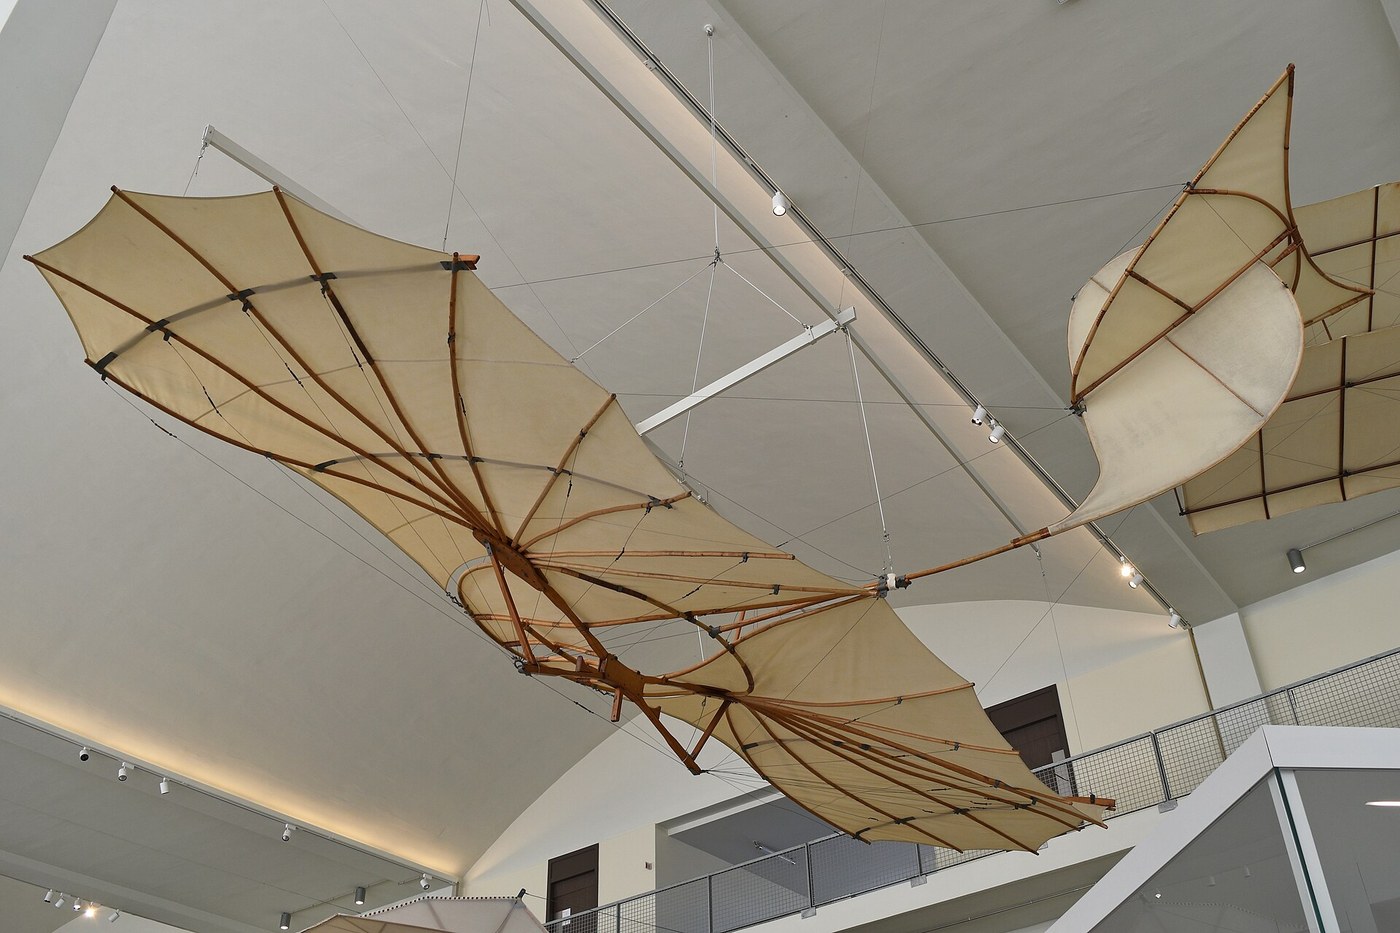


Lilienthal Glider
说明
Build a model at a scale you can throw
Build a model at a scale you can throw
Build the glider small first. Every mistake is then a broken stick rather than a broken person.
- Make a bat-like monoplane wing of roughly 600 mm span from balsa sticks and sheet, with a shallow camber matching the best section from the whirling-arm tests.
- Fit a fixed cruciform tail — a horizontal surface for pitch, a vertical one for yaw.
- Hang a weight beneath the wing on a short pylon so the centre of gravity sits at about 30 percent of the chord.
- Launch it gently, level, into still air. Adjust ballast until it glides straight rather than diving or stalling.
The trimming is the lesson: a glider is a balance between where the weight is and where the lift acts, and a few millimetres of ballast decides whether it flies or drops. Lilienthal did this trimming with his own body, in flight, which is why his control authority was limited by how far he could lean.
Measure the glide ratio while you are here: launch from a known height, measure the distance travelled, and divide. A ratio of 6:1 means six metres forward per metre down. Lilienthal’s best machines managed roughly that.此步骤所需材料:
 轻木板2 张
 巴尔沙木条1 束
 木工胶1 瓶
 用作压重的雕塑泥1 包
所需工具:
 带备用刀片的手工刀
 6 英寸数显卡尺
 量角器
量角器 带式砂光机
带式砂光机 数字天平
数字天平 透明安全眼镜
Cover the frame, and learn why the covering is structural
Cover the frame, and learn why the covering is structural
A wing is a frame plus a skin, and the skin is not just there to keep the air out.
- Build a wing frame of ribs and spars with no covering, and try to twist it by hand. Note how easily it distorts.
- Cover it tightly with cotton fabric or modelling tissue, glued or doped to the frame on both surfaces.
- Try to twist it again.
The covered frame is dramatically stiffer in torsion than the bare one. A taut skin turns an open lattice into something approaching a closed box, and it carries shear that the sticks alone cannot. Lilienthal used cotton shirting over willow; the Wrights used cotton doped tight; the principle is identical and it is why an uncovered model feels alarmingly floppy and a covered one feels solid.
Doping shrinks the fabric as it dries and pulls the surface drum-tight. Overdo it on a light frame and the shrinkage will bow the spars — a real failure mode, and the reason dope is applied in several thin coats rather than one heavy one.此步骤所需材料:
 棉布(轻薄)1 m
 模型蒙皮薄纸1 套件
 模型绷紧漆1 套件巴尔沙木条1 束
所需工具:
带备用刀片的手工刀 C 形夹带式砂光机透明安全眼镜
Fly it off a slope in small increments
Fly it off a slope in small increments
Lilienthal’s method matters more than his machine, and it is the part worth copying exactly.
- Choose a smooth grassy slope with a steady breeze blowing up it, and clear ground beyond.
- Start at the very bottom, with hops measured in metres, not from the top.
- Change ONE thing at a time — ballast position, tail angle, launch speed — and repeat the same short hop.
- Record every run: what you changed, what it did.
Incremental testing on a shallow slope is what made Lilienthal survive long enough to learn anything. The alternative — build the whole machine, launch from height, hope — killed a great many of his contemporaries and eventually killed him too, in 1896, when a gust stalled him from about fifteen metres.
Do this with models, not with yourself. A person-carrying glider is genuinely dangerous, needs a suitable site, and is not what this blueprint is for. Everything worth learning here is learnable at 600 mm span, and the trimming logbook you build is the real deliverable.此步骤所需材料:
 坐标纸1 pad
所需工具:
 手持风速仪
手持风速仪 可拍慢动作视频的智能手机数字天平量角器透明安全眼镜
Find the limit of weight-shift control
Find the limit of weight-shift control
Understand why this design could not be scaled up, because that is what the next thirty years were about.
- On the model, simulate weight-shift by moving the ballast sideways and observing the response.
- Now double the model’s size — or reason it through — and ask how far the ballast must move to produce the same effect.
- Compare the mass being moved with the mass of the whole machine in each case.
Weight-shift control works only while the pilot is a large fraction of the total mass, and its authority falls away as the machine grows. A person can shift perhaps half a metre; on a small glider that is a big change in balance, on a large one it is nothing. Worse, it is slow — the pilot must physically swing before anything happens, and a gust does not wait.
So the machine had to be given control surfaces of its own: things that redirect the AIR rather than move the mass. That is the entire subject of the next stage, and it is why the aileron and wing-warping blueprints exist.
Hang gliders still use weight shift, and they are precisely as large as that method allows. It is not a discarded idea, it is a technique with a size limit — which is a much more useful way to think about superseded engineering.此步骤所需材料:
用作压重的雕塑泥1 包所需工具:
数字天平6 英寸数显卡尺量角器可拍慢动作视频的智能手机透明安全眼镜Copy his lift table, and note what he could not know
Copy his lift table, and note what he could not know
Lilienthal’s published tables were the best data in the world and they contained an error that nearly ended the Wrights.
- Using the whirling arm from the previous blueprint, measure lift coefficients for your cambered section across the angle range.
- Tabulate them the way Lilienthal did: coefficient against angle of attack.
- Note the conditions of your measurement — the size of the surface, the speed, and whether the air was already moving.
Write those conditions down, because a coefficient without its conditions is not a measurement, it is a rumour. Lilienthal’s figures were taken on a whirling arm, in air his own apparatus had already disturbed, on surfaces of one particular size. Used outside those conditions they were wrong — and they were used outside those conditions by everyone, because they were the only numbers available.
The Wrights built their 1900 and 1901 gliders using these tables, found the lift far short of prediction, and faced a choice: assume they had built badly, or assume the world’s best data was wrong. Choosing the second is the subject of the next blueprint, and it is the most important decision in the history of aviation.此步骤所需材料:
坐标纸1 pad所需工具:
 弹簧秤量角器6 英寸数显卡尺数字天平透明安全眼镜
材料
8- 2 张占位符
- 1 束占位符
- 1 瓶占位符
- 1 包占位符
- 1 m占位符
- 1 套件占位符
- 1 套件占位符
- 1 pad占位符
相关蓝图
这些蓝图共享知识——技术、材料或原理

CC0 公共领域
此蓝图以 CC0 协议发布。你可以自由复制、修改、分发和使用此作品,无需征得许可。
通过购买蓝图中的产品支持创客,他们将获得 创客佣金 (由供应商设定),或创建此蓝图的新版本并将其作为连接包含在你自己的蓝图中以分享收入。