Forging a Roman Gladius Short Sword — Legionary Sidearm
说明
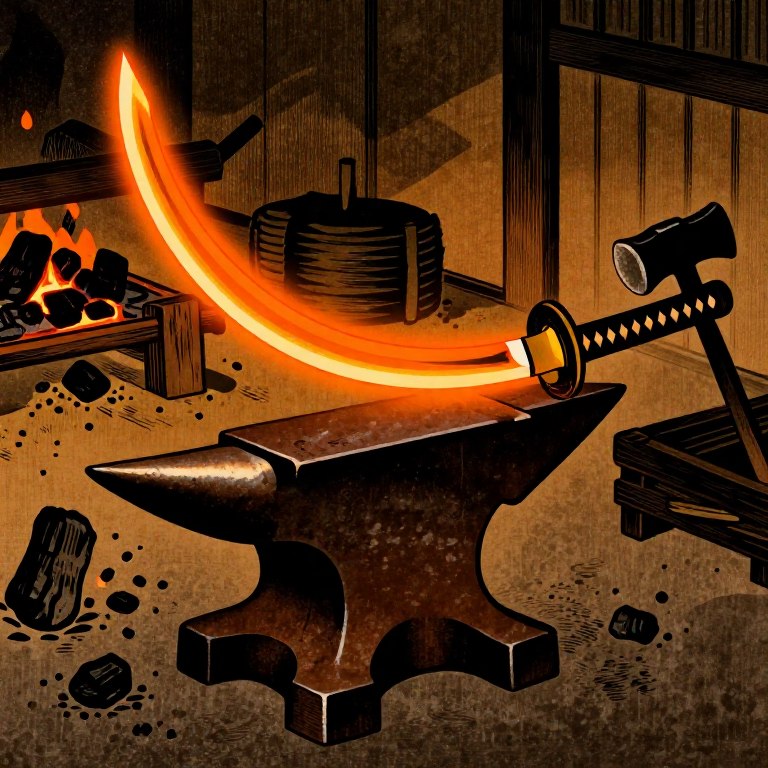
Draw Out the Blade Profile
Draw Out the Blade Profile
Heat the steel billet to bright orange-yellow (approximately 1000-1100 °C) in the forge. Using the cross-peen hammer on the anvil face, draw the billet out to approximately 55 cm in total length — 45 cm for the blade and 10 cm for the tang. The Mainz-type gladius has a gently leaf-shaped blade that widens slightly from the guard before tapering to a sharp triangular point. Work the blade to a thickness of approximately 5-6 mm at the spine (centre ridge) and taper toward the edges. Forge a flat tang approximately 10 cm long and 2 cm wide extending from the blade shoulder. Reheat as needed whenever the steel drops below dull red (approximately 700 °C) — forging below this temperature risks cracking the steel.
此步骤所需材料:
 Linseed Oil500 ml 毫升
所需工具:
 Anvil
Anvil Forge Tongs
Forge the Bevels and Refine the Shape
Forge the Bevels and Refine the Shape
Reheat the blade and forge the primary edge bevels on both sides. Hold the blade at an angle on the anvil edge and hammer the steel down to create a V-shaped cross-section with a central ridge running the length of the blade. The gladius was a double-edged weapon with both edges sharpened for cutting, though its primary function was thrusting. Work both edges evenly to maintain symmetry. Refine the leaf-shaped taper toward the point — the last 8 to 10 cm should narrow to a strong triangular tip capable of penetrating armour gaps. Straighten the blade by laying it flat on the anvil and correcting any warps with light hammer blows. The final forged blade should be approximately 4.5 to 5 cm wide at the widest point.
Heat Treat — Quench and Temper
Heat Treat — Quench and Temper
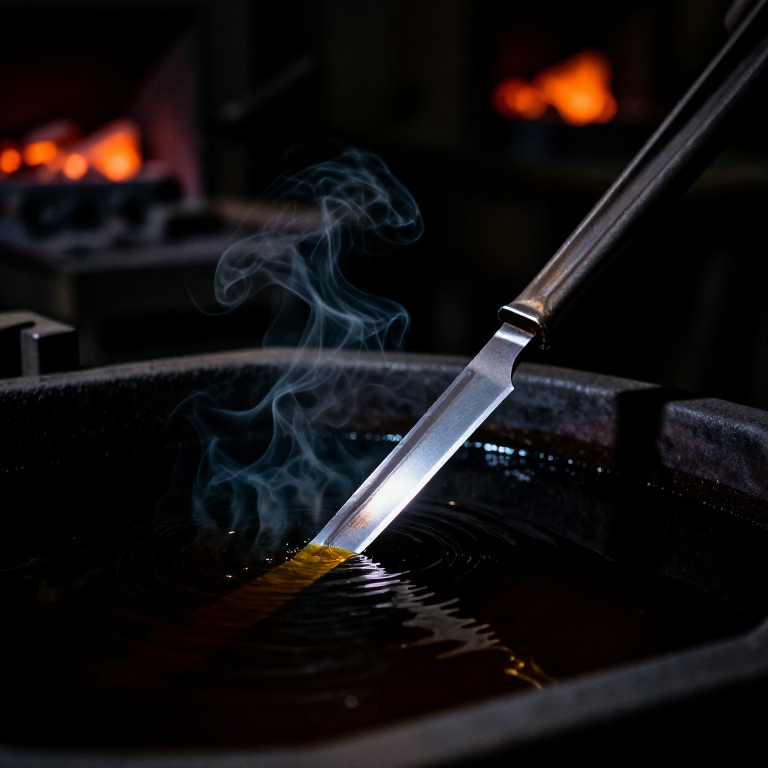
Heat the blade evenly to its critical temperature — for 0.5-0.7% carbon steel this is approximately 780-820 °C, visible as a cherry red that is non-magnetic (test with a magnet). Quench the blade edge-first into warm oil (approximately 50 °C), plunging it in smoothly and straight to minimise warping. Hold it submerged for at least 30 seconds, moving it gently in a figure-eight pattern. The blade is now fully hardened but extremely brittle. Temper immediately by placing the cleaned blade in an oven at 220-250 °C for one hour, or heat the spine with a torch until a straw-yellow oxide colour (approximately 220 °C) appears on the flat of the blade. This reduces brittleness while retaining edge hardness sufficient for combat use. Roman swords show Vickers hardness values of approximately 200-350 HV in archaeological samples, indicating they were tempered to a practical balance of hardness and toughness.
Grind the Edges and Polish
Grind the Edges and Polish
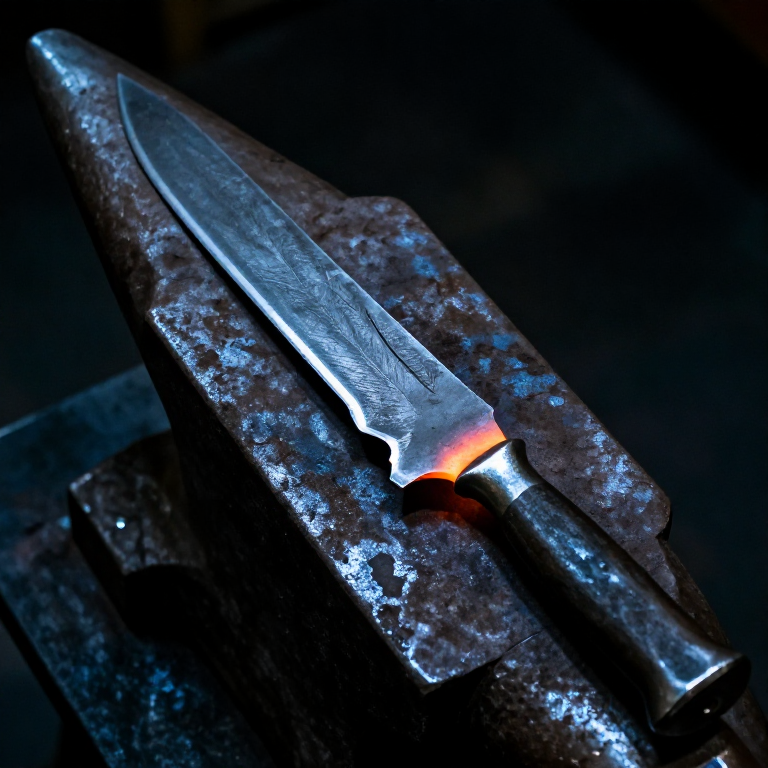
Grind the blade on a belt grinder or use hand files to refine the edge bevels to an even, straight line on both sides. Work through progressively finer grits — starting around 80 grit to remove forging scale and hammer marks, then 220, 400, and finally 600 grit for a serviceable finish. The final edge bevel should be approximately 20-25 degrees per side (40-50 degrees inclusive angle) for a durable combat edge. Do not thin the edge too much — the gladius was designed to thrust through mail and padded armour, requiring a robust edge geometry. Hone the final edge with a whetstone using light, consistent strokes. Polish the blade flats if desired, though many surviving gladii show functional rather than mirror finishes.
Fit the Guard, Grip, and Pommel
Fit the Guard, Grip, and Pommel
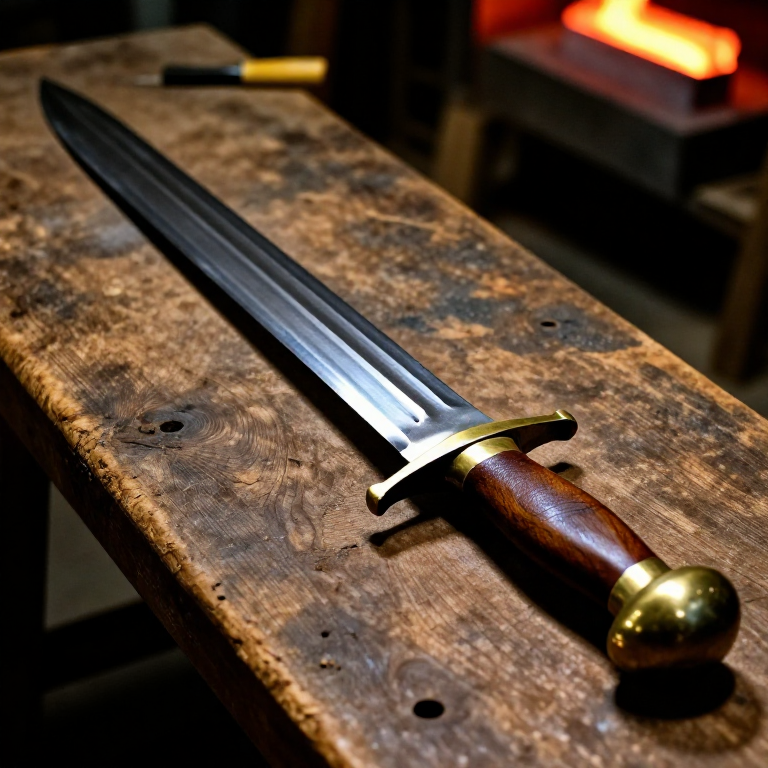
Cut a rectangular brass or bronze guard plate and file a slot in the centre to fit snugly over the tang. Slide the guard onto the tang and seat it against the blade shoulder. Shape the wooden grip block to an oval cross-section comfortable for a one-handed grip, approximately 10 cm long. Drill or burn a central hole through the grip to receive the tang. Slide the grip over the tang and peen or rivet the tang end over a wooden or bone pommel disc to lock the assembly together. The pommel of the Mainz-type gladius was typically a spherical or ovoid wooden knob. Wrap the grip with a leather strip in a spiral pattern, securing the ends with small brass tacks. The completed gladius should weigh approximately 700 to 1000 grams, balanced close to the guard for quick handling.
材料
5- 1 billet, 30x5x3 cm 个占位符
- 1 block, 12x4x4 cm 个占位符
- 1 piece, 8x8 cm, 2mm thick 个占位符
- 1 strip, 60x2 cm 个占位符
- 500 ml 个占位符
所需工具
7Related blueprints
Other builds that share materials, tools, or techniques with this one.

CC0 公共领域
此蓝图以 CC0 协议发布。你可以自由复制、修改、分发和使用此作品,无需征得许可。
通过购买蓝图中的产品支持创客,他们将获得 创客佣金 (由供应商设定),或创建此蓝图的新版本并将其作为连接包含在你自己的蓝图中以分享收入。