艺术
美容与健康
工艺
文化与历史
娱乐
环境
食品与饮料
逆向工程
科学
体育
技术
可穿戴设备
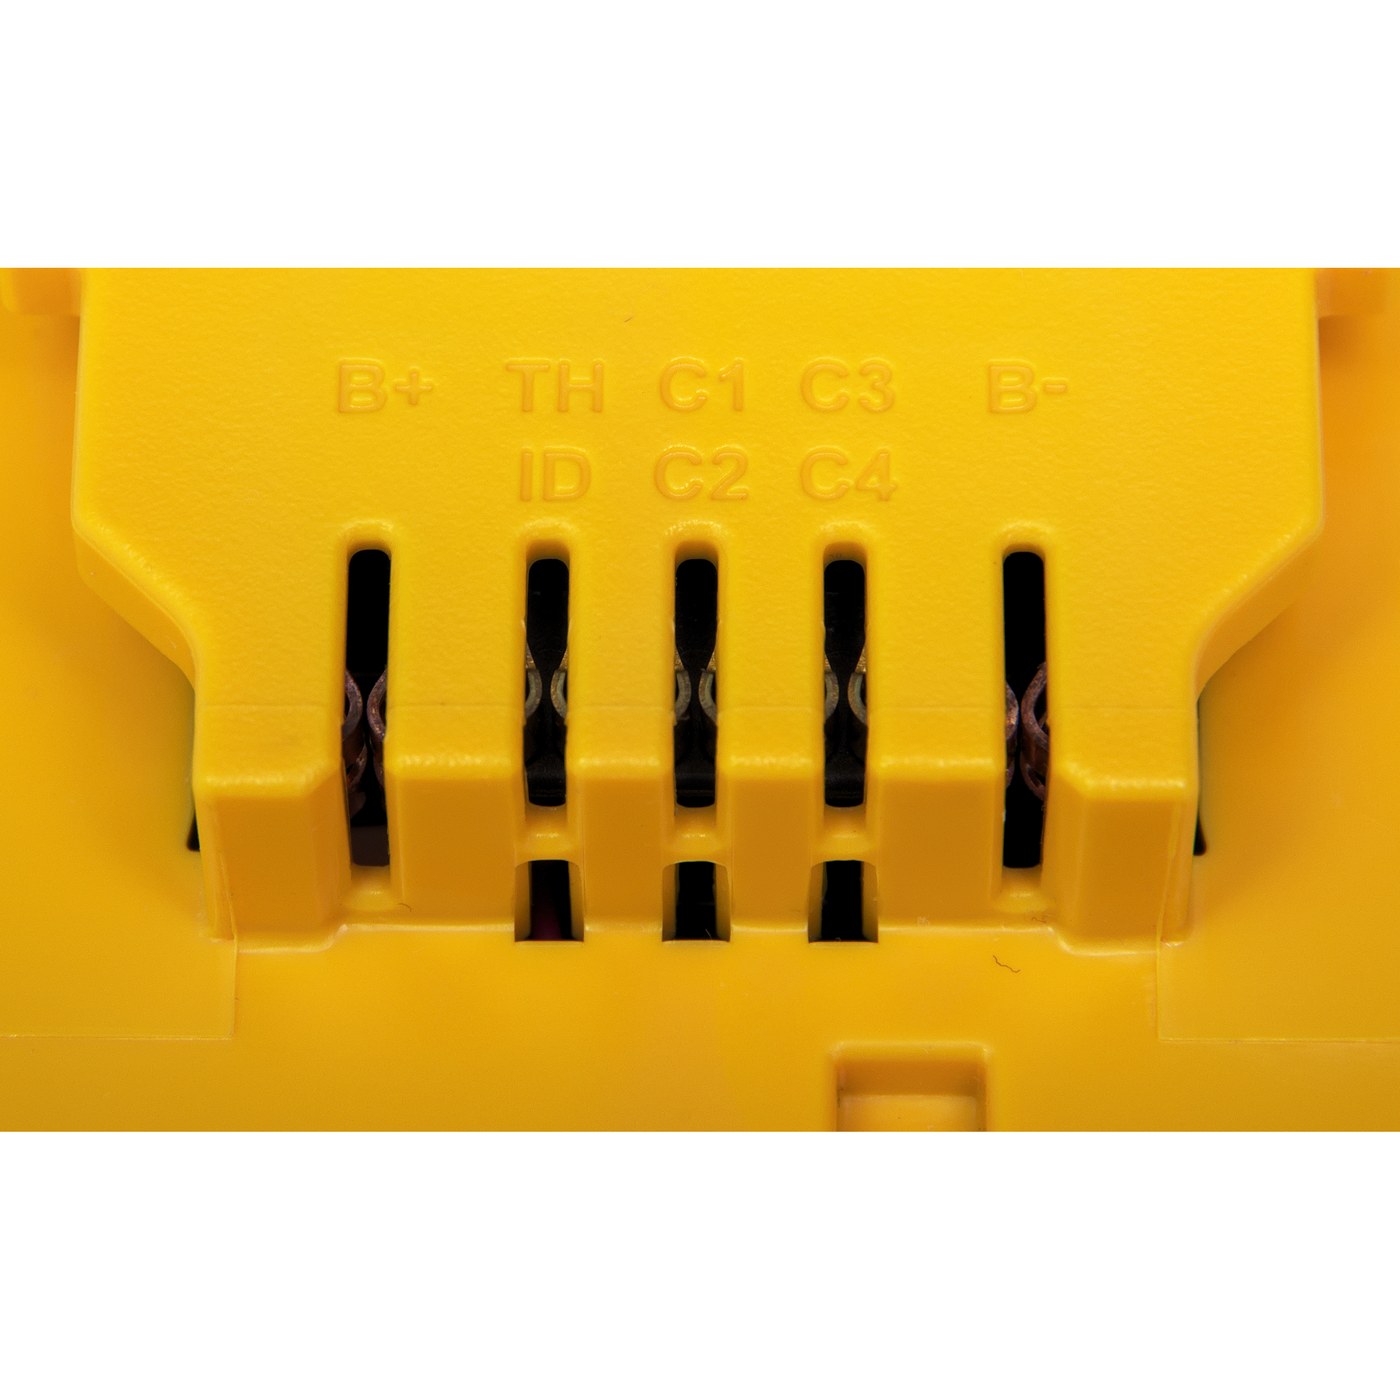


The Pack as a Part: Contacts, Keying and the Third Wire
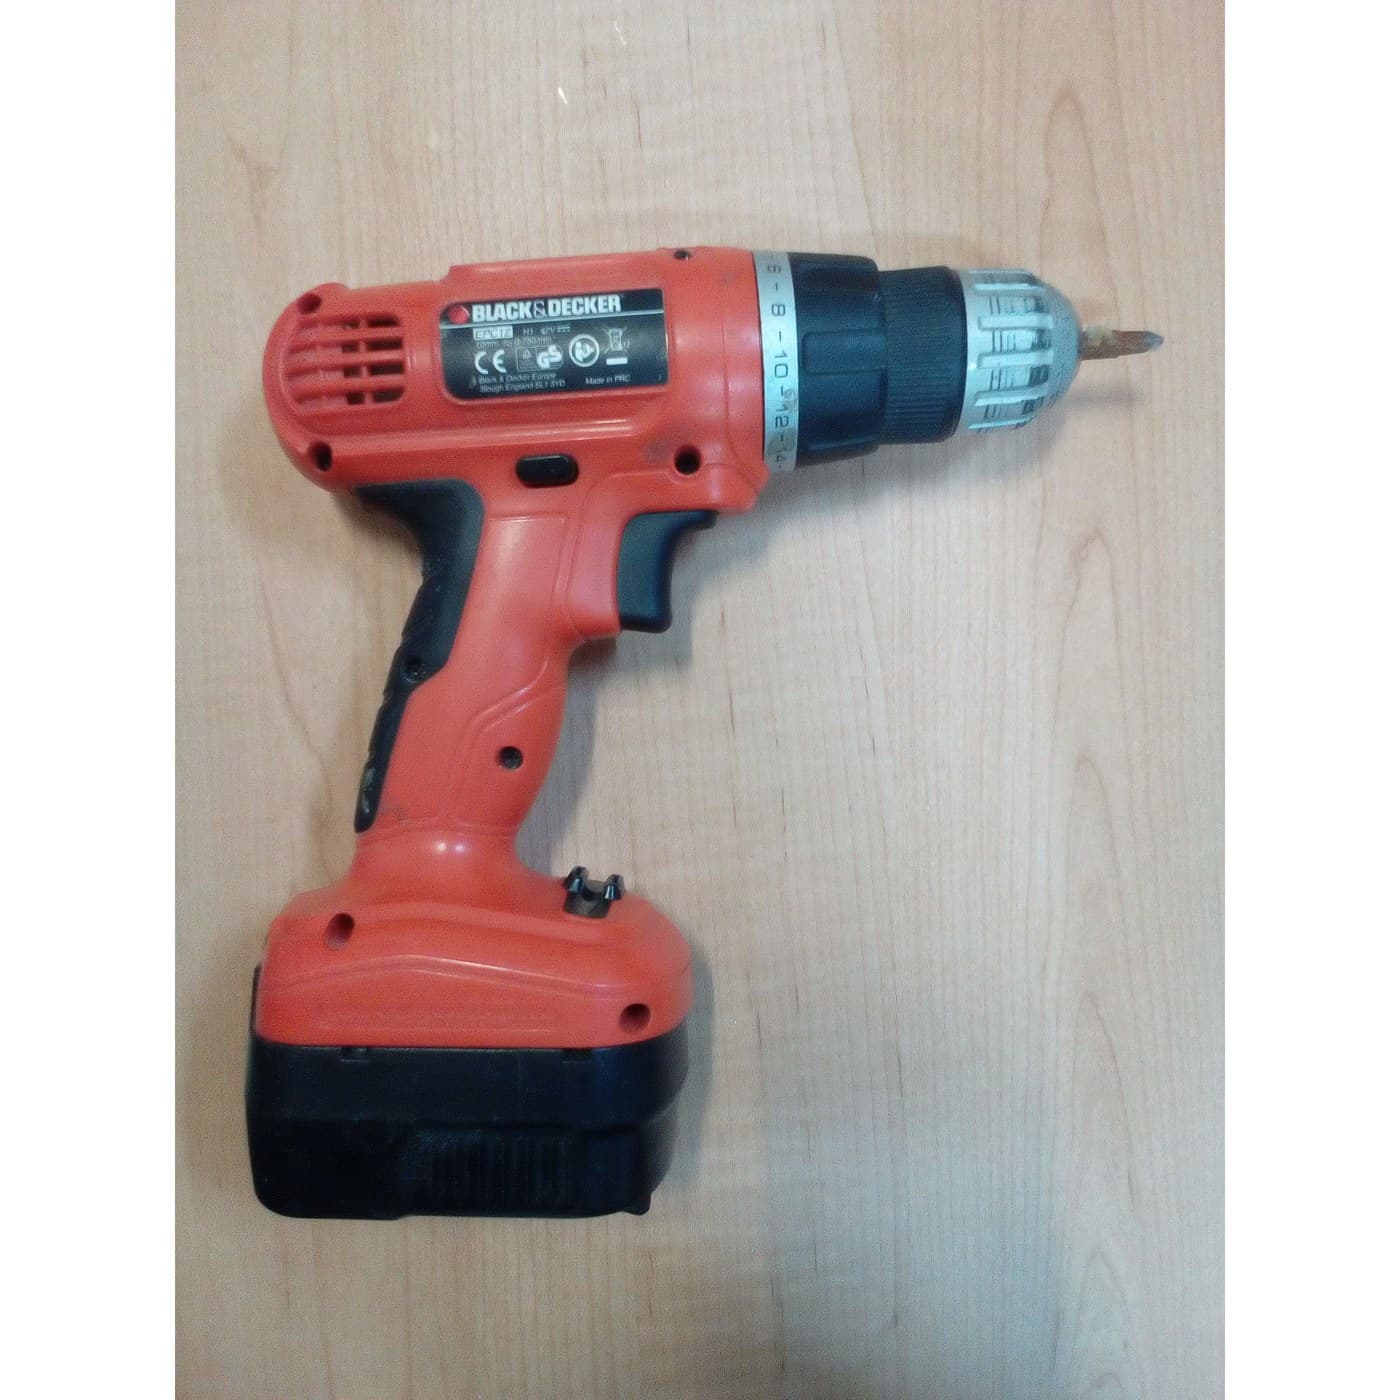
The 1961 cordless drill had its cells inside the tool. You charged the tool, and while it charged you did not work.
Making the battery a separate, removable part changes what a tool is. One charged pack goes in while another sits on the charger; a dead pack is replaced instead of a dead tool; one pack serves a drill, a saw and a light. But it also puts the entire motor current through a connector that a tired person will slam home ten thousand times.
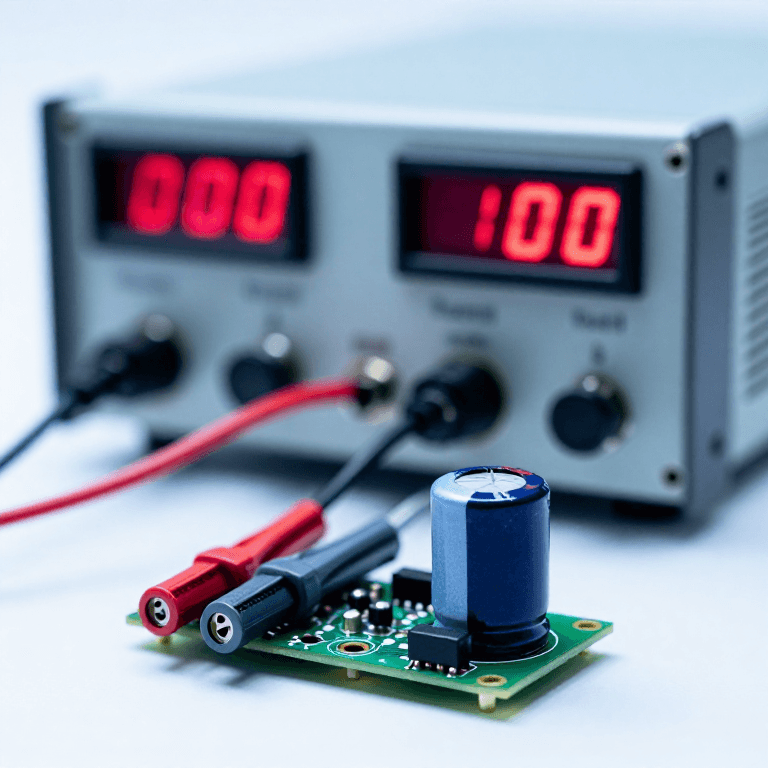
This rung is about that connector, and the quiet extra pins beside it. Look at the photograph: **B+** and **B−** carry the work, and **TH**, **ID** and **C1–C4** carry everything the tool and the charger need to know about what they have just been handed.
中级
About 3 hours
说明
1
1
Read the terminal block
Read the terminal block
Take the pack off and look straight into its terminal block, as in the photograph on this page. Most modern packs mark the pins. Write down what yours has.
- **B+ / B−** — the two outermost, heaviest blades. Everything the motor draws goes through these. They are wider and thicker than the rest for exactly that reason.
- **TH** — the thermistor tap. Step 4 measures it.
- **ID** — a resistor to B−, of a value that tells the charger which chemistry and capacity it is holding. This is how one charger safely serves several packs.
- **C1, C2, C3, C4** — taps between the series cells, so a smart charger or balancer can read each cell separately rather than only the total. Rung 7 is entirely about why that matters.
Measure the geometry with the calipers while it is in your hand: blade width, blade thickness, the depth of engagement, and the rib spacing. Then look at the **keying** — the asymmetric ribs and the latch. The pack physically cannot enter the wrong tool, cannot enter backwards and cannot fall out under vibration, and none of that depends on the user reading anything.
Measure the voltage on each pin against B− with the meter, and note which read a steady voltage, which read nothing and which read something odd. Do not short anything: an 18 V pack will deliver over a hundred amps into a screwdriver blade and the blade will weld.
所需工具:
 6 英寸数显卡尺
 数字万用表——自动量程、真有效值
2
2
Measure what the connector costs you
Measure what the connector costs you
You cannot read a 2 mΩ contact with an ordinary meter on its resistance range, because the meter's own leads are worth more than that. Measure it the way it is actually measured: **push a known current through and read the voltage across**.
Set the bench supply to constant current — 2 A is plenty and is safe — and pass it through the pack-to-tool contact pair with the pack fitted and the tool's own switch off. Put the meter directly across the two points either side of the joint, as close to the contact as your probes will reach. Resistance is the voltage you read divided by the current you set. This is a four-wire measurement: the current leads and the voltage leads are separate, so the lead resistance drops out.
Do it on a clean pack and again on a neglected one. Then clean the neglected one's blades with isopropyl alcohol on a lint-free swab, let it dry, and repeat. The improvement is usually large and it is the single most effective repair anyone can do to a tired tool.
Take the number into step 3 and see what it costs at 40 A. A joint that measures 25 mΩ is not a marginal joint; it is a joint that is on its way to a melted terminal block.
**Do not** attempt this with the tool running, and do not bridge B+ to B− at any point.
此步骤所需材料:
 99% 异丙醇1 个
所需工具:
 台式电源数字万用表——自动量程、真有效值
 鳄鱼夹测试线
 连接导线
连接导线3
3
What a milliohm costs, and why the keying is mechanical
What a milliohm costs, and why the keying is mechanical
正在加载 Jupyter 笔记本…
4
4
Find the thermistor and calibrate it
Find the thermistor and calibrate it
Put the meter on resistance between **TH** and **B−** on a pack that has been sitting at room temperature. You should read something in the region of 10 kΩ. That is the pack's thermistor, and it is pressed against a cell inside.
Now prove it is a thermistor and not a plain resistor. Warm the pack gently — a few minutes of ordinary work, or a heat gun on its lowest setting held well back and waved, never parked — and watch the resistance **fall**. Cool it and watch it rise. Write down three pairs of temperature and resistance, taking the temperature with the infrared thermometer on the case beside the terminal block.
Then do the same with a loose 10 kΩ NTC from the thermistor kit, which you can put in iced water and in warm water and measure properly. Two fixed points and the beta equation from step 3 give you a calibration good enough to predict the third.
Why this pin exists: charging a cold lithium cell plates metallic lithium on the anode instead of intercalating it, which is permanent damage and, eventually, the failure of rung 9. Charging a hot cell accelerates every side reaction it has. The charger needs to know, it cannot guess from voltage, and one cheap part in the pack answers it.
**Never** put a heat gun on a lithium pack on anything but its lowest setting, and stop at 50 °C. You are demonstrating a slope, not testing a limit.
所需工具:
数字万用表——自动量程、真有效值 NTC 热敏电阻套件
 红外测温仪
红外测温仪 热风枪
热风枪 透明安全眼镜
5
5
How a pack is built inside, without opening one
How a pack is built inside, without opening one
You are not going to open a pack — a slipped screwdriver across a cell tab is a short of a hundred amps or more, and in a lithium pack that is a fire. But you can build the same thing from loose cells and see exactly how it goes together.
Put four 18650 cells in a four-cell holder. That is a *4S* string: four in series, 14.4 V nominal. Wire it as a pack would be wired:
1. **B+** from the top cell's positive, **B−** from the bottom cell's negative, both in heavy wire — at least 14 AWG for a tool-sized current.
2. A **tap from every cell junction**, in thin wire, brought out to a connector. These are the C1–C4 pins from step 1.
3. A **10 kΩ NTC** taped against the middle of the middle cell, its other leg on B−. That is TH.
Measure B+ to B−, then each tap against B−, and check the arithmetic: the taps should step up by roughly one cell voltage each. Any tap that is out of step has told you something real, and rung 7 is about what.
In a production pack the series links are not wire at all: they are **nickel strip spot-welded** to the cell ends. A weld is used rather than solder because the heat of soldering a cell tab damages the cell right under the joint, and because a welded strip has a far lower and far more repeatable resistance than a solder blob. If you have the spot welder, practise on strip and scrap ends only; cell-to-cell welding is a separate skill and a separate risk, and step 2's resistance measurement is the way to tell a good weld from a pretty one.
此步骤所需材料:
 18650 锂电芯4 个
 镍带1 个连接导线1 个
 热缩管1 个
所需工具:
 18650 四节电池座数字万用表——自动量程、真有效值
 带烙铁的焊台
 63/37 松香芯焊锡丝
 焊剂
焊剂 剥线钳
剥线钳 压接钳
压接钳 电池点焊机
电池点焊机 尖头镊子透明安全眼镜
6
6
History and context
History and context
**Attribution, stated honestly.** The removable slide-on pack appears in the professional tool market around **1978**, with Makita's 3.6 V cordless driver usually cited as the first widely sold example and Black & Decker working the same ground in the same period. No single patent number is asserted here: the sources disagree, and the feature is a convergence rather than one filing. What is documented, and what matters, is the arrangement — a keyed, latched, multi-pin connector that separates the energy store from the tool.
**Why it changed the industry and not just the tool.** Once the pack is a part, the *platform* becomes the product. A maker buys into a voltage and a connector, and every later tool in that family costs the price of a bare tool. That is why the pins multiplied: ID so the charger knows what it holds, TH so it knows whether it may hurry, and the cell taps so the pack can be looked after rather than merely filled.
**Honest limits.** The connector is the weakest part of a cordless tool and always has been. It wears, it corrodes, it loosens, and it is the usual reason a pack 'goes bad' when the cells are fine. It is also proprietary by design — the same keying that stops a wrong pack entering also stops a compatible one entering, which is a commercial decision wearing safety clothing. And the pins that make a pack smart also make it repairable only with the manufacturer's charger, which is the part of this rung worth arguing about rather than admiring.
相关蓝图
这些蓝图共享知识——技术、材料或原理

CC0 公共领域
此蓝图以 CC0 协议发布。你可以自由复制、修改、分发和使用此作品,无需征得许可。
通过购买蓝图中的产品支持创客,他们将获得 创客佣金 (由供应商设定),或创建此蓝图的新版本并将其作为连接包含在你自己的蓝图中以分享收入。