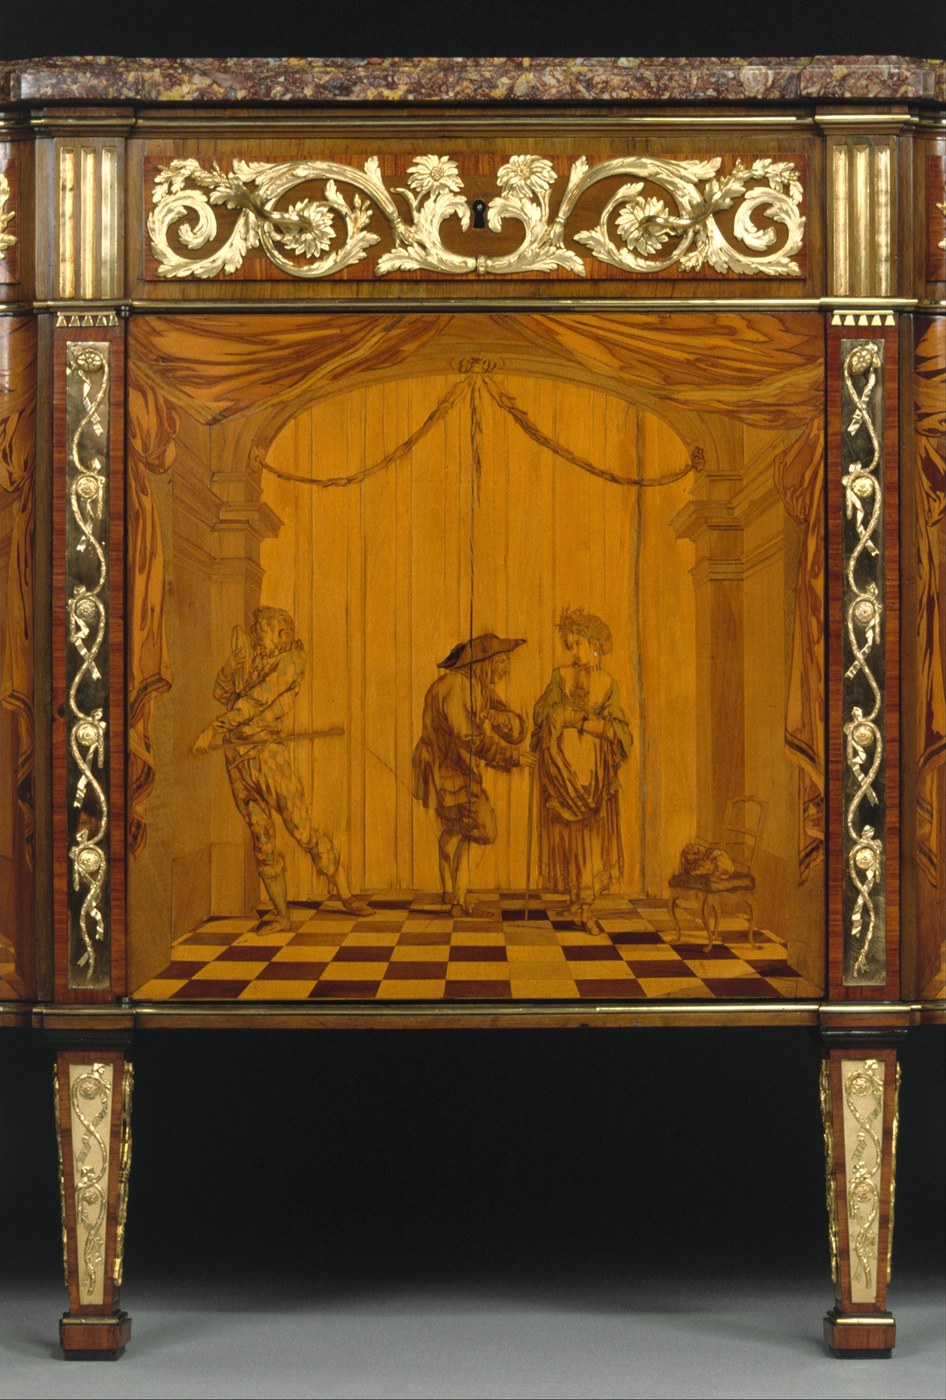


Veneer Marquetry
Marquetry is picture-making in wood. Thin veneers of different species are cut to shape and assembled into a pattern like a jigsaw, then glued down onto a solid carcass as a single sheet. All the drawing is done with the natural grain, figure and colour of the timber — no stain, no paint.
It is worth separating two words people mix up. Marquetry assembles a picture from veneers and lays it on a surface. Intarsia cuts recesses into solid wood and inlays pieces into them. Both are old and both are Italian Renaissance specialities, but they are different operations, and a source that treats them as synonyms is being loose.
The traditional cutting method stacks the veneers and saws all the layers at once, so every piece is cut with the identical kerf and they fit each other by construction. That trick — cut once, fit everywhere — is the whole craft in one idea.
说明
Draw the design at full size
Draw the design at full size
Draw the design full size on paper with clear closed outlines. Keep shapes chunky — anything narrower than 3 mm will break during handling.
Choose veneers by grain, not just colour
Choose veneers by grain, not just colour
Pick a species for each area and note the grain direction on your drawing. Grain running the length of a shape reads as movement; grain across it reads as texture. This is the drawing medium.
此步骤所需材料:
 黑胡桃木皮薄片1 张
 枫木薄板贴面1 张
 红橡木薄木贴面1 张
Stack the veneers into a packet
Stack the veneers into a packet
Stack the veneers with a scrap sheet top and bottom, tape the edges, and pin the stack at two corners outside the design. Sawing all layers together is what makes the pieces fit.
Paste the drawing onto the packet
Paste the drawing onto the packet
Paste the paper drawing onto the top scrap sheet. You saw through the paper — it is a cutting guide that gets destroyed, which is why it goes on a sacrificial layer.
Pierce a starter hole for each internal shape
Pierce a starter hole for each internal shape
Drill a 1 mm hole inside every enclosed shape so the saw blade can be threaded through. Drill inside the waste area, never on the line.
Saw the packet on the line
Saw the packet on the line
Thread a fine blade and saw the whole packet, following the line exactly. Every layer is being cut to the same shape at the same time — that is the point, so wandering off the line spoils every piece at once.
所需工具:
 钢丝锯(曲线锯)
Sort the pieces by layer
Sort the pieces by layer
Open the packet and sort every cut piece by which veneer it came from. You now have the same shape in each species — pick and mix to build the picture.
Assemble face down on gummed tape
Assemble face down on gummed tape
Lay the picture out face down and hold it together with gummed paper tape across the joints. The tape goes on the show face — it is removed after glue-up, and masking tape leaves adhesive that blocks finish.
此步骤所需材料:
 胶水纸带1 卷
Prepare the groundwork
Prepare the groundwork
Flatten the substrate and key it with 120 grit. Veneer telegraphs every lump beneath it, and a hollow will show as a visible dip once light rakes across the finished panel.
此步骤所需材料:
 波罗的海桦木胶合板1 个
 砂纸1 张
砂纸1 张Warm the hide glue
Warm the hide glue
Warm hide glue to about 60 °C — thin cream consistency. Too cool and it gels before the veneer is down; too hot for too long and it loses strength.
此步骤所需材料:
 兽皮胶100 毫升
Hammer veneer the panel down
Hammer veneer the panel down
Brush glue on both surfaces, lay the taped assembly tape-side up, and work a veneer hammer from the centre outward in overlapping strokes to squeeze out glue and air. Reheat any lifted spot and re-press — hide glue re-melts, which is the whole reason it is still used.
所需工具:
 贴面锤
贴面锤Tap for voids
Tap for voids
Once cool, tap across the panel with a fingernail. A hollow tick means a void — reheat that spot with an iron through paper and press it down again.
Damp off the tape and level
Damp off the tape and level
Damp the gummed tape, peel it off, and level the surface with a card scraper. Sand only lightly — veneer is under a millimetre thick and sanding through is unrecoverable.
此步骤所需材料:
砂纸1 张Oil the surface
Oil the surface
Wipe on boiled linseed oil and wipe off the surplus. Oil deepens the colour differences between species and is the moment the picture actually appears.
此步骤所需材料:
 熟亚麻籽油50 毫升
History & Context
History & Context
Marquetry is not intarsia. Intarsia sets pieces of wood — sometimes with bone, ivory or mother-of-pearl — into recesses cut in a solid matrix: floors, walls, table tops. Marquetry assembles a pattern out of veneers and glues the assembled sheet onto a carcass. The inlay tradition centred on Siena from around the 11th century and was heavily used for church furniture and panelling; during the Italian Renaissance wood inlay decorated both furniture and walls. The two words are often used interchangeably, including by people who should know better.
The donkey. Early marquetry was cut with a fretsaw or a "donkey" — a horizontal fretsaw with a foot-operated clamp that grips the packet and leaves both hands free to steer. It was the only practical way to work the heavy sawn veneers of up to 6 mm that early marquetry used. Modern veneer is far thinner, which is why a hand fretsaw is now enough.
Why stack-cutting is the whole idea. Cutting all layers at once means the saw kerf is identical for the piece and the hole it drops into. Cut them separately and every joint carries the error of two independent cuts. This is the same principle as transferring dovetails from the tails to the pins rather than measuring both: let one physical cut define both mating surfaces.
Hide glue, again. Hammer veneering with hide glue is reversible with heat and moisture, which means marquetry can be repaired almost indefinitely — lifted, re-laid, patched, taken apart by a conservator two centuries later. That is why antique marquetry survives at all. A panel laid with modern PVA is a one-shot object.
Grain as pigment. The discipline of marquetry is that you have no paint. Shade comes from choosing a darker species, movement from grain direction, shimmer from figured timber that reflects light differently as you move. Some traditions scorch pieces in hot sand to shade an edge — a burn used as a gradient. Working within that constraint is what gives good marquetry its particular quiet quality.
材料
9- 1 张占位符
- 1 张占位符
- 1 张占位符
- 1 卷占位符
- 1 个占位符
- 1 张占位符
- 100 毫升占位符
- 1 张占位符
- 50 毫升占位符
此蓝图制作

CC0 公共领域
此蓝图以 CC0 协议发布。你可以自由复制、修改、分发和使用此作品,无需征得许可。
通过购买蓝图中的产品支持创客,他们将获得 创客佣金 (由供应商设定),或创建此蓝图的新版本并将其作为连接包含在你自己的蓝图中以分享收入。