

Three-Point Seat Belt
A lap belt holds the pelvis and lets the torso go. In a frontal crash the upper body pivots forward about the belt and the head travels into the wheel or the screen, while the belt itself concentrates the whole deceleration into a narrow band across the abdomen. Two-point belts saved lives and caused a characteristic set of internal injuries doing it.
The body needs restraining in two places, and the strap must load bone rather than soft tissue. A diagonal across the chest catches the ribcage and collarbone; a lap section catches the pelvis. Both are structures that can take a load.
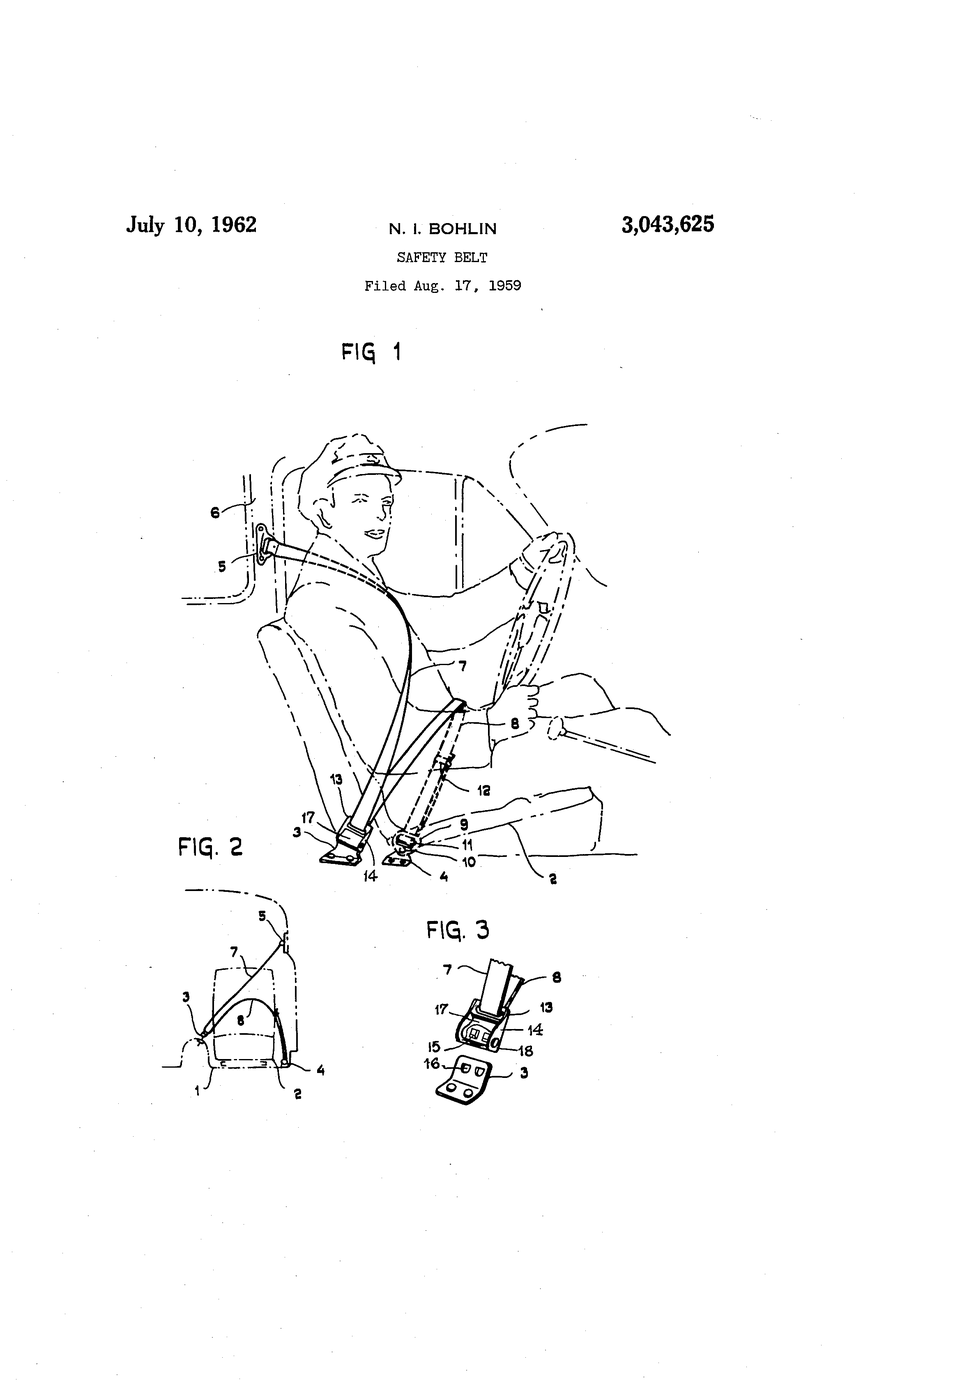
Bohlin's belt does it with one continuous strap and three anchor points — one above the shoulder, two at the floor — forming a sling that is fastened with a single buckle beside the hip. It restrains upper and lower body together, it anchors to the vehicle frame rather than the seat, and crucially it can be put on with one hand in a second.
US Patent 3,043,625, "Safety belt", filed 17 August 1959 and granted 10 July 1962 to Nils Ivar Bohlin, assigned to Volvo AB.
Anweisungen
Use a weighted dummy, never a person
Use a weighted dummy, never a person
Every test here uses a jointed model figure on a rolling sled. Never restrain a person in a home-made belt and never test on a real vehicle. Real belts are certified, load-rated components.
Read US 3,043,625 and find where it anchors
Read US 3,043,625 and find where it anchors
Bohlin anchors to the vehicle frame, not the seat, and describes a "continuous sling" giving "physiologically favourable" restraint. The word physiological is doing real work.
Build a sled and a ramp
Build a sled and a ramp
Make a small rolling platform with a seat back, and a ramp ending in a fixed stop. Every run starts from the same height so every deceleration is the same.
Materialien für diesen Schritt:
 Sperrholzplatte1 Blatt
 Gummiradsatz1 Stück
Make a jointed dummy
Make a jointed dummy
Build a figure with a hinged hip and neck and a weighted head. The hinges matter — a solid block cannot show you what a torso does.
Benötigte Werkzeuge:
 Flachzange
Run it unrestrained and mark where the head lands
Run it unrestrained and mark where the head lands
Release the sled and let it hit the stop. The dummy leaves the seat entirely. Mark the impact point on the ramp — this is the baseline.
Fit a two-point lap belt
Fit a two-point lap belt
Strap a single band across the hips to two floor anchors. Run the sled again and watch what the upper body does.
Materialien für diesen Schritt:
 Pflanzlich gegerbtes Leder1 Stück
Measure the jackknife angle
Measure the jackknife angle
The pelvis stays, the torso folds forward over the belt, the head still travels a long way. Measure how far. The lap belt has restrained a third of the problem.
Try a diagonal belt on its own
Try a diagonal belt on its own
Remove the lap section and fit only a shoulder diagonal. Run it. The dummy submarines — it slides forward underneath the strap, hips first.
Combine them into one continuous strap
Combine them into one continuous strap
Run a single length from a shoulder anchor, diagonally across the chest, down to a buckle at the hip, and across to the far floor anchor. Three anchors, one strap.
Run it and compare all three
Run it and compare all three
Same release height. The dummy is held at both the pelvis and the chest, and the head moves a fraction of the distance. Put the three head-travel numbers side by side.
Check where the strap crosses the body
Check where the strap crosses the body
Trace the diagonal on the dummy. It should cross the collarbone and sternum, not the neck, and the lap section should sit low across the pelvis, not the abdomen. Adjust the shoulder anchor height until it does.
Deliberately mount the diagonal too high
Deliberately mount the diagonal too high
Move the shoulder anchor up so the strap crosses the throat, and run it. Note that geometry, not webbing strength, decides whether a belt protects or injures.
Anchor the belt to the seat instead of the frame
Anchor the belt to the seat instead of the frame
Attach both lower ends to the seat and repeat. The seat itself moves, and the restraint slackens. Bohlin anchors to the frame for exactly this reason.
Time putting it on with one hand
Time putting it on with one hand
Fasten and release it repeatedly with one hand only. Anything slower than a second or two, or needing two hands, will not be used every trip — and an unworn belt protects nobody.
History & Context — the patent Volvo gave away
History & Context — the patent Volvo gave away
The patent. US 3,043,625, "Safety belt", filed 17 August 1959 and granted 10 July 1962 to Nils Ivar Bohlin, assigned to Volvo AB. Bohlin had come from Saab, where he worked on ejection seats — an unusually good background for the problem, because an ejection seat harness must restrain a body against enormous forces and be operable instantly by someone under stress.
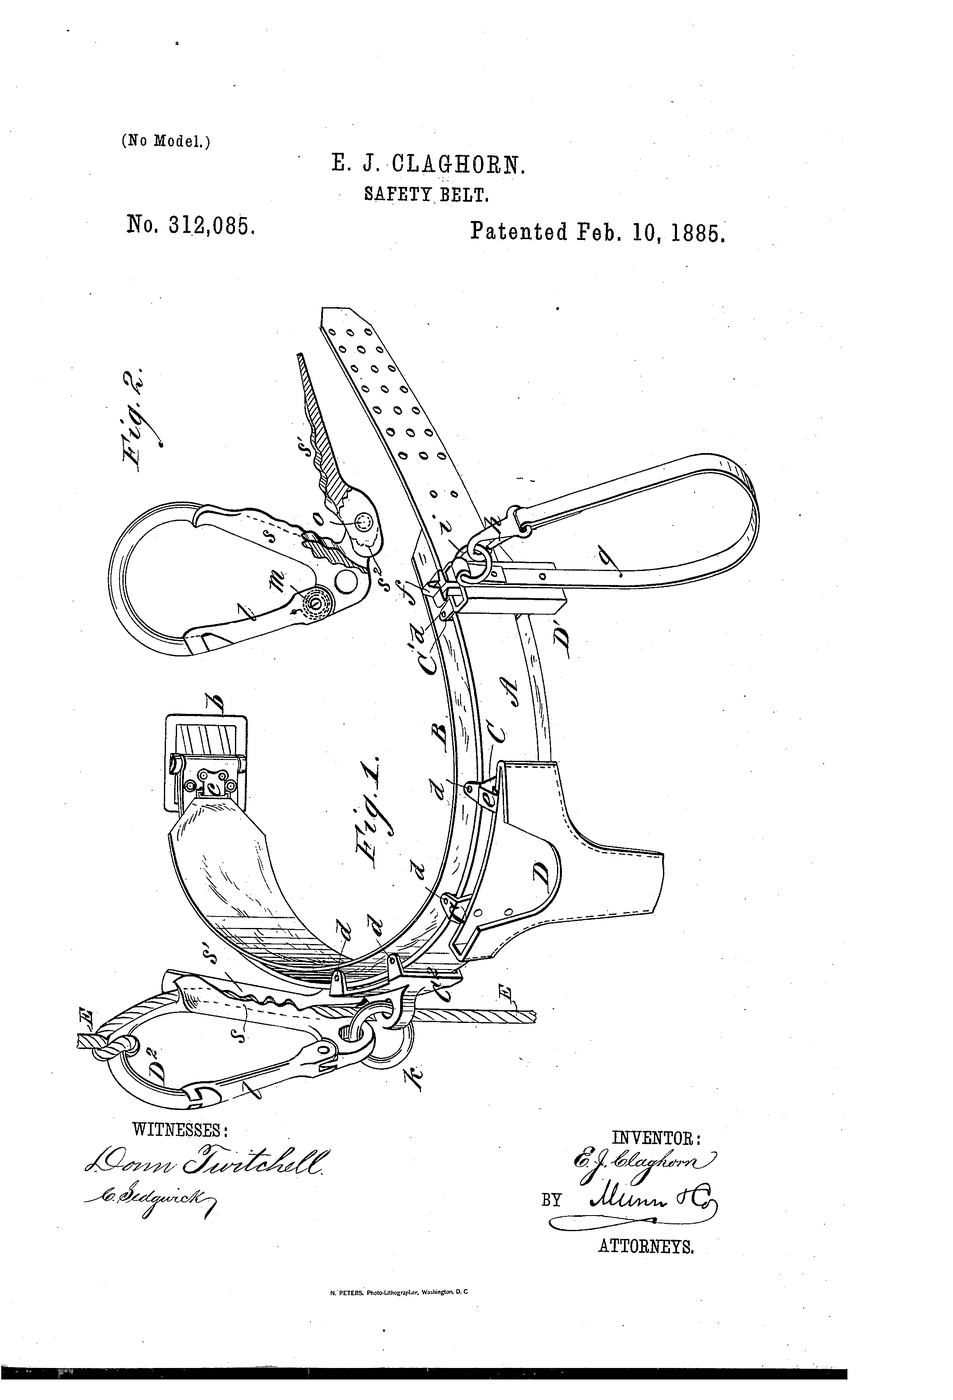
🔴 This is the seat belt that the Claghorn patent elsewhere in this collection is not. US 312,085 of 1885, titled "Safety Belt", is routinely cited as the first automotive seat belt; it is a work-at-height harness for painters, sailors and telegraph linemen, with a friction hook for rope descent, from a period with essentially no automobiles. Bohlin's is the real thing, and the two make a clean pair: same words, seventy-seven years apart, entirely different objects.
Volvo made the patent freely available, and that is the remarkable part. Holding a patent on a device that measurably prevents death creates an obvious conflict, and Volvo resolved it by opening the design to other manufacturers rather than licensing it for profit. The three-point belt spread across the industry as a result, and is commonly credited with saving over a million lives. It is worth sitting with as a counter-example to most of this programme, where the interesting question is usually who got paid.
Why three points and not two. Steps 6 to 10 are the entire argument, and they can be run in an afternoon. A lap belt alone leaves the torso free to jackknife; a diagonal alone lets the body submarine underneath it. Only the combination restrains the pelvis and the chest together — and Bohlin's insight was to do it with one continuous strap and one buckle, so that the whole thing goes on in a single movement. Earlier four-point harnesses restrained beautifully and were used by almost nobody, because they took two hands and thirty seconds. Compliance is a design parameter, and step 14 measures it.
Loading bone, not tissue. The patent's word is "physiologically favourable", and it means the strap must cross structures that tolerate concentrated load — pelvis, ribcage, clavicle — and avoid the abdomen and neck. Step 12 shows how quickly correct geometry becomes dangerous geometry. This is why modern cars have height-adjustable upper anchors, and why a belt worn under the arm or behind the back is worse than useless.
Materialien
3- 1 BlattPlatzhalter
- 1 StückPlatzhalter
- 1 StückPlatzhalter
Benötigte Werkzeuge
1- Platzhalter
Verwandte Blueprints
Diese Blueprints teilen Wissen — Techniken, Materialien oder Prinzipien


CC0 Gemeinfrei
Dieser Blueprint ist unter CC0 veröffentlicht. Sie dürfen dieses Werk für jeden Zweck frei kopieren, ändern, verbreiten und verwenden, ohne um Erlaubnis zu fragen.
Unterstützen Sie den Maker, indem Sie Produkte über seinen Blueprint kaufen, wo er eine Maker-Provision von Anbietern festgelegt, verdient. Oder erstellen Sie eine neue Iteration dieses Blueprints und verbinden Sie ihn in Ihrem eigenen Blueprint, um Einnahmen zu teilen.