Zusammenarbeit
KUNST
SCHÖNHEIT & WELLNESS
HANDWERK
KULTUR & GESCHICHTE
UNTERHALTUNG
UMFELD
ESSEN & GETRÄNKE
REVERSE ENGINEERING
WISSENSCHAFTEN
SPORT
TECHNOLOGIE
WEARABLES
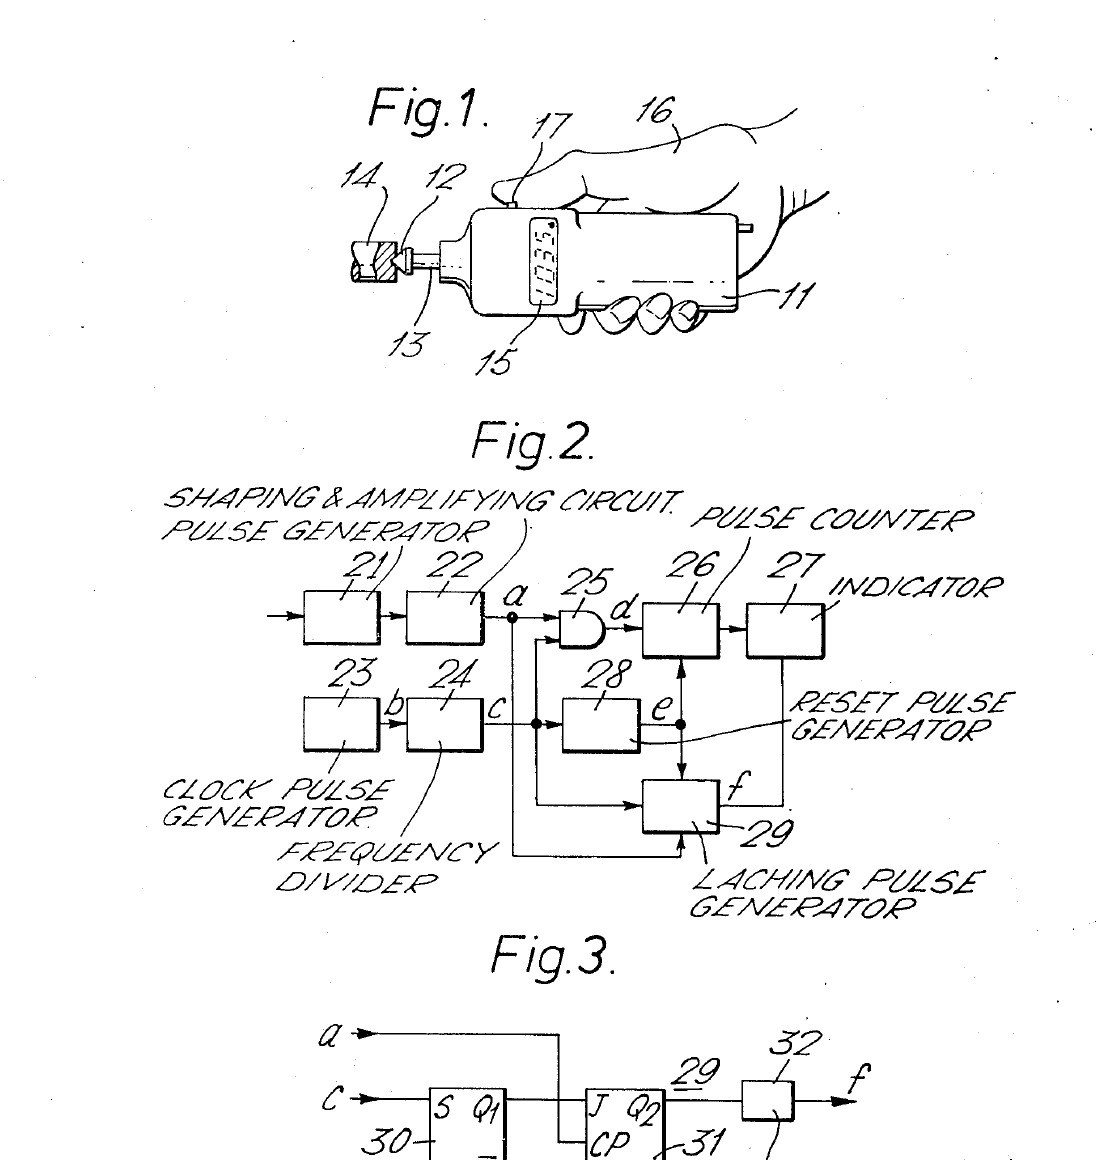


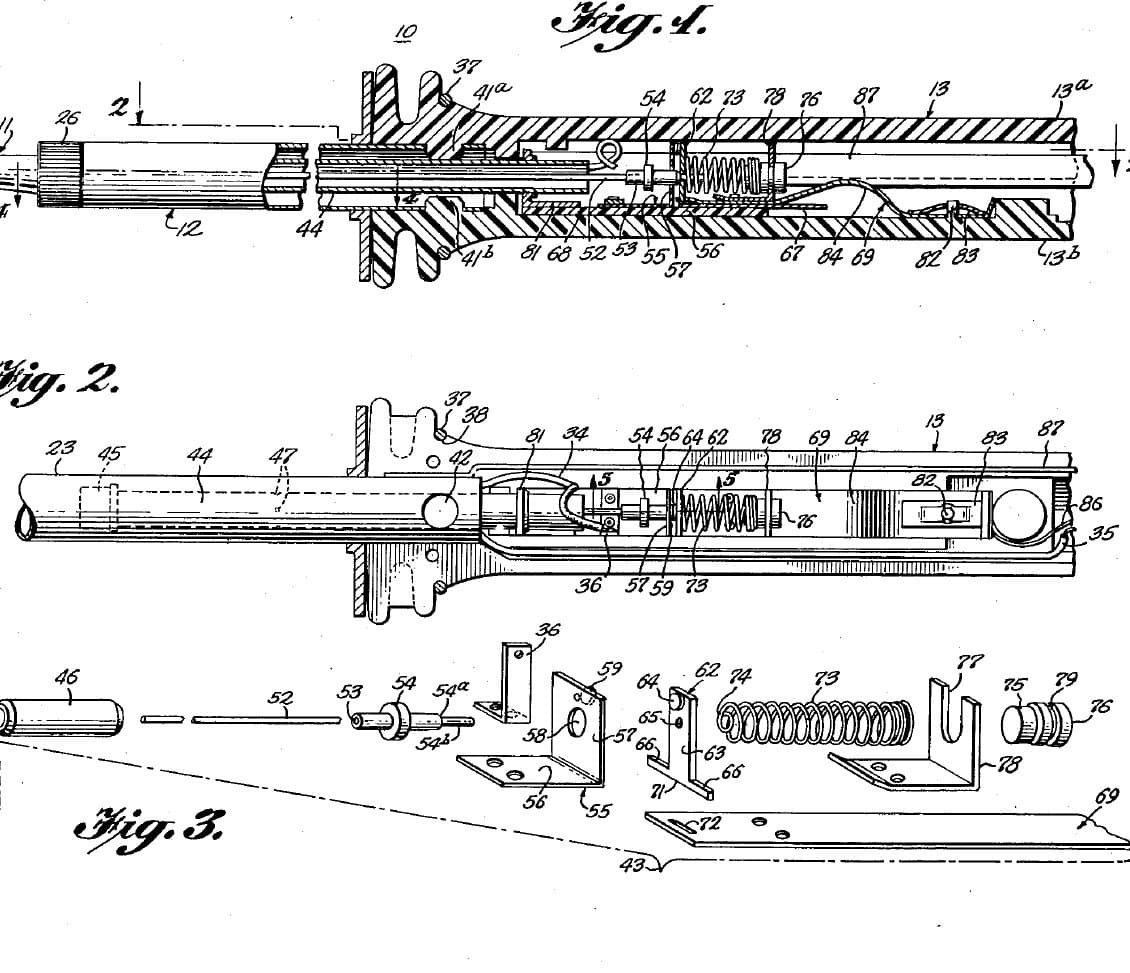
Digital Tachometer: Hand-Held Contact Type That Holds Its Reading (Sugiyama, Shimpo, US 4,000,465, 1976)
A hand-held digital tachometer. You press the contact head on its shaft against the end of a turning shaft and push the thumb button; a slotted disk inside chops a light beam into pulses, and the pulses counted in a fixed time, set by a quartz clock, appear in the window as the speed. A latch holds the reading after you take the tachometer away, so you can read it even where you could not see the window while measuring.
Result: a contact tachometer that shows revolutions per unit time and keeps the last reading.
Source: Y. Sugiyama (Shimpo Kogyo), US 4,000,465 (1976). Unknown: the number of holes, the clock, the gate time and the circuit details. Picture: the patent drawing.
Erfahren
Unknown
Anweisungen
1
1
Make the housing and measuring shaft
Make the housing and measuring shaft
Make a cylindrical housing to hold in one hand, with a window in its side for the reading and a push button for the power switch where the thumb falls. Run a measuring shaft out of the front end in bearings and fit a contact head on its tip to press against the shaft being measured. Not given: materials, sizes. Ours: aluminium tube, a ball bearing.
Materialien für diesen Schritt:
 Aluminiumrohr1 housing
 Unbekanntes Metall1 measuring shaft
 Kugellager1 Stück
 Unbekanntes Material1 contact head
Benötigte Werkzeuge:
 Metalldrehmaschine
 Handbohrer
 Unbekannte Maße
2
2
Make the pulse generator
Make the pulse generator
Fix a disk on the measuring shaft with a ring of small holes evenly spaced near its edge. Put a light source on one side of the disk and a photodetector on the other: each hole passing makes one pulse. Shape and amplify the pulses. Not given: the number of holes. Ours: an LED and a photodiode.
Materialien für diesen Schritt:
Unbekanntes Material1 slotted disk LED-Sortiment1 light source
 Fotodiode (BPW34)1 photodetector
 Widerstand1 Set
Benötigte Werkzeuge:
Handbohrer3
3
Build the counting circuit
Build the counting circuit
Divide a quartz oscillator's clock down to gate pulses one unit of time long. Pass the measurement pulses through an AND gate during each gate pulse into a counter. At the start of each gate pulse a reset pulse clears the counter. After the gate pulse ends, the first measurement pulse that arrives triggers a latch pulse that loads the new count into the display. If the head has been taken off the shaft, no pulse arrives, no latch pulse is made, and the display keeps the last reading until the next measurement or until the power is switched off. Not given: the clock frequency and gate time. Ours: logic ICs and a seven-segment display.
Materialien für diesen Schritt:
 Leiterplatte1 Stück
 Schwingquarz1 Stück
 Logik-IC-Sortiment1 divider, AND gate, counter, latch, reset
 Siebensegment-Anzeigetreiber1 Stück
 Vierstellige Siebensegmentanzeige1 Stück
 Lötdraht1 as needed
Benötigte Werkzeuge:
 Lötkolben
4
4
Power it and measure
Power it and measure
Fit the battery and the thumb button as the power switch. Press the contact head against the end of the turning shaft so it turns with it, push the button, and read the revolutions in the window, now or after you take the tachometer away.
Materialien für diesen Schritt:
 Batterie1 Stück
 Drucktaster1 Stück
Benötigte Werkzeuge:
LötkolbenMaterialien
15- 1 housingPlatzhalter
- 1 measuring shaftPlatzhalter
- Platzhalter
- 1 slotted diskPlatzhalter
- 1 light sourcePlatzhalter
- 1 photodetectorPlatzhalter
- 1 SetPlatzhalter
- 1 StückPlatzhalter
- 1 StückPlatzhalter
- 1 divider, AND gate, counter, latch, resetPlatzhalter
- 1 StückPlatzhalter
- Platzhalter
- 1 as neededPlatzhalter
- 1 StückPlatzhalter
- Platzhalter
Materialien verbundener Blueprints
Dieser Bauplan stellt her

CC0 Gemeinfrei
Dieser Blueprint ist unter CC0 veröffentlicht. Sie dürfen dieses Werk für jeden Zweck frei kopieren, ändern, verbreiten und verwenden, ohne um Erlaubnis zu fragen.
Unterstützen Sie den Maker, indem Sie Produkte über seinen Blueprint kaufen, wo er eine Maker-Provision von Anbietern festgelegt, verdient. Oder erstellen Sie eine neue Iteration dieses Blueprints und verbinden Sie ihn in Ihrem eigenen Blueprint, um Einnahmen zu teilen.