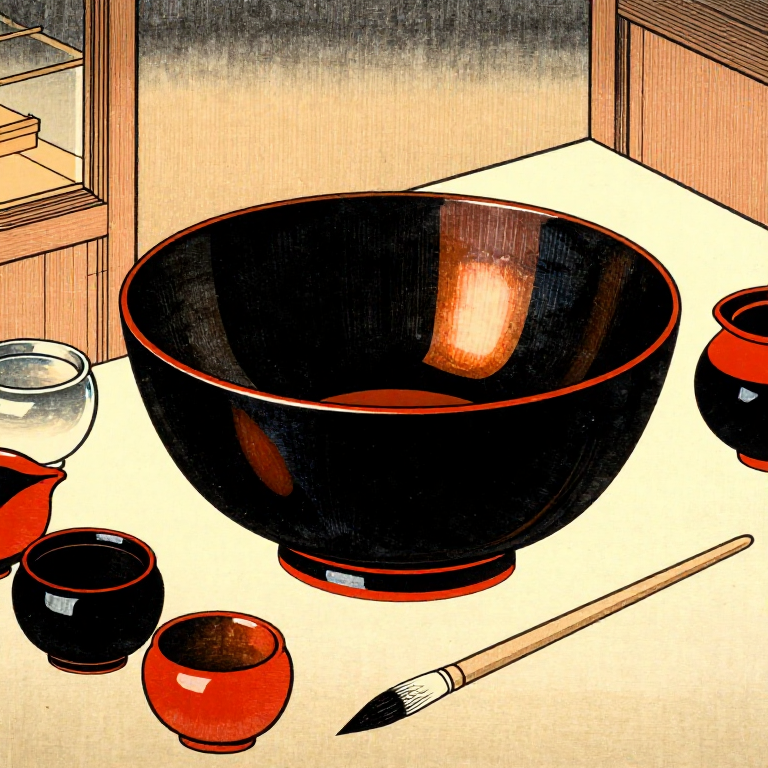
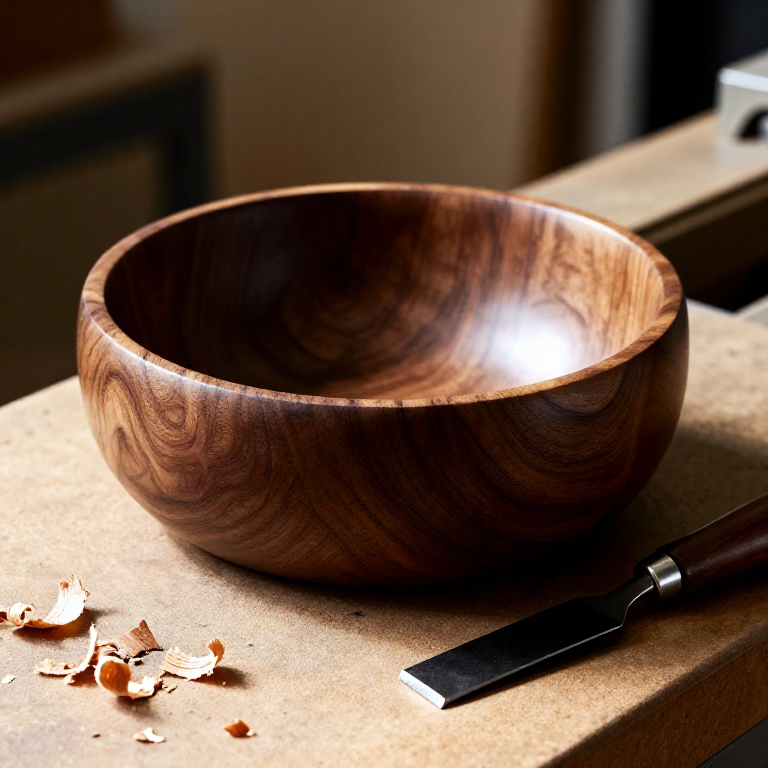
Applying Urushi Lacquer to a Wooden Bowl — Japanese Lacquerwork
Anweisungen
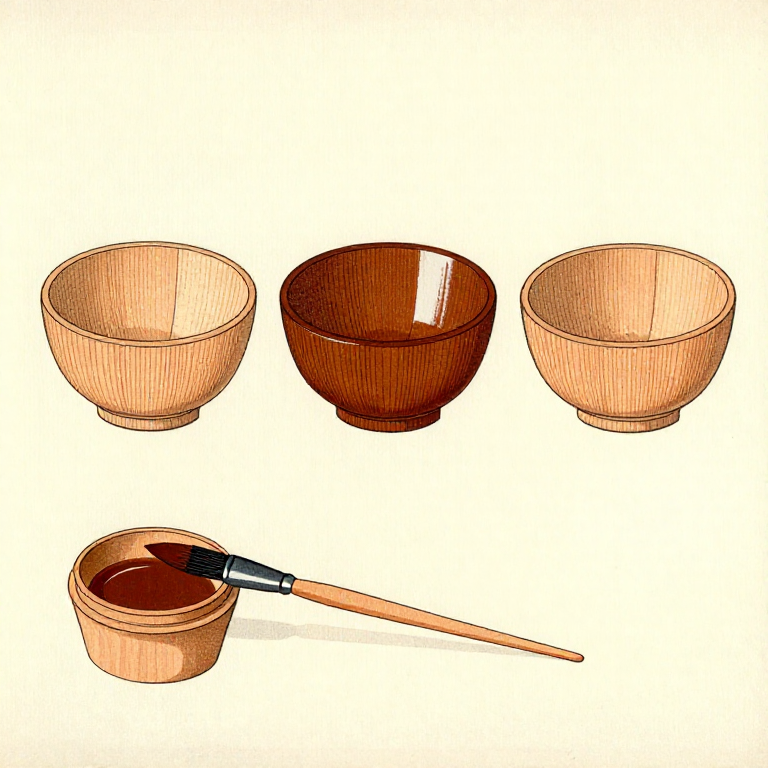
Seal and Prime the Raw Wood
Seal and Prime the Raw Wood
Sand the wooden bowl to 220 grit and remove all dust. Thin raw urushi lacquer (ki-urushi) with a small amount of camphor oil or turpentine to reduce viscosity, and brush a thin coat over the entire surface. This first coat (kiji-gatame) soaks into the wood pores, sealing them and providing a bond for subsequent layers. Wear nitrile gloves — urushi contains urushiol and causes severe contact dermatitis in most people. Place the coated bowl in a humidity cabinet (furo) at 70-80% relative humidity and 20-25 degrees C. Unlike conventional finishes, urushi cures by absorbing moisture from the air through an enzyme-catalyzed polymerization reaction. Curing takes 24-48 hours per coat.
Materialien für diesen Schritt:
Benötigte Werkzeuge:
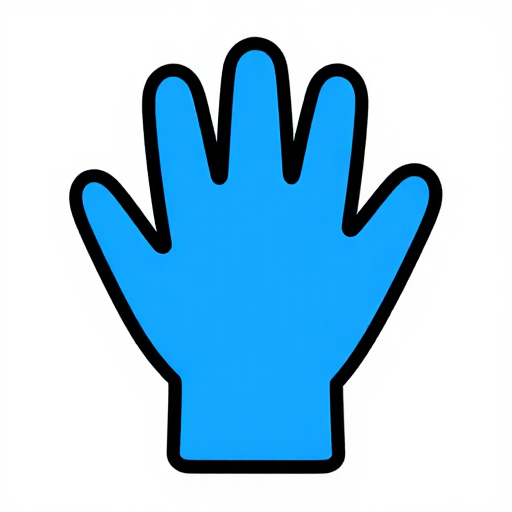 Nitrile Gloves
Apply Foundation Layers
Apply Foundation Layers
After the primer has cured, sand lightly with 400-grit wet sandpaper and wipe clean. Mix raw urushi with tonoko powder to create a thick paste (sabi). Apply this paste to the entire surface using a spatula, filling any pores, grain, or imperfections. Cure in the furo. Sand smooth when cured. Apply 2-3 coats of sabi, sanding between each, until the surface is perfectly uniform with no visible wood grain. On areas prone to chipping (the rim and foot), reinforce with strips of thin washi paper embedded in urushi before applying sabi. These foundation layers create a smooth, dimensionally stable base that prevents the finished surface from telegraphing wood grain movement.
Apply Middle Coats (Naka-nuri)
Apply Middle Coats (Naka-nuri)
Apply 2-4 coats of filtered black urushi (naka-nuri urushi), each coat extremely thin — barely more than a film. Thick coats wrinkle during curing because the outer surface polymerizes before the interior, trapping uncured lacquer beneath. After each coat, place in the furo and cure for 48 hours. Sand each cured coat with progressively finer wet sandpaper (600, then 800 grit). The surface should feel glass-smooth after sanding, with no visible brush marks or orange peel texture. Wipe with a damp cloth between sanding and the next coat to remove all sanding residue. These middle coats build the colour depth and create a substrate for the final finishing coats.
Apply Final Coats (Uwanuri)
Apply Final Coats (Uwanuri)
The final coat (uwanuri) uses the highest-quality refined urushi (roiro-urushi for glossy black). Filter the urushi through fine-weave silk or paper to remove any particles or skin. Apply with a clean, dust-free hake brush in a dust-free environment — a single speck of dust trapped in the final coat is visible forever. Brush in one direction with even, overlapping strokes. The coat must be thin and uniform. Place in the furo and cure for 72 hours minimum. The uwanuri coat can be left as-is for a semi-gloss finish, or polished to a mirror finish in the next step. For red lacquer (shu-urushi), vermilion pigment (mercuric sulfide) is ground into the urushi before application.
Polish to Mirror Finish (Roiro)
Polish to Mirror Finish (Roiro)
For the highest gloss (roiro finish), wet-sand the cured final coat with 1200-grit then 2000-grit wet sandpaper until the surface is uniformly matte. Then polish progressively using tonoko powder mixed with water on a soft cloth, followed by deer-horn charcoal powder (tsunoko) on silk, and finally raw urushi rubbed by hand on silk (suri-urushi). Each polishing stage produces a finer surface finish. The final hand-rubbed urushi polish produces a depth and luminosity that synthetic lacquers cannot replicate — light appears to penetrate into the surface rather than reflecting off it. A properly finished urushi surface is waterproof, resistant to temperatures up to 80 degrees C, naturally antimicrobial, and will last for centuries with proper care.
Materialien
5- 50-100ml StückPlatzhalter
- 30-50ml StückPlatzhalter
- 50g StückPlatzhalter
- Washi Paper Sheets1-2 sheets Stück
- 1 StückPlatzhalter
Benötigte Werkzeuge
5- Urushi Brush (Flat Hake)
- Platzhalter
- Platzhalter
- Platzhalter
Required Equipment
Equipment this kind of build typically needs — buy from any maker below.
- CriticalHand Saw·
 Portable Band Saw
 Track-Mounted Chain Saw Quarry Cutter
 Band Saw (9-inch, Benchtop)
 Miter Box with Saw
 Small Hand Saw
 Jeweler's Saw
 - CriticalNitrile Lab Gloves·
 Boxing Gloves (Training)
 Leather Gauntlet Gloves
 Cotton Gloves
 Welding Gloves
 Heavy-Duty Gloves
 Leather Work Gloves
 - CriticalChemical Splash Goggles·
 Splash-Proof Safety Goggles
 Chemical Splash Goggles
 Safety Goggles
 Welding Goggles
 Laser Safety Goggles Set
 Anti-Fog Safety Goggles
 - CriticalTape Measure·
 Barrier Tape
 Bias Tape
 Finish Line Tape Dispenser
 Measuring Tape 3m
 Plumber's Tape (PTFE)
 Measuring Tape (30m)
 - RecommendedBeaker·
 Borosilicate Beaker
 Heat-Resistant Glass Beaker (1 liter)
 Glass Beaker (Borosilicate, 500ml)
 Volumetric Beaker
 Borosilicate Glass Beaker
 Beaker Set
 - RecommendedChisel·
 Thin Flat Chisel (10mm)
 Cold Chisel (flat, 25mm)
 Copper Chisel
 Cold Chisel (pointed)
 Chisel Set (Wood)
 Steel Chisel
 - RecommendedClamps·
 Injection Mold Clamp Kit
 Parallel Clamp
 Wheel Loader with Marble Clamp
 C-Clamp
 Utility Clamp (Burette/Flask)
 Toggle Clamp Set (4 Types)
 - RecommendedDust Mask / Respirator·
 Full-Face Gas Mask (ABEK multi-gas cartridge)
 Dust Mask
 Venetian Mask Blank (Papier-Mache)
 Full-Face Respirator
 Respirator Fit Test Kit
 Respirator with Acid Gas Cartridge
 - RecommendedGraduated Cylinder·
 Graduated Cylinder (100 ml)
 Cast Iron Cylinder
 Graduated Mixing Cups (50-Pack)
 Measuring Cylinder
 Hydraulic Cylinder
 Graduated Cylinder (10ml)
 - RecommendedSafety Glasses·
 Safety Sign (Caution/Warning)Splash-Proof Safety Goggles
 Reflective Safety Vest Kit (DIY)Chemical Splash Goggles
 Safety Netting for Rockfall
 Steel-Toed Safety Boots
 - RecommendedSandpaper·
 Sandpaper (120 Grit)
 Sandpaper (1000 Grit)
 Sandpaper (80 Grit)
 Wet/Dry Sandpaper Pack (400-3000 Grit)
 Sandpaper 220 Grit (Fine)
 Sandpaper (320 Grit)
 - RecommendedPrecision Scale·
 Iron Scale
 Livestock Scale
 Architectural Model Kit (Scale 1:100)
 Weighing Scale
 Precision Scale
 Platform Weighing Scale
 - RecommendedWork Gloves·Boxing Gloves (Training)Leather Gauntlet GlovesCotton GlovesWelding GlovesHeavy-Duty GlovesLeather Work Gloves
- OptionalFire Extinguisher·
 ABC Fire Extinguisher
 Fire Extinguisher
 - OptionalFirst Aid Kit·
 First Aid Kit
 Mountain First Aid Kit (Altitude)
 Workshop First Aid Kit
 Bow Release Aid
You can swap these in
Can't get one of the materials? Swap it for an equivalent — these work just as well.
- Instead of Sandpaper (1000 Grit), try: Sandpaper (120 Grit)Sandpaper (80 Grit)Wet/Dry Sandpaper Pack (400-3000 Grit)Sandpaper (320 Grit)
- Instead of Lacquer Curing Box (Urushi Buro), try:
 Storage Box
 Light Box (for visual grading)
 Sports Achievement Shadow Box
 - Instead of Maple Bowl Blank, try: Venetian Mask Blank (Papier-Mache)
 Hard Maple Turning Blank
 Stabilized Burl Wood Blank
 - Instead of Nitrile Gloves, try: Boxing Gloves (Training)Leather Gauntlet Gloves
Recommended for this build
Products makers often use with builds like this one.
Sandpaper (120 Grit)Used together and in similar builds Geological HammerFrequently used with this build's materials
 Hand Lens (10x)Frequently used with this build's materials
 Glass Sample Vial (50ml)Frequently used with this build's materials
 BellowsFrequently used with this build's materials
 Charcoal Furnace (small)Frequently used with this build's materialsLeather Gauntlet GlovesFrequently used with this build's materialsSafety GogglesFrequently used with this build's materials
Related blueprints
Other builds that share materials, tools, or techniques with this one.
CC0 Gemeinfrei
Dieser Blueprint ist unter CC0 veröffentlicht. Sie dürfen dieses Werk für jeden Zweck frei kopieren, ändern, verbreiten und verwenden, ohne um Erlaubnis zu fragen.
Unterstützen Sie den Maker, indem Sie Produkte über seinen Blueprint kaufen, wo er eine Maker-Provision von Anbietern festgelegt, verdient. Oder erstellen Sie eine neue Iteration dieses Blueprints und verbinden Sie ihn in Ihrem eigenen Blueprint, um Einnahmen zu teilen.