Zusammenarbeit
KUNST
SCHÖNHEIT & WELLNESS
HANDWERK
KULTUR & GESCHICHTE
UNTERHALTUNG
UMFELD
ESSEN & GETRÄNKE
REVERSE ENGINEERING
WISSENSCHAFTEN
SPORT
TECHNOLOGIE
WEARABLES
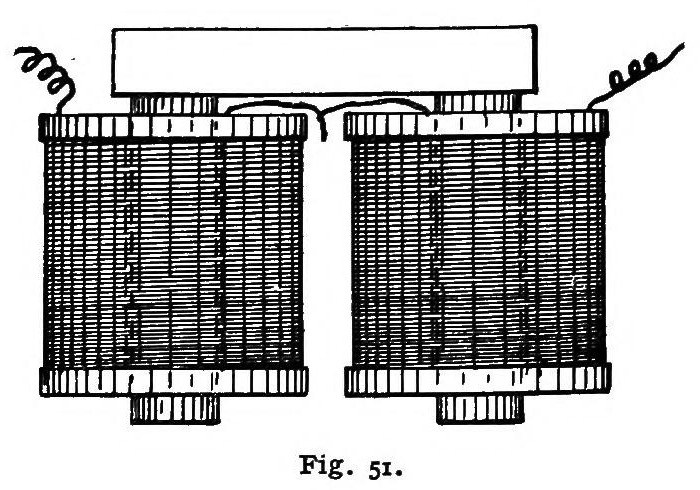


Electromagnet: Horseshoe Holding Magnet Sized by Its Pull (Underhill, 1903)
A holding electromagnet in its practical horseshoe form: two iron cores, each wound with wire, fastened to an iron yoke, and an iron armature across the poles. You size it from the pull you need: the pull sets the pole area, and the supply voltage sets the wire.
Variable: the pull. Each pound needs a set area of pole, depending on the iron.
Source: C. R. Underhill, The Electromagnet (1903), pp. 92, 106-118, 150. Unknown: sizes and the ampere-turns. Picture: Fig. 51 of the book.
Fortgeschritten
Unknown
Anweisungen
1
1
Size the poles from the pull
Size the poles from the pull
Pull P (pounds) = B² × A / 72,134,000, where B is the flux density in lines per square inch and A the pole area in square inches. Working densities: wrought iron 90,000, cast steel 85,000, Mitis iron 80,000, ordinary cast iron 50,000, which give 112.3, 100.1, 88.72 and 34.66 lb per square inch of pole. Divide the pull you need by that figure to get the pole area. Underhill's example, for cast steel taken at 90,000: 10 lb needs 0.089 square inch, a core 0.336 inch across. A two-pole magnet holds twice the weight of a single pole at the same induction.
Benötigte Werkzeuge:
 Unbekannte Maße
2
2
Make the cores, yoke and armature
Make the cores, yoke and armature
Make the practical horseshoe magnet in three pieces besides the armature: two round cores and a yoke (back iron) to join them. Make an armature to lie across the two pole ends. Face the poles and the armature accurately; an uneven contact spreads the lines unevenly and weakens the pull. Ours: wrought iron. Not given: sizes, how the cores are fastened.
Materialien für diesen Schritt:
 Schmiedeeisenstange1 two cores, yoke, armature
Benötigte Werkzeuge:
 MetalldrehmaschineUnbekannte Maße
3
3
Choose the wire for the supply
Choose the wire for the supply
Design the coil to stand the full supply voltage without overheating; never put a resistor in series with the magnet, as that wastes power and makes the magnet weaker. Pick the wire size that makes the coil's resistance equal to that of the line and the source, then try the next larger size, and keep the one giving more ampere-turns. A coil rises about 100 °F at about 0.9 watt per square inch of surface for a thin telephone-ringer coil, or 0.33 for a thick one (4 1/8 in across, 7 in long, 1 7/16 in thick), and the rise grows in proportion to the watts. Ours: the supply, e.g. 12 V.
Benötigte Werkzeuge:
 GleichstromnetzgerätUnbekannte Maße
4
4
Wind the cores and fasten them to the yoke
Wind the cores and fasten them to the yoke
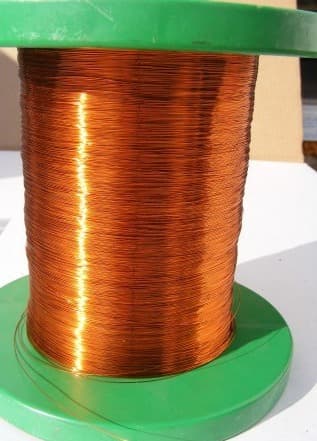
Wind the wire directly onto each core between insulating end heads, and fasten the wound cores to the yoke. The joints between cores and yoke lose a little pull. Ours: enamelled copper wire. Not given: the winding method, the insulation.
Materialien für diesen Schritt:
 Lackierter Kupferdraht1 two coils
 Unbekannter Isolierstoff1 end heads and core insulation
 Unbekanntes Metall1 core fastenings
Benötigte Werkzeuge:
 Unbekanntes WickelverfahrenMetalldrehmaschine
5
5
Switch on and hold
Switch on and hold
Connect the coils to the supply and put the armature against the faced poles: the magnet holds it with the pull it was sized for. When the armature touches the poles there is practically no leakage between them.
Benötigte Werkzeuge:
GleichstromnetzgerätMaterialien
4- 1 two cores, yoke, armaturePlatzhalter
- 1 two coilsPlatzhalter
- 1 end heads and core insulationPlatzhalter
- 1 core fasteningsPlatzhalter
Benötigte Werkzeuge
4- Platzhalter
- Platzhalter
- Platzhalter
- Platzhalter
Materialien verbundener Blueprints


Dieser Bauplan stellt her

CC0 Gemeinfrei
Dieser Blueprint ist unter CC0 veröffentlicht. Sie dürfen dieses Werk für jeden Zweck frei kopieren, ändern, verbreiten und verwenden, ohne um Erlaubnis zu fragen.
Unterstützen Sie den Maker, indem Sie Produkte über seinen Blueprint kaufen, wo er eine Maker-Provision von Anbietern festgelegt, verdient. Oder erstellen Sie eine neue Iteration dieses Blueprints und verbinden Sie ihn in Ihrem eigenen Blueprint, um Einnahmen zu teilen.