
Foucault Knife-Edge Test
A telescope mirror has to be accurate to a fraction of a wavelength of light. You cannot see an error that small, you cannot feel it, and no ruler will find it. Before 1858 mirror makers checked their work by pointing the finished telescope at a star and deciding whether the image looked right — which tells you something is wrong but never where.
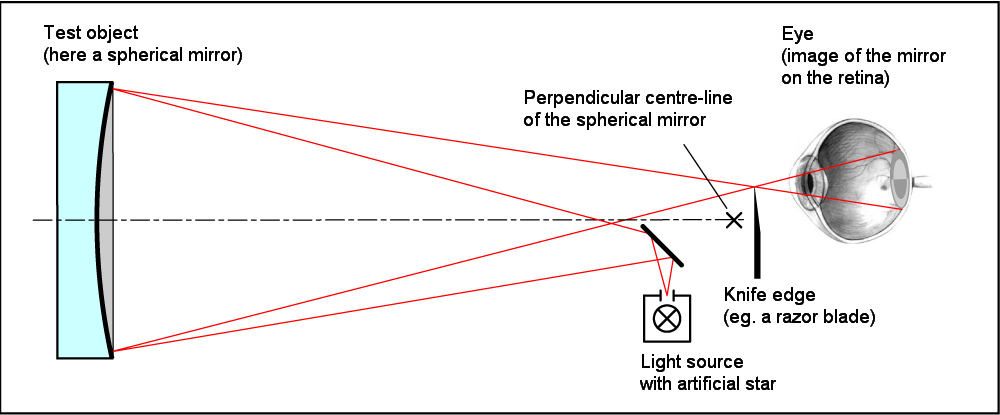
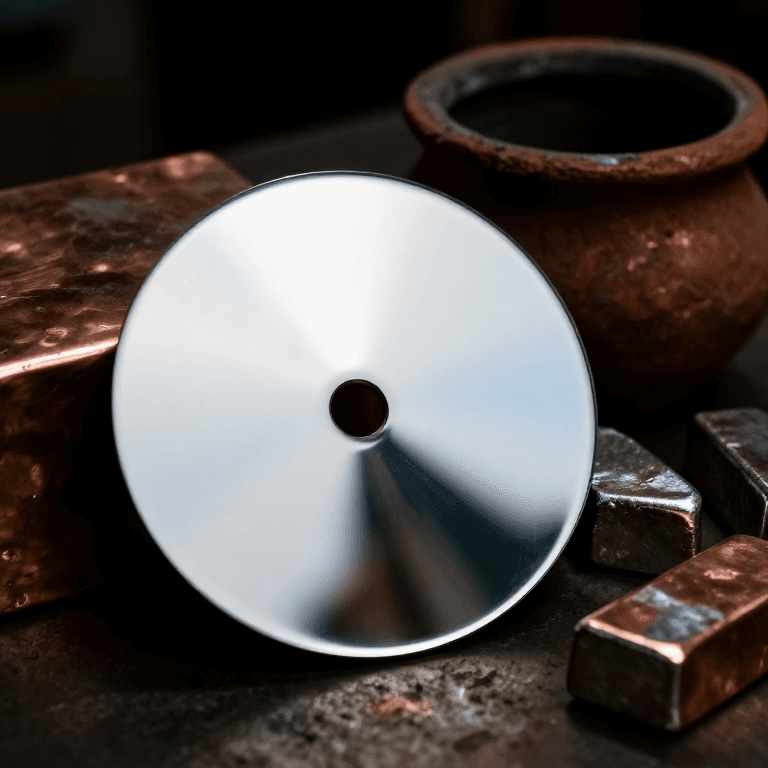
Léon Foucault's answer was to put a point of light at the mirror's centre of curvature, let the mirror throw the light back to a focus, and then slide a razor blade into that focus while watching the mirror face. The shadow that sweeps across the disc is a contour map of the surface, magnified until errors of a few tens of nanometres become plainly visible shading.
It is the most sensitive measurement most people can make with household objects, and it is still how amateur mirror makers figure a paraboloid.
Anweisungen
Handle the blade and the mirror edge with care
Handle the blade and the mirror edge with care
A razor blade is the knife edge. Mount it before you start working in the dark, and tape over the half you are not using. A ground mirror blank has sharp edges until they are bevelled.
Find the mirror's radius of curvature
Find the mirror's radius of curvature
The test happens at the centre of curvature, not the focus. R = 2f. A 150 mm f/8 mirror has a focal length of 1200 mm, so you need about 2400 mm of clear space between mirror and tester.
Benötigte Werkzeuge:
 Lineal
Stand the mirror on edge, facing down the range
Stand the mirror on edge, facing down the range
Support it vertically on two points at roughly the lower edge, with a strap or rest holding it back. Do not clamp it — squeezing a mirror bends it, and you will measure the clamp instead of the glass.
Make a point light source
Make a point light source
Put a pinhole of about 0.2 mm, or a narrow slit, in front of a bright white LED. The source must be genuinely small — its size sets the resolution of the whole test.
Materialien für diesen Schritt:
 LED-Sortiment1 Packung
Mount the knife edge beside the source
Mount the knife edge beside the source
Fix the razor blade so its edge is vertical, in the same plane as the pinhole and a few millimetres to one side of it. Source and blade must travel together along the optical axis.
Materialien für diesen Schritt:
 Rasierklinge1 Stück
Put both on a stage that slides along the axis
Put both on a stage that slides along the axis
Build a small carriage that moves smoothly toward and away from the mirror, with a screw and a scale reading to 0.1 mm. This longitudinal reading is the number the whole test produces.
Materialien für diesen Schritt:
 Gewindestange1 Stück
Darken the room completely
Darken the room completely
Any stray light destroys the contrast. Work at night with the lights off, and let your eyes adapt for several minutes before judging anything.
Find the returned image of the pinhole
Find the returned image of the pinhole
Slide the stage until the light coming back from the mirror converges to its smallest, brightest point beside the blade. You are now at the centre of curvature.
Cut into the returning cone with the blade
Cut into the returning cone with the blade
Move the knife edge sideways into the light while looking past it at the mirror face. Do not look at the blade — look at the illuminated disc of the mirror. That disc is the display.
Read what the shadow does
Read what the shadow does
Inside the centre of curvature the shadow enters from the same side as the blade; outside it, from the opposite side. At the exact centre it does neither — the whole disc dims together. Learning these three appearances is learning the test.
Test a sphere first
Test a sphere first
A truly spherical mirror goes uniformly, flatly grey all at once, with no structure. This is the null, and it is unmistakable once seen. Every departure from flat grey is a departure from sphere.
Mask the mirror into zones
Mask the mirror into zones
Cut a card mask with paired holes at matching radii — centre, mid, edge. This is the Couder mask. It lets you compare two symmetric patches at a time instead of judging the whole surface at once.
Materialien für diesen Schritt:
 Karton1 Packung
Benötigte Werkzeuge:
 Bastelmesser
Null each zone pair and record the reading
Null each zone pair and record the reading
For each zone, move the stage until both holes of the pair darken simultaneously, then write down the scale reading. Work from centre outward and repeat each zone at least three times.
Compare against the paraboloid the mirror should be
Compare against the paraboloid the mirror should be
For a paraboloid tested at the centre of curvature, the zone at height h from the axis should null at a longitudinal distance h² ÷ R further out than the centre. Tabulate required against measured for every zone; the differences are your figuring errors.
Polish the high zones and retest
Polish the high zones and retest
Work only where the readings say to, then clean the mirror and test again. Figuring is a loop of small corrections and repeated measurement — never one long polishing session followed by a hopeful look.
History & Context — seeing a nanometre with a razor blade
History & Context — seeing a nanometre with a razor blade
Foucault published this in 1859, in his memoir on the construction of silvered-glass telescopes, and it changed who was allowed to make a telescope. Before it, figuring a mirror was a guild skill passed by apprenticeship and judged by the finished star image. After it, the surface could be measured directly, zone by zone, by anyone with a dark room. The silvered-glass mirror itself — Foucault's other contribution, replacing brittle speculum metal — and this test together put large reflectors within reach of amateurs, where they have remained ever since.
Why it is so sensitive. Two amplifications stack. First, a bump of height x on the surface displaces the reflected wavefront by 2x, because the light travels the error twice. Second, the test converts a longitudinal displacement of the focus into a lateral sweep of a visible shadow across a disc many centimetres wide — an enormous lever arm. The eye is very good at spotting an asymmetric grey gradient, and that is all the skill the test asks of it. Surface defects far smaller than the wavelength of the light being used show up as plain shading.
The counter-intuitive part. A parabolic mirror — the shape you actually want — does not null at the centre of curvature. Only a sphere does. Tested this way a good paraboloid looks wrong: it shows the classic doughnut, like a sphere lit from one side. Beginners routinely polish that away and end up with a beautifully spherical, optically useless mirror. The doughnut is the target, not the fault.
What it cannot tell you. The knife-edge test measures rotationally symmetric zones extremely well and astigmatism poorly — a mirror that is slightly cylindrical can pass zone testing and still perform badly. That is why serious workers rotate the mirror between tests and cross-check with a star test on a real night sky. Foucault's method is a superb tool with a known blind spot, and pretending otherwise produces confident measurements of the wrong thing.
Materialien
4- 1 PackungPlatzhalter
- 1 StückPlatzhalter
- 1 StückPlatzhalter
- 1 PackungPlatzhalter
Materialien verbundener Blueprints
Verwandte Blueprints
Diese Blueprints teilen Wissen — Techniken, Materialien oder Prinzipien

CC0 Gemeinfrei
Dieser Blueprint ist unter CC0 veröffentlicht. Sie dürfen dieses Werk für jeden Zweck frei kopieren, ändern, verbreiten und verwenden, ohne um Erlaubnis zu fragen.
Unterstützen Sie den Maker, indem Sie Produkte über seinen Blueprint kaufen, wo er eine Maker-Provision von Anbietern festgelegt, verdient. Oder erstellen Sie eine neue Iteration dieses Blueprints und verbinden Sie ihn in Ihrem eigenen Blueprint, um Einnahmen zu teilen.