KUNST
SCHÖNHEIT & WELLNESS
HANDWERK
KULTUR & GESCHICHTE
UNTERHALTUNG
UMFELD
ESSEN & GETRÄNKE
REVERSE ENGINEERING
WISSENSCHAFTEN
SPORT
TECHNOLOGIE
WEARABLES
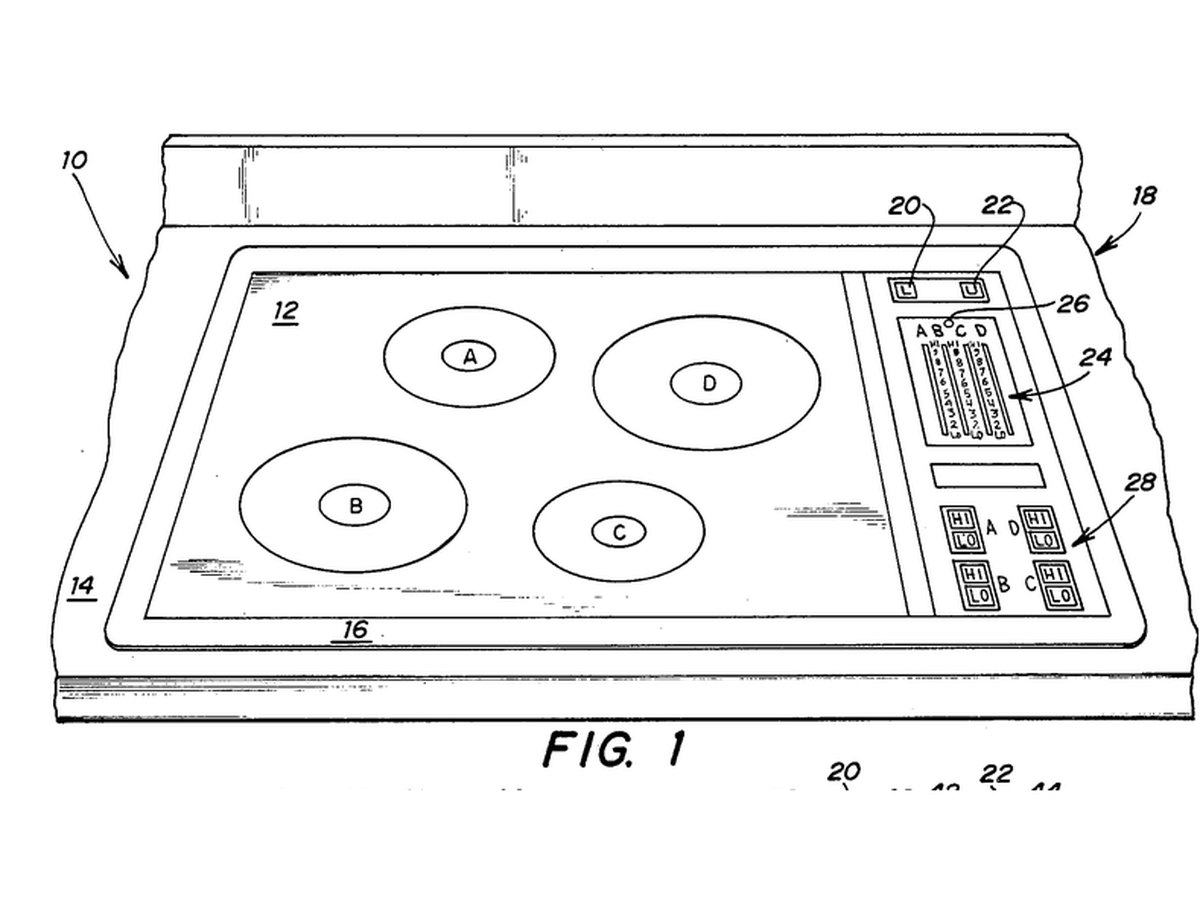


Induction Hob
The induction coil already published makes a changing magnetic field, and the induction motor uses one to drive currents in a rotor. The cooking rung uses the same trick to heat the pan itself: no element, no flame, and a cold top - the pan is the only thing that gets hot.
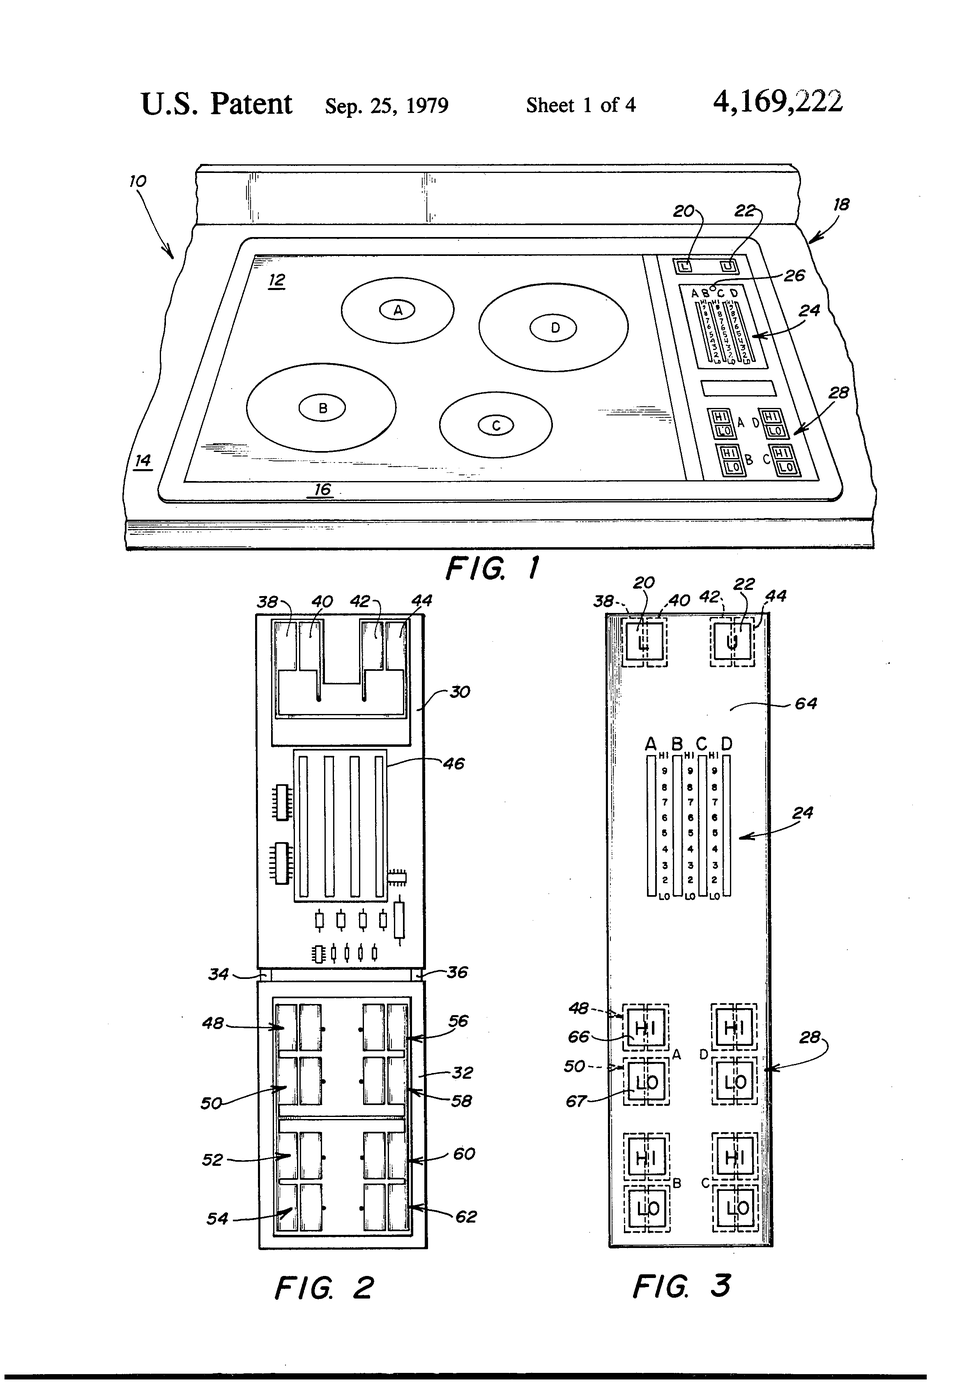
**US 4,169,222**, "Induction cook-top system and control", Raymond M. Tucker, assigned to Rangaire, filed 26. July 1977, granted 25. September 1979: mains rectified to DC, switched into induction heating coils under a non-metallic top, with the power set by the switching.
**A mains hob is never opened or built here.** You build a LOW-VOLTAGE induction heater from a 12–24 V module and measure which metals it can heat - which is exactly why some pans work on a hob and others do nothing.
Fortgeschritten
3 hours
Anweisungen
1
1
Wind a work coil
Wind a work coil
Wind 6 turns of 10 AWG bare copper wire round a 60 mm former into a flat spiral, leaving 80 mm tails. Keep the turns evenly spaced and not touching.
Materialien für diesen Schritt:
 Kupferdraht1 Meter
Benötigte Werkzeuge:
 Zangensatz
 Lineal
2
2
Power it safely
Power it safely
Bolt the coil to the ZVS module's terminals. Set the bench supply to 12 V with a 5 A limit; the module draws several amps and its transistors get hot. Never run it with no metal near the coil for more than a few seconds, and keep the supply under 24 V.
Materialien für diesen Schritt:
 ZVS-Induktionsheizmodul1 Stück
Benötigte Werkzeuge:
 Regelbares Labornetzteil
 Klare Schutzbrille
3
3
Cut six discs
Cut six discs
Cut 40 mm discs from mild steel, stainless (both a magnetic and a non-magnetic grade if you have them), aluminium and copper, all the same thickness. Deburr the edges. Try a magnet on each and note which hold it.
Materialien für diesen Schritt:
 Baustahlblech1 Stück
 Edelstahlblech1 Stück
 Aluminiumblech1 Stück
 Kupferblech1 Stück
Benötigte Werkzeuge:
 Blechschere
 Metallfeile
 Neodym-Magnetsatz
4
4
Sixty seconds each
Sixty seconds each
Rest each disc on a ceramic tile 5 mm above the coil, note its starting temperature, run for 60 seconds at the same supply setting, and read it again. Lift hot discs with pliers and gloves; let the module cool between runs.
Benötigte Werkzeuge:
 Infrarot-Thermometer
 Stoppuhr
 SchweißerhandschuheZangensatz
5
5
The same test on a real hob
The same test on a real hob
If a commercial induction hob is to hand, put a cast-iron skillet on it, then an aluminium saucepan, and see which one it will even acknowledge. Then hold a magnet to each base.
Benötigte Werkzeuge:
 Gusseiserne Pfanne
 StielkasserolleNeodym-Magnetsatz
6
6
Skin depth and your results
Skin depth and your results
Jupyter-Notebook wird geladen …
7
7
History & Context
History & Context
**What the patent specifies:** a cook-top with rectifier, gated semiconductor switches and induction heating coils beneath a non-metallic top, with the heat set by how the coils are switched. **Modern build (derived):** a low-voltage ZVS heater and metal discs.
Induction reached kitchens slowly because the electronics were dear; efficiency into the pan is high and the top stays cool enough not to burn spills on. Its limits: the pan must be magnetic (so much old aluminium and copper cookware is useless), the electronics whine, and a pan smaller than the coil couples poorly.
Materialien
6- 1 MeterPlatzhalter
- 1 StückPlatzhalter
- 1 StückPlatzhalter
- 1 StückPlatzhalter
- 1 StückPlatzhalter
- 1 StückPlatzhalter
Benötigte Werkzeuge
12- Platzhalter
- Platzhalter
- Platzhalter
- Platzhalter
- Platzhalter
- Platzhalter
- Platzhalter
- Platzhalter
- Platzhalter
- Platzhalter
- Platzhalter
- Platzhalter
Verwandte Blueprints
Diese Blueprints teilen Wissen — Techniken, Materialien oder Prinzipien

CC0 Gemeinfrei
Dieser Blueprint ist unter CC0 veröffentlicht. Sie dürfen dieses Werk für jeden Zweck frei kopieren, ändern, verbreiten und verwenden, ohne um Erlaubnis zu fragen.
Unterstützen Sie den Maker, indem Sie Produkte über seinen Blueprint kaufen, wo er eine Maker-Provision von Anbietern festgelegt, verdient. Oder erstellen Sie eine neue Iteration dieses Blueprints und verbinden Sie ihn in Ihrem eigenen Blueprint, um Einnahmen zu teilen.