KUNST
SCHÖNHEIT & WELLNESS
HANDWERK
KULTUR & GESCHICHTE
UNTERHALTUNG
UMFELD
ESSEN & GETRÄNKE
REVERSE ENGINEERING
WISSENSCHAFTEN
SPORT
TECHNOLOGIE
WEARABLES
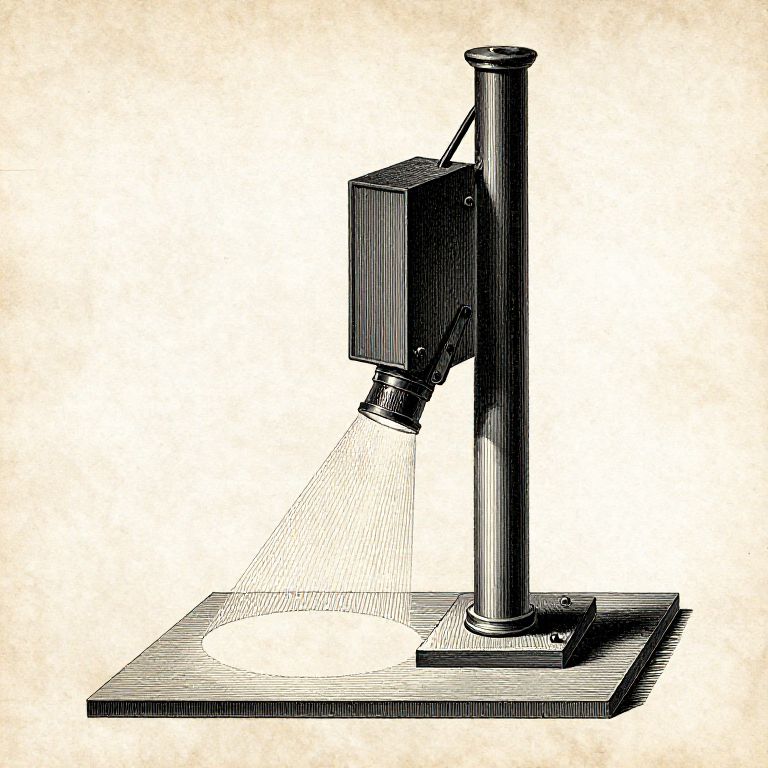


Making a Print: The Test Strip Is Not Optional
Printing is a second exposure, made under an enlarger onto paper, with two controls the camera never had: **time**, which can be judged by looking at the result, and **contrast**, which can be changed after the fact.
It is also the only part of photography that can be done entirely by trial, because paper is cheap and the result is visible in two minutes. Which is why guessing at it is such a waste: a test strip costs one sheet cut into five and removes the guessing completely.
This rung is the test strip, the contrast grade, and the two hand controls — dodging and burning — that turn a correct print into a good one.
Fortgeschritten
5 hours
Anweisungen
1
1
Setting up, and the safelight
Setting up, and the safelight
**Black and white printing paper is not sensitive to red and amber light**, which is why the darkroom can be worked in. Film is; paper is not. That one difference is what makes printing a pleasant craft and film developing a matter of feeling about in the dark.
**Test the safelight before trusting it.** Lay a sheet of paper out with a coin on it, leave it under the safelight for five minutes — longer than any print will be out — then develop it. If the coin's shape appears, the safelight is too bright, too close, or the wrong filter.
**Three trays and one direction.** Developer, stop, fix, left to right, with their own tongs each. Fixer carried back into the developer on a pair of tongs contaminates it, and the marks it leaves are unmistakable.
**Focus with the lens wide open**, using a focus finder on the grain of the negative — not on the image, on the grain, which is the only thing guaranteed to be in the film plane. Then stop down two or three stops to print.
**Clean the negative.** Dust on a negative prints as a white speck on the paper and has to be spotted out by hand afterwards. A blower is thirty seconds; spotting is an hour.
Materialien für diesen Schritt:
 Fotopapier (Multigrade)1 Stück
 Fotografischer Film1 Stück
Benötigte Werkzeuge:
 Dunkelkammer-Vergrößerer (Mittelformat)
 Dunkelkammerleuchte (Amber, LED)
 Satz Dunkelkammerzangen
 Einschlaglupe
2
2
The test strip
The test strip
A test strip is one sheet of paper exposed in bands at increasing times, so the right exposure can be read off rather than guessed.
**Cut a sheet into strips** and lay one across the most important part of the image — not a corner, and not the sky.
**Expose in steps**, covering progressively more with a card: 2, 4, 8, 16, 32 seconds gives a wide range in stops, and 5, 10, 15, 20, 25 gives a fine range when the answer is roughly known. Steps in **stops** are the right way to search when nothing is known, because the eye judges ratios.
**Develop it fully.** The single commonest beginner's error is pulling a print early because it looks right: a print that reaches the right density before its full development time is a print that will be mottled and flat. Develop for the full time — normally a minute or two — and change the EXPOSURE to change the density.
**Judge it in white light**, dry if possible. A wet print under a safelight looks lighter than it is — **dry-down** darkens a print by a noticeable amount as it dries, so a print that looks perfect when wet is usually a touch dark when finished.
Then make a full print at the chosen time, and judge THAT before adjusting.
Materialien für diesen Schritt:
Fotopapier (Multigrade)2 StückBenötigte Werkzeuge:
Dunkelkammer-Vergrößerer (Mittelformat)Satz DunkelkammerzangenDunkelkammerleuchte (Amber, LED) Fotochemie-Set (S/W-Entwickler, Stopp, Fixierer)
3
3
Contrast grade: the control the camera does not have
Contrast grade: the control the camera does not have
Paper comes in **contrast grades**, from about 0 (very soft) to 5 (very hard). Grade 2 or 3 is normal. The grade decides how big a difference in negative density becomes a given difference in print tone.
**Multigrade paper** carries two emulsions of different contrast and different colour sensitivity, so a yellow-to-magenta filter under the enlarger selects the grade. One box of paper, every grade, chosen after the negative is on the easel.
**Match the grade to the negative, not to taste:**
*A flat negative* — under-developed, or a dull day — needs a HARD grade, 4 or 5, to separate the tones.
*A contrasty negative* — over-developed, or a harsh sunny scene — needs a SOFT grade, 0 or 1, or the highlights will be blank paper and the shadows solid black.
**The order that saves paper:** find the grade first on a test strip that includes both the darkest and the lightest important areas, then find the exposure. Doing it the other way means finding the exposure twice, because changing the grade changes the exposure.
**Split-grade printing** exposes the same sheet twice, once through a soft filter and once through a hard one, controlling highlights and shadows separately. It is the most useful advanced technique in printing and it needs no extra equipment at all.
Materialien für diesen Schritt:
Fotopapier (Multigrade)2 StückBenötigte Werkzeuge:
Dunkelkammer-Vergrößerer (Mittelformat)Satz Dunkelkammerzangen4
4
Dodging and burning
Dodging and burning
One exposure for the whole sheet is rarely the best print, because the interesting parts of a scene are rarely all the same brightness.
**Dodging** holds light back from an area so it prints lighter — a piece of card on a wire, held under the lens for part of the exposure.
**Burning** gives an area extra exposure so it prints darker — a card with a hole in it, or two hands, after the main exposure. Skies are burned in on almost every landscape print ever made.
**Keep the tool moving.** A dodger held still leaves a visible pale patch with a hard edge. Constant small movement blurs the edge into nothing, and that is the entire skill.
**Work in stops, not seconds.** "Burn the sky one stop" means giving it the same again, and it is the same amount whether the base exposure was 8 seconds or 30. Notes written in seconds do not transfer between sessions; notes written in stops do.
**Write the recipe down as a map.** A small sketch of the print with the dodges and burns marked in stops is what makes a second identical print possible — and the second print is always the one that is wanted, usually months later.
**Nothing here rescues a bad negative.** Dodging and burning move tones that exist. A blank shadow stays blank.
Materialien für diesen Schritt:
Fotopapier (Multigrade)2 StückBenötigte Werkzeuge:
Dunkelkammer-Vergrößerer (Mittelformat)Satz DunkelkammerzangenDunkelkammerleuchte (Amber, LED)Fotochemie-Set (S/W-Entwickler, Stopp, Fixierer)Materialien
2- 2 StückPlatzhalter
- 1 StückPlatzhalter
Dieser Bauplan stellt her
Verwandte Blueprints
Diese Blueprints teilen Wissen — Techniken, Materialien oder Prinzipien

CC0 Gemeinfrei
Dieser Blueprint ist unter CC0 veröffentlicht. Sie dürfen dieses Werk für jeden Zweck frei kopieren, ändern, verbreiten und verwenden, ohne um Erlaubnis zu fragen.
Unterstützen Sie den Maker, indem Sie Produkte über seinen Blueprint kaufen, wo er eine Maker-Provision von Anbietern festgelegt, verdient. Oder erstellen Sie eine neue Iteration dieses Blueprints und verbinden Sie ihn in Ihrem eigenen Blueprint, um Einnahmen zu teilen.