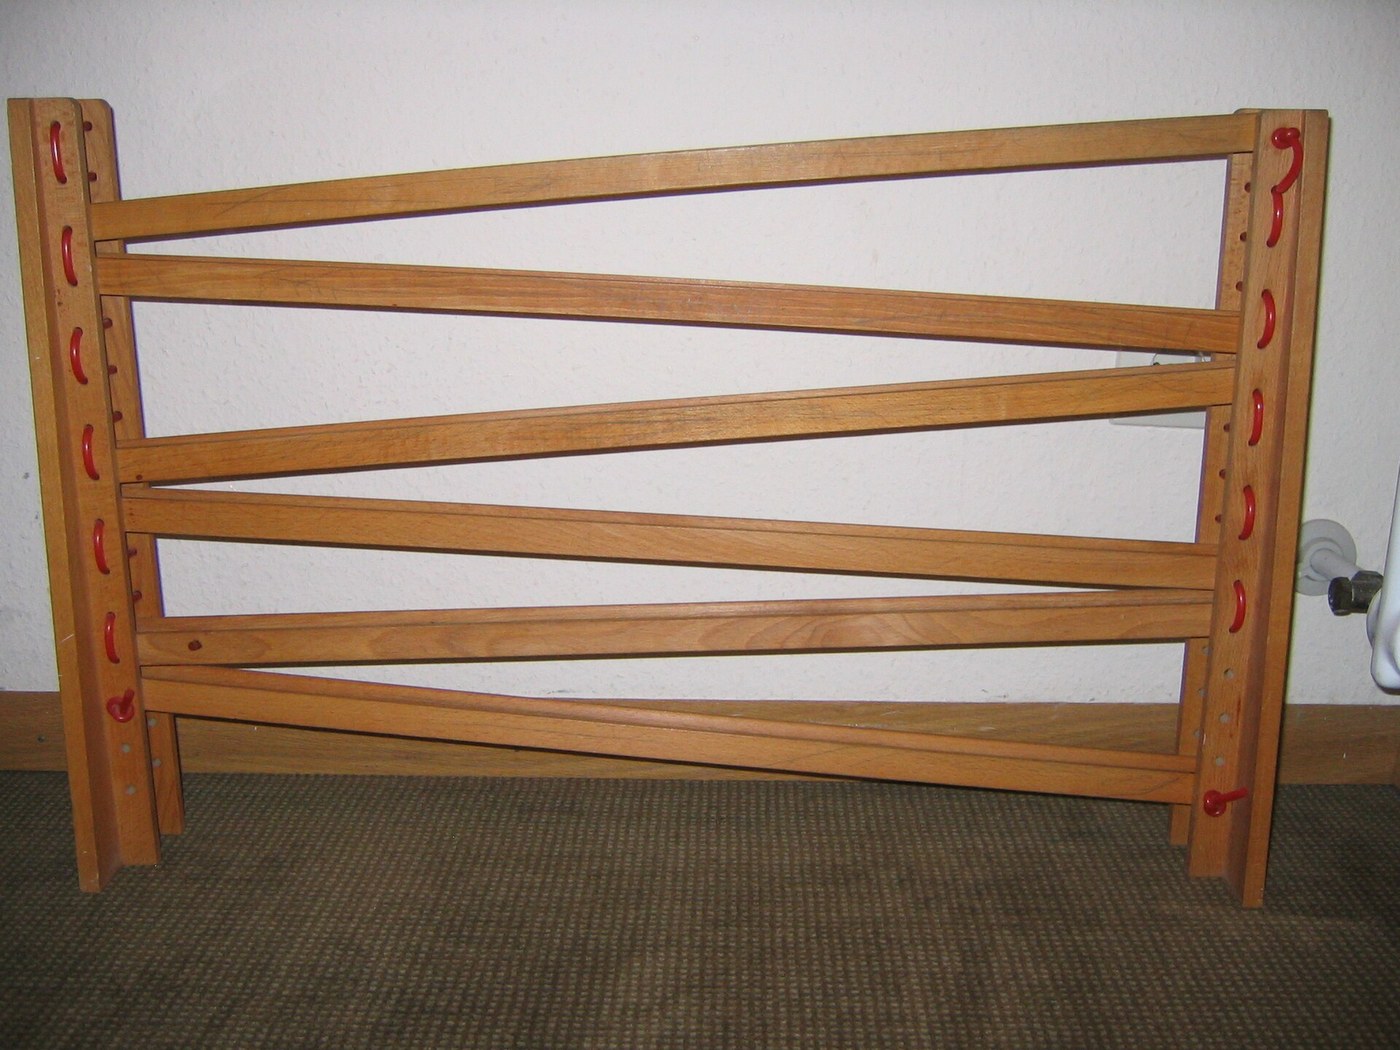


Marble Run
A marble run has one energy source and it is switched on before you start: the height you lift the marble to. Everything after that is spending, never earning. Each bend, each rattle, each rub against a wall takes a little back, and once it is gone the marble stops halfway down and sits there.
That is why every ramp must start lower than the one before. Not slightly lower — measurably lower, and the amount is something you find by testing rather than by calculating. Build one where two ramps meet at the same height and it will fail in exactly the same place every single time.
Wood, a saw, glue and a bag of marbles. The engineering is real, the debugging loop is fast, and a child of seven can run the whole experiment themselves.
Anweisungen
Marbles are a choking hazard for the under-threes
Marbles are a choking hazard for the under-threes
This is a build for children of about six and up, and the finished run must be kept away from toddlers. An adult does the sawing throughout.
Measure your marbles before you cut anything
Measure your marbles before you cut anything
Standard glass marbles are about 16 mm. Every channel width, hole and gap on the run is set by this number, so measure the actual marbles you own.
Materialien für diesen Schritt:
 Glasmurmeln20 Stück
Benötigte Werkzeuge:
 Lineal
Cut a backboard to stand the whole run on
Cut a backboard to stand the whole run on
A pine board about 60 cm tall by 30 cm wide. Everything mounts to this one face, so make sure it is flat and square.
Materialien für diesen Schritt:
 Kiefernbrett1 Stück
Benötigte Werkzeuge:
 Handsäge
Make each ramp from two rails on a strip
Make each ramp from two rails on a strip
Glue two thin strips along a flat piece, leaving a channel a few millimetres wider than a marble. Too tight and it jams, too loose and it hops out on the bends.
Materialien für diesen Schritt:
 Holzdübelstange4 Stück
 Weißleim (PVAc)50 ml
Sand every channel smooth
Sand every channel smooth
Sand the running surface and both rails. A rough channel eats the marble's energy directly and is the commonest reason a run stalls.
Benötigte Werkzeuge:
 Schleifpapier
Mark the top ramp and set its slope
Mark the top ramp and set its slope
Fix the highest ramp at roughly 10 degrees. Steeper is faster but overshoots the turns; shallower is slower but far more reliable.
Test that ramp on its own before adding another
Test that ramp on its own before adding another
Hold it in place and roll a marble. Get one ramp working properly before committing glue anywhere — this is the loop you will repeat six times.
Position the next ramp under the end of the first
Position the next ramp under the end of the first
Set it sloping back the other way, with its high end below the previous ramp's low end. Zig-zagging is what fits a long run onto a short board.
Leave a real drop at every handover
Leave a real drop at every handover
Allow at least 15 mm of fall between the end of one ramp and the start of the next. Level with the previous ramp means dead stop — the marble has no energy left to climb even a millimetre.
Add a catch wall where the marble lands
Add a catch wall where the marble lands
Fit a short upstand at the receiving end of each ramp so a fast marble is stopped and redirected instead of flying off the board.
Test after every single ramp you glue
Test after every single ramp you glue
Roll a marble through the whole run each time you add a piece. Finding a fault with six ramps already glued down is a very different job.
Fix a stall by raising the ramp before it
Fix a stall by raising the ramp before it
If the marble dies at a handover, the problem is almost never at the stall — it is upstream. Add height earlier or reduce the friction it has already crossed.
Fit a catcher tray at the bottom
Fit a catcher tray at the bottom
A shallow tray or a strip with a lip. Without it every run ends with marbles under the furniture.
Time the run and then try to make it slower
Time the run and then try to make it slower
Time a marble from top to bottom. Adding a long shallow ramp or a spiral makes the journey longer without adding height — and understanding why is the whole lesson.
History & Context — a budget you can only spend
History & Context — a budget you can only spend
Where the energy comes from and where it goes. Lifting a marble to the top stores gravitational potential energy, mgh — mass times gravity times height. Release it and that converts to kinetic energy as it descends. Nothing on the run adds any energy back, so the total available is fixed at the moment you drop it in. Friction against the channel, air resistance, and the small impacts at every handover all convert some of it to heat. The height you have left to spend therefore only ever decreases, and a run that asks the marble to climb anywhere at all is asking for energy that does not exist.
Rolling is not the same as sliding. A rolling marble stores part of its energy as rotation, not just as forward motion. For a solid sphere, two sevenths of the kinetic energy goes into spin and five sevenths into travel, which means a rolling ball accelerates down a slope more slowly than a frictionless sliding block would. Counter-intuitively, some friction is required — without it the marble would slide rather than roll. That is why a channel sanded to a mirror finish is not actually the fastest option.
Why the loop-the-loop is hard. To stay in contact at the top of a vertical loop, a marble needs enough speed that gravity alone supplies the centripetal force — which works out to a minimum entry height of about two and a half times the loop radius, and more once friction is counted. Children who add a loop to a run almost always build it too tall, and the marble leaves the track at the top. The failure is quantitative and the fix is to lower the loop, not to push harder.
An old toy and a genuine engineering habit. Wooden and tin marble runs were common European nursery toys by the nineteenth century, and the modern modular versions descend from mid-twentieth-century German and Swiss designs. What makes them worth building rather than buying is the debugging loop: build a little, test, find the failure, change one thing, test again. It is the same loop used on real machines, running at a scale where the whole cycle takes fifteen seconds and costs nothing.
Materialien
4- 20 StückPlatzhalter
- 1 StückPlatzhalter
- 4 StückPlatzhalter
- 50 mlPlatzhalter
Materialien verbundener Blueprints

Dieser Bauplan stellt her

Verwandte Blueprints
Diese Blueprints teilen Wissen — Techniken, Materialien oder Prinzipien

CC0 Gemeinfrei
Dieser Blueprint ist unter CC0 veröffentlicht. Sie dürfen dieses Werk für jeden Zweck frei kopieren, ändern, verbreiten und verwenden, ohne um Erlaubnis zu fragen.
Unterstützen Sie den Maker, indem Sie Produkte über seinen Blueprint kaufen, wo er eine Maker-Provision von Anbietern festgelegt, verdient. Oder erstellen Sie eine neue Iteration dieses Blueprints und verbinden Sie ihn in Ihrem eigenen Blueprint, um Einnahmen zu teilen.