Building a Simple Magnetic Compass — Medieval Navigation
Anweisungen
Magnetise the Needle
Magnetise the Needle
Stroke the iron or steel needle with the lodestone (natural magnetite ore) in one direction only — always from the eye end to the point — approximately 50 to 100 times. This process aligns the magnetic domains in the iron, inducing a semi-permanent magnetic field in the needle. Medieval writers described this process as the lodestone imparting its virtue to the iron. Use only one pole of the lodestone and stroke consistently in one direction; reversing or random stroking will demagnetise the needle. After magnetising, test by bringing the needle near a small iron object (a nail or another needle) — it should attract the iron weakly but detectably. A modern bar magnet or neodymium magnet can substitute for the lodestone and produces a stronger magnetisation.
Materialien für diesen Schritt:
 Iron1 needle Stück
 Waterenough to fill the bowl Stück
Benötigte Werkzeuge:
 Knife
KnifePrepare the Float
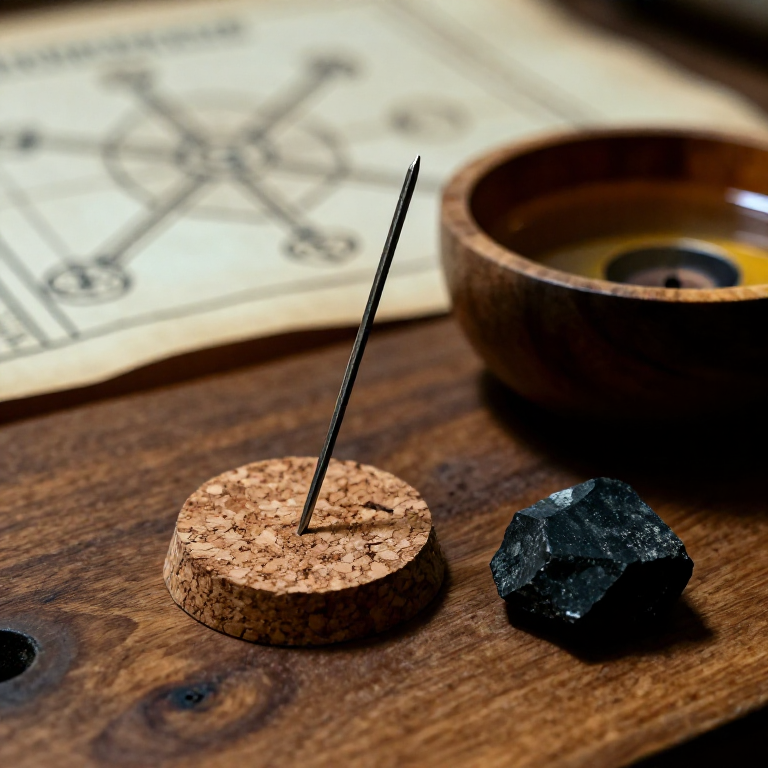
Prepare the Float
Cut a thin disc from a cork bottle stopper, approximately 2 cm in diameter and 3 mm thick. The cork must be thin and light enough to float level on the water surface without tipping. Alternatively, medieval sources describe using a piece of straw or a small leaf as the float. Pierce the cork disc along its diameter with the magnetised needle so the needle passes through the centre and protrudes equally on both sides. The needle-and-cork assembly should balance level when placed on water. Alexander Neckam describes placing the needle on a straw; Petrus Peregrinus de Maricourt (1269) describes a more sophisticated dry-pivot compass with the needle on a vertical pin, but the floating method was the earliest European form.
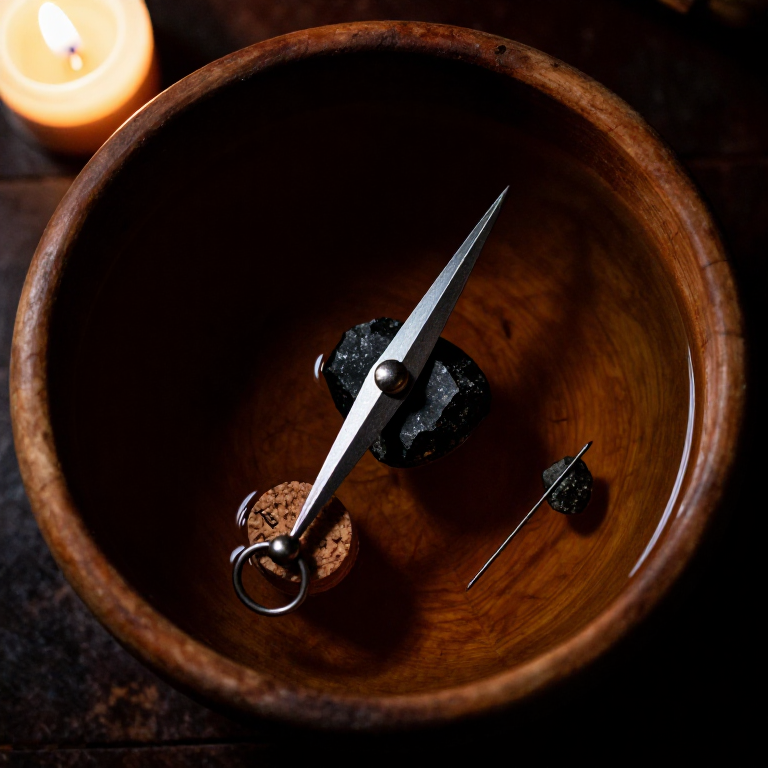
Float the Compass
Float the Compass
Fill the shallow bowl with still water and carefully place the cork-and-needle assembly on the water surface. The cork should float freely without touching the sides of the bowl. Within a few seconds, the magnetised needle will rotate to align itself with the Earth's magnetic field, with one end pointing toward magnetic north and the other toward magnetic south. The needle aligns because the Earth itself acts as a giant magnet, with magnetic field lines running approximately north-south. The end of the needle that was consistently stroked from eye to point (the point end, if stroked correctly) will point north. Avoid placing the compass near iron objects, which will distort the Earth's magnetic field locally and cause the needle to point in the wrong direction.
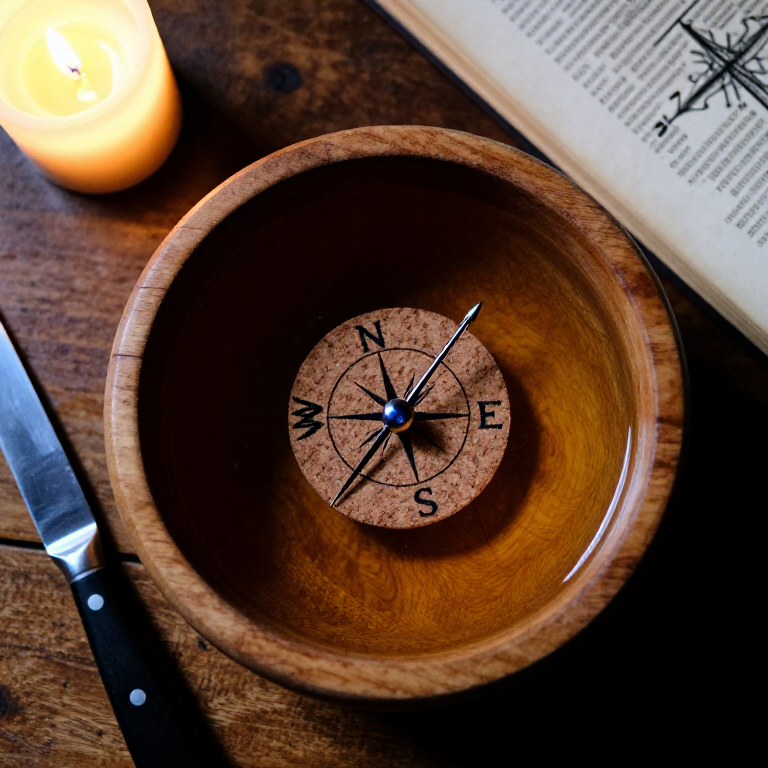
Mark the Cardinal Directions
Mark the Cardinal Directions
Once the needle has settled and consistently points in the same direction, you have identified the magnetic north-south line. Verify this against a known reference — the position of the North Star (Polaris) at night, or the direction of the midday sun (which is due south in the Northern Hemisphere). Mark the bowl rim at the north, south, east, and west positions using a knife scratch or ink mark. The floating compass can now be used as a direction-finding instrument. Note that magnetic north differs from true (geographic) north by an angle called magnetic declination, which varies by location and time — in 13th-century Europe, this declination was approximately 5 to 10 degrees east. Medieval navigators were aware of this discrepancy by the 15th century.
Understand and Use the Compass
Understand and Use the Compass
The floating compass is most useful in conditions where celestial navigation (using the sun or stars) is impossible — overcast days at sea, in dense forest, or in fog. To navigate with the compass, note the direction of your destination relative to north before departing, then maintain that bearing by keeping the needle oriented to the north mark on the bowl as you travel. Medieval Mediterranean sailors combined compass bearings with distance estimates (based on speed and time) to create portolan charts — remarkably accurate navigational maps that first appeared in the late 13th century. Petrus Peregrinus de Maricourt's Epistola de Magnete (1269) provides the most detailed medieval description of compass construction and the properties of magnetism, including the observation that breaking a magnet produces two smaller magnets, each with its own north and south poles — an early statement of what we now understand as the inseparability of magnetic poles.
Materialien
5- 1 piece StückPlatzhalter
- 1 piece StückPlatzhalter
Related blueprints
Other builds that share materials, tools, or techniques with this one.
CC0 Gemeinfrei
Dieser Blueprint ist unter CC0 veröffentlicht. Sie dürfen dieses Werk für jeden Zweck frei kopieren, ändern, verbreiten und verwenden, ohne um Erlaubnis zu fragen.
Unterstützen Sie den Maker, indem Sie Produkte über seinen Blueprint kaufen, wo er eine Maker-Provision von Anbietern festgelegt, verdient. Oder erstellen Sie eine neue Iteration dieses Blueprints und verbinden Sie ihn in Ihrem eigenen Blueprint, um Einnahmen zu teilen.