Zusammenarbeit
KUNST
SCHÖNHEIT & WELLNESS
HANDWERK
KULTUR & GESCHICHTE
UNTERHALTUNG
UMFELD
ESSEN & GETRÄNKE
REVERSE ENGINEERING
WISSENSCHAFTEN
SPORT
TECHNOLOGIE
WEARABLES
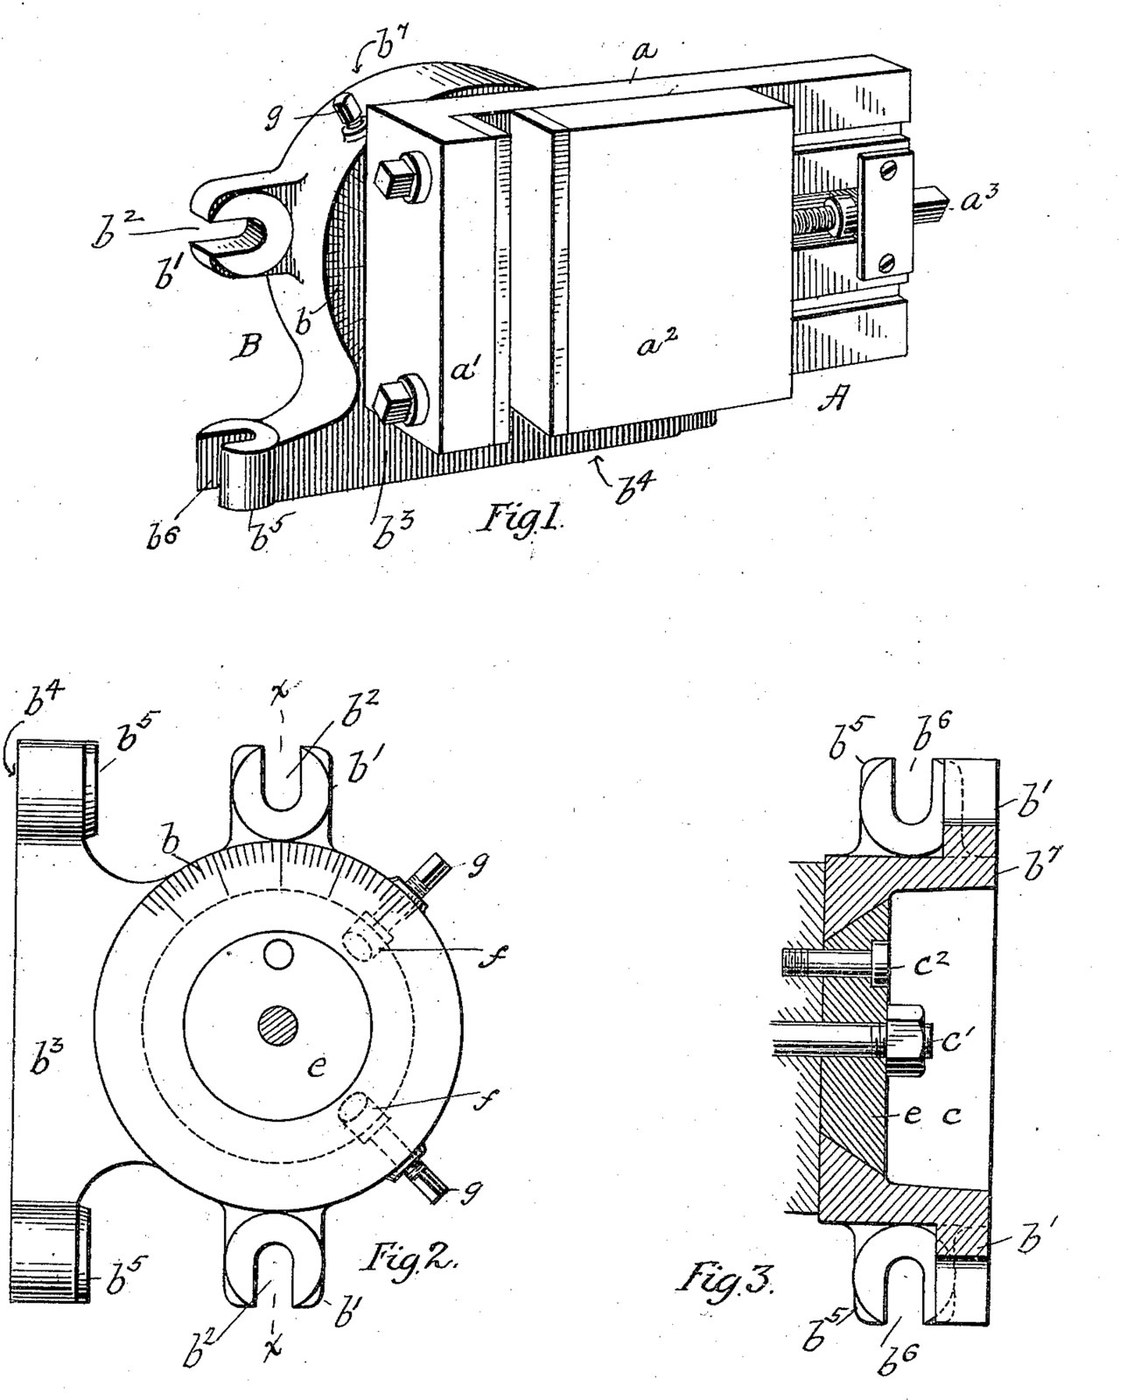


Milling Vise: Swivelled on a Two-Face Base with a Cone Seat and Locking Shoes (McClellan, US 652,441)
A milling vise holds the work on the table of a milling machine: a fixed jaw, a jaw moved by a screw, and a base that lets the vise swivel to any angle. E. J. McClellan (US 652,441, 1900) turns the vise on a cone-shaped disk in a matching seat in a cylindrical base, reads the angle on a scale, and locks it with two shoes screwed against the cone.
His base has two planed faces at right angles, each with its own bolt slots, so the vise can be bolted to the table lying flat or standing upright.
Source: E. J. McClellan, "Milling-Machine Vise", US Patent 652,441 (1900). Picture: its Figs. 1-3.
Erfahren
Unknown
Anweisungen
1
1
Read McClellan
Read McClellan
"With such a construction it is possible to support the vise in one plane only, which plane is horizontal; but it is often found desirable to mount the vise in an upright position upon the slide in order to use the machine to the best advantage".
2
2
Make the base
Make the base
Make a cylindrical block. Plane one end face square to its axis to fit the machine table, with two ears at opposite points, slotted for bolts parallel to the axis. Give it a side extension with a second planed face at right angles to the first and parallel to the axis, with its own slotted ears, so the base can be bolted down on its end or on its side. Mark a scale round part of the opposite end face. Sizes, metal and how the scale is cut are not given.
Materialien für diesen Schritt:
 Unbekanntes Metall1 base
Benötigte Werkzeuge:
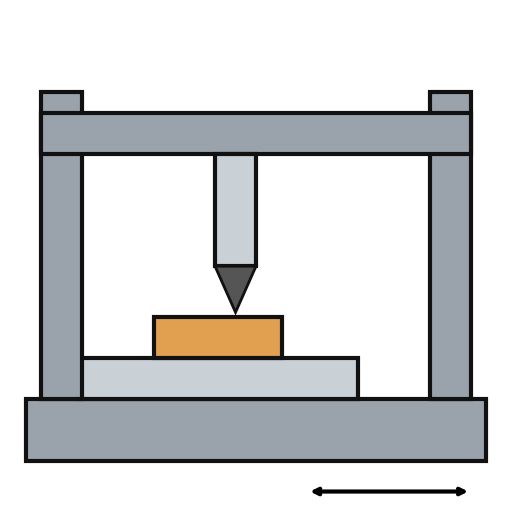 Metallhobelmaschine
 Feilen (Handfeile)
 Unbekannte Maße
 Unbekanntes Umformverfahren
3
3
Cut the cone seat
Cut the cone seat
Bore a large central opening through the base and turn the end next to the scale into a conical seat, narrowest at the scaled face. Turn a disk with a matching conical edge. Drill two radial holes into the seat, ninety degrees apart, fit a shoe in each whose face forms part of the cone, and tap the holes behind them for adjusting screws.
Materialien für diesen Schritt:
Unbekanntes Metall1 diskUnbekanntes Metall2 shoesBenötigte Werkzeuge:
 Metalldrehmaschine
 Standbohrmaschine
 Bohrersatz
 Gewindeschneidsatz
4
4
Make the vise
Make the vise
Make a plate carrying a fixed jaw, and a second plate as the sliding jaw, fitted to slide on the first and moved by a screw. Put an index mark on the vise to read against the base scale. The vise may be of any good construction; its sizes and the screw's thread are not given.
Materialien für diesen Schritt:
Unbekanntes Metall1 plate and fixed jawUnbekanntes Metall1 sliding jawUnbekanntes Metall1 screwBenötigte Werkzeuge:
MetallhobelmaschineMetalldrehmaschineStandbohrmaschineBohrersatzGewindeschneidsatzUnbekannte Maße5
5
Assemble and set
Assemble and set
Pass the disk into its seat from below and bolt it to the vise plate with a centre bolt and an off-centre bolt. Bolt the base to the table on whichever face suits the job. To set an angle, slacken the bolts, swivel the vise to the scale, and screw the two shoes hard against the cone to lock it.
Materialien für diesen Schritt:
 Sechskantschrauben-Sortiment1 centre and off-centre bolts
Benötigte Werkzeuge:
 Rollgabelschlüssel
Materialien
2- 1 screwPlatzhalter
- 1 centre and off-centre boltsPlatzhalter
Benötigte Werkzeuge
9- Platzhalter
- Platzhalter
- Platzhalter
- Platzhalter
- Platzhalter
- Platzhalter
- Platzhalter
- Platzhalter
- Platzhalter
Dieser Bauplan stellt her

CC0 Gemeinfrei
Dieser Blueprint ist unter CC0 veröffentlicht. Sie dürfen dieses Werk für jeden Zweck frei kopieren, ändern, verbreiten und verwenden, ohne um Erlaubnis zu fragen.
Unterstützen Sie den Maker, indem Sie Produkte über seinen Blueprint kaufen, wo er eine Maker-Provision von Anbietern festgelegt, verdient. Oder erstellen Sie eine neue Iteration dieses Blueprints und verbinden Sie ihn in Ihrem eigenen Blueprint, um Einnahmen zu teilen.