
Zusammenarbeit
KUNST
SCHÖNHEIT & WELLNESS
HANDWERK
KULTUR & GESCHICHTE
UNTERHALTUNG
UMFELD
ESSEN & GETRÄNKE
REVERSE ENGINEERING
WISSENSCHAFTEN
SPORT
TECHNOLOGIE
WEARABLES
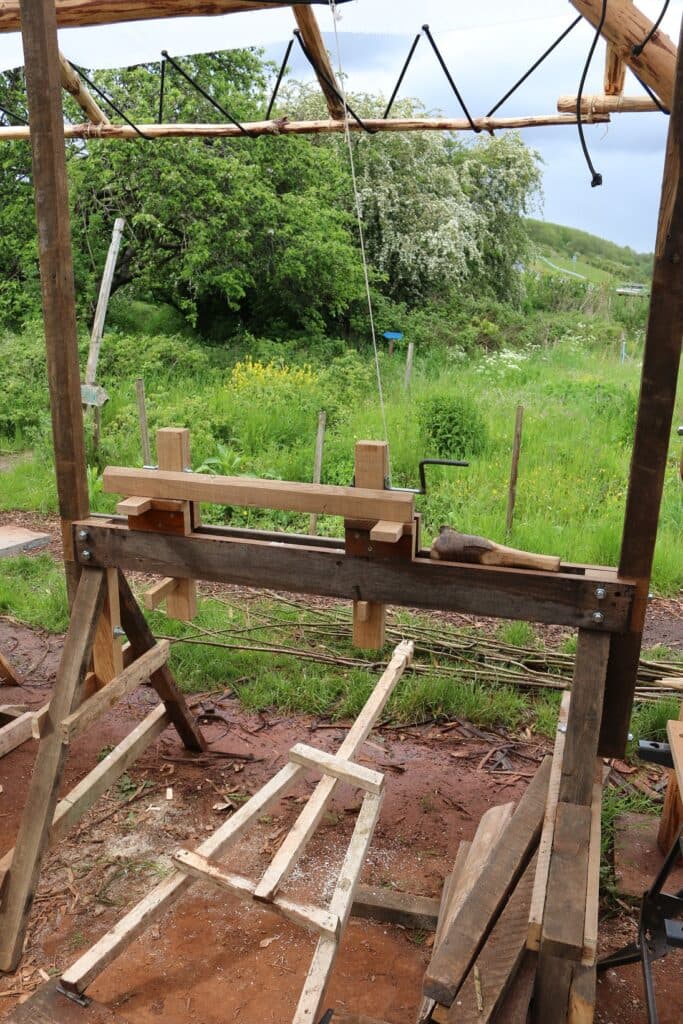
Turner's Pole Lathe with Puppets, Screw Centre and Treadle (Moxon, 1680)
Woody

Erstellt von

Woody

14. November 2026NO
2
0
0
0
0

Turner's Pole Lathe with Puppets, Screw Centre and Treadle (Moxon, 1680)

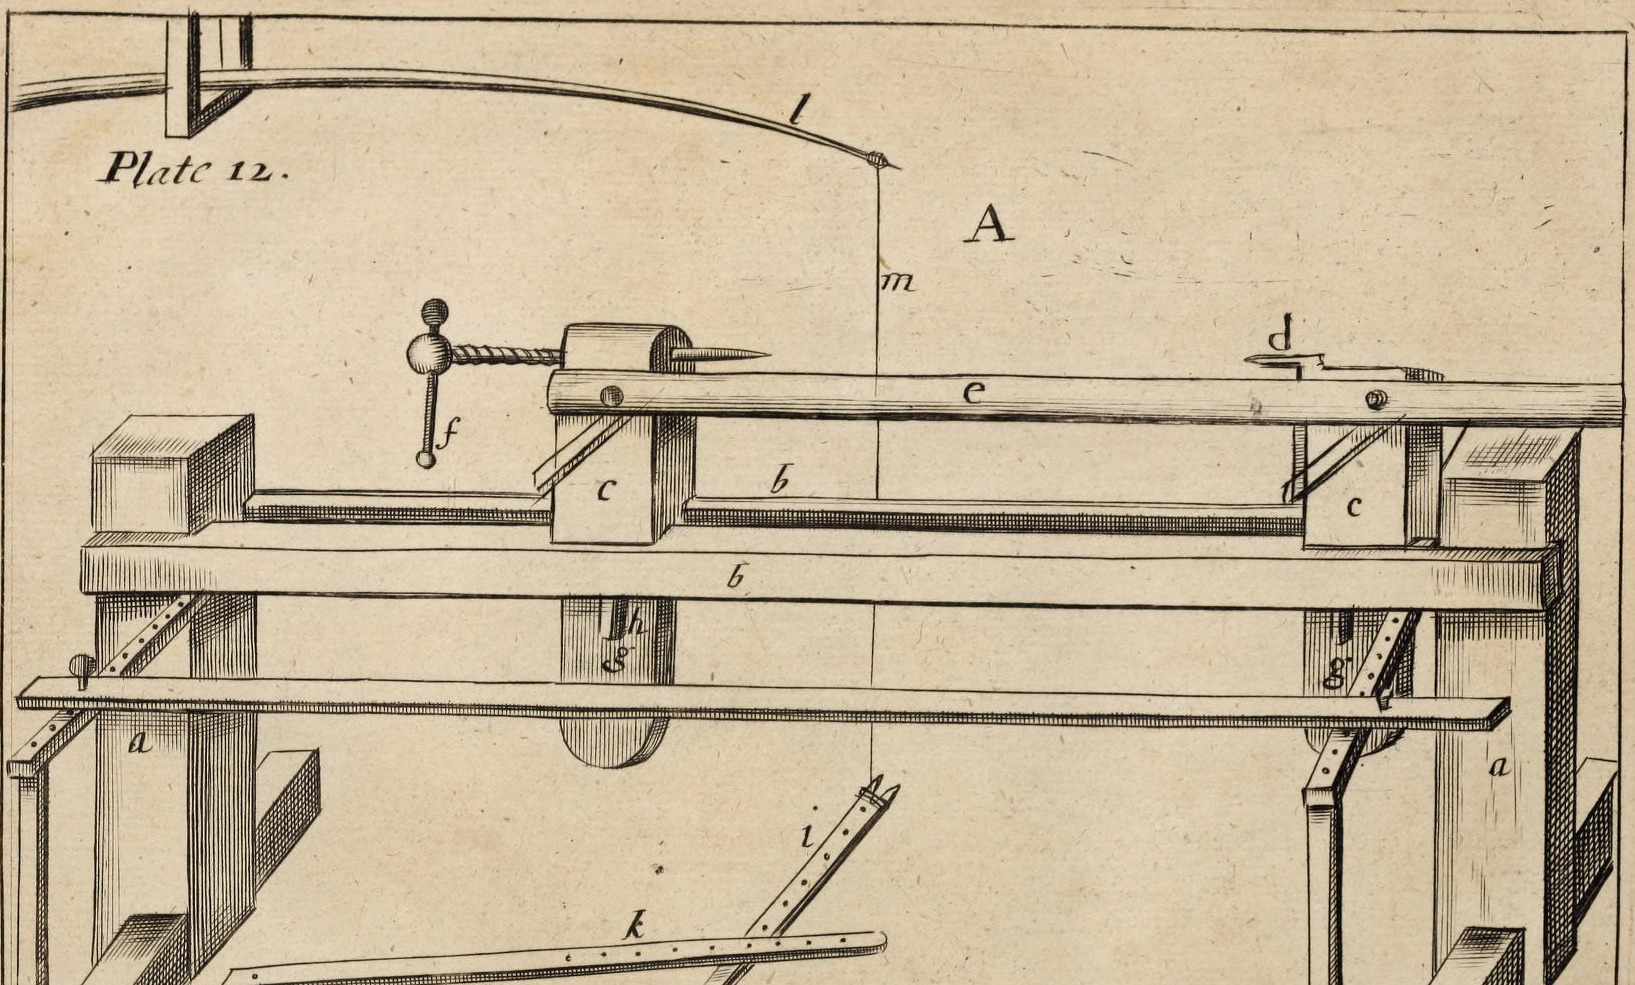
The workshop pole lathe of Joseph Moxon's Mechanick Exercises: legs and twin cheeks bolted square, sliding puppets wedged through the bed, a fixed steel-pointed pike and an adjustable screw centre, a hinged treadle with a cross-treadle, and a fir pole pinned to the ceiling for the spring.
Erfahren
Two to three days

Anweisungen

1

His sizes

Jupyter-Notebook wird geladen …
2

Read Mechanick Exercises

"The Lathe is described in Plate 12. A. This Machine is so vulgarly known..."
3

Legs and cheeks

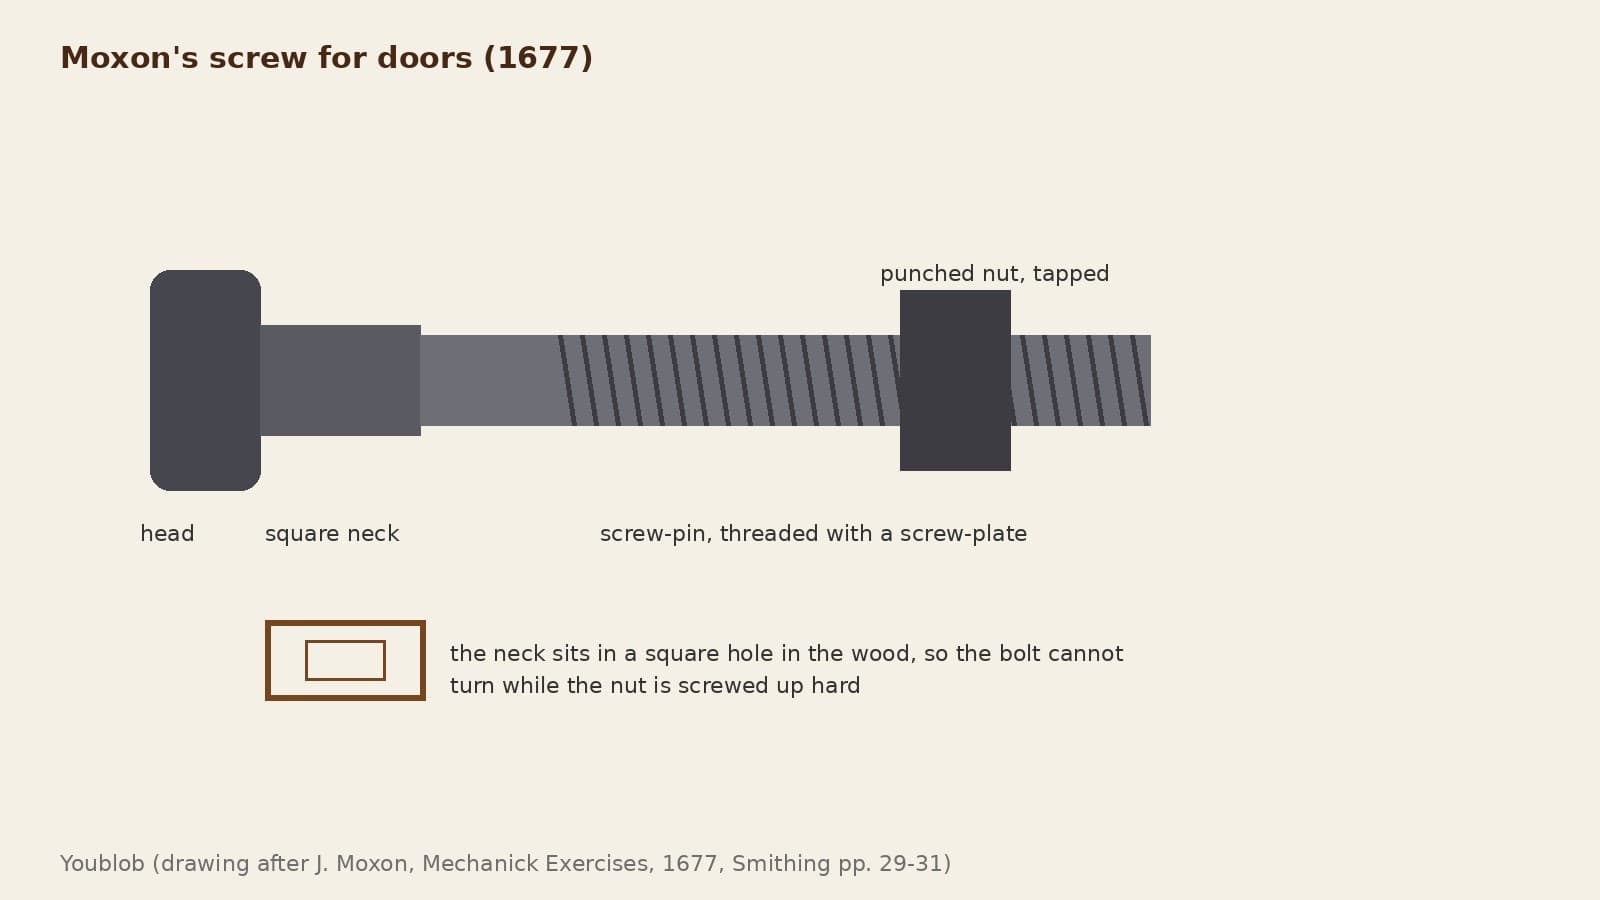
Set up two legs about 2 ft 10 in (86 cm) high, plumb, each with a tenon on top as thick as the gap you want between the two cheeks. Lay a cheek each side of the tenons, level, and fix them: pinned, or better with an iron bolt whose square neck sits in a square hole in the near cheek, drawn up by a nut. Brace legs and cheeks to the floor and walls so nothing trembles.

Materialien für diesen Schritt:

WeißeichenbrettWeißeichenbrett1 Stück
SchlossschraubeSchlossschraube1 Stück

Benötigte Werkzeuge:

HandsägeHandsäge
LochbeitelLochbeitel
Holzhammer (Klüpfel)Holzhammer (Klüpfel)
Bohrwinde mit BohrerBohrwinde mit Bohrer
4

Puppets

Make two (or two or three pairs of) square puppets, strong rather than weak and as short as your work allows: the centres must stand a little more than half the work's diameter above the cheeks. Give each a tenon at the foot that slides in the gap between the cheeks, with a mortise through it below the cheeks for a tapering wedge, driven with a mallet to clamp the puppet down.

Materialien für diesen Schritt:

WeißeichenbrettWeißeichenbrett1 Stück
HartholzkeilHartholzkeil1 Stück

Benötigte Werkzeuge:

HandsägeHandsäge
LochbeitelLochbeitel
Holzhammer (Klüpfel)Holzhammer (Klüpfel)
5

Pike and screw centre

Near the top of one puppet fix a strong iron pike with a tempered steel point. Through the other fit an iron screw in a nut in the puppet, also with a steel point, both points in one straight line facing each other. Put an iron handle 7-8 in long with a knob at each end through the screw head. Cut the puppets to square shoulders just below the pikes to carry the rest.

Materialien für diesen Schritt:

SchmiedeeisenstangeSchmiedeeisenstange1 Stück
Werkzeugstahl-VierkantstabWerkzeugstahl-Vierkantstab1 Stück

Benötigte Werkzeuge:

SchmiedeesseSchmiedeesse
AmbossAmboss
GewindeschneidsatzGewindeschneidsatz
AbschreckbottichAbschreckbottich
6

Rest and oil horn

Make the rest a square piece 1-1.5 in thick, 2-2.5 in broad, a little longer than the gap between the puppets. Hang a horn tip down on the outside of the right-hand puppet near the top, filled with oil, with a wooden cover and button carrying an iron wire that reaches nearly to the bottom, to oil the centre holes.

Materialien für diesen Schritt:

WeißeichenbrettWeißeichenbrett1 Stück
RinderhornRinderhorn1 Stück
EisendrahtEisendraht1 Stück
MaschinenölMaschinenöl1 Stück

Benötigte Werkzeuge:

HandsägeHandsäge
Bohrwinde mit BohrerBohrwinde mit Bohrer
7

Treadle and cross-treadle

Make a treadle about 2.5 in broad, 1 in thick and 3 ft (up to 4 ft) long. Nail its back end to the floor with a piece of leather, 1-1.5 ft behind the lathe and midway between the legs, so the front reaches 1.5-2 ft past the front of the lathe. Cut a square notch 1.5 in wide and 2 in long in the far end for winding the string. Fix an iron pin about 0.5 in thick, standing 1.5-2 in up, in the middle; under the cheeks fix a cross-treadle with a row of holes 2-3 in apart to take the pin.

Materialien für diesen Schritt:

WeißeichenbrettWeißeichenbrett1 Stück
LederriemenLederriemen1 Stück
EisennägelEisennägel1 Stück
SchmiedeeisenstangeSchmiedeeisenstange1 Stück

Benötigte Werkzeuge:

HandsägeHandsäge

HammerHammer
Bohrwinde mit BohrerBohrwinde mit Bohrer
8

Pole and string

Use a fir pole, thick or thin to suit the work; if it is too stiff, thin its upper and under sides with a draw-knife. Pin the thick end to a ceiling timber with one nail so it pivots. About a foot away nail two cheeks to the joists with a batten across their foot to carry the pole. Run the string from the pole's thin end, round the work, to the treadle.

Materialien für diesen Schritt:

HolzstangeHolzstange1 Stück
SchnurSchnur1 Stück
EisennägelEisennägel1 Stück
WeißeichenbrettWeißeichenbrett1 Stück

Benötigte Werkzeuge:

ZugmesserZugmesser
HammerHammer
9

Troubleshooting

Pole lathe troubleshooting.

Flow

Loading...
10

History and honest limits

From Joseph Moxon, **Mechanick Exercises**, Numb. X, Turning (1680), pp. 176-185 and Plate 12 (checked on the archive.org scan mechanickexercis00moxo). He gives no sizes for cheeks, puppets or pole; metric and the wood choices are ours.

Materialien

12

Benötigte Werkzeuge

10

Dieser Bauplan stellt her

CC0 Gemeinfrei

Dieser Blueprint ist unter CC0 veröffentlicht. Sie dürfen dieses Werk für jeden Zweck frei kopieren, ändern, verbreiten und verwenden, ohne um Erlaubnis zu fragen.

Unterstützen Sie den Maker, indem Sie Produkte über seinen Blueprint kaufen, wo er eine Maker-Provision von Anbietern festgelegt, verdient. Oder erstellen Sie eine neue Iteration dieses Blueprints und verbinden Sie ihn in Ihrem eigenen Blueprint, um Einnahmen zu teilen.

Diskussion

(0)

Anmelden um an der Diskussion teilzunehmen

Kommentare werden geladen...