Zusammenarbeit
KUNST
SCHÖNHEIT & WELLNESS
HANDWERK
KULTUR & GESCHICHTE
UNTERHALTUNG
UMFELD
ESSEN & GETRÄNKE
REVERSE ENGINEERING
WISSENSCHAFTEN
SPORT
TECHNOLOGIE
WEARABLES
Rinsing-Ring Churn: Lid, Gearing, Dasher and Breaker Bars Lift Out as One, a Perforated Ring Under the Lid Washes Them
Buttercup

Erstellt von

Buttercup

11. November 2026IE
1
0
0
0
0

Rinsing-Ring Churn: Lid, Gearing, Dasher and Breaker Bars Lift Out as One, a Perforated Ring Under the Lid Washes Them

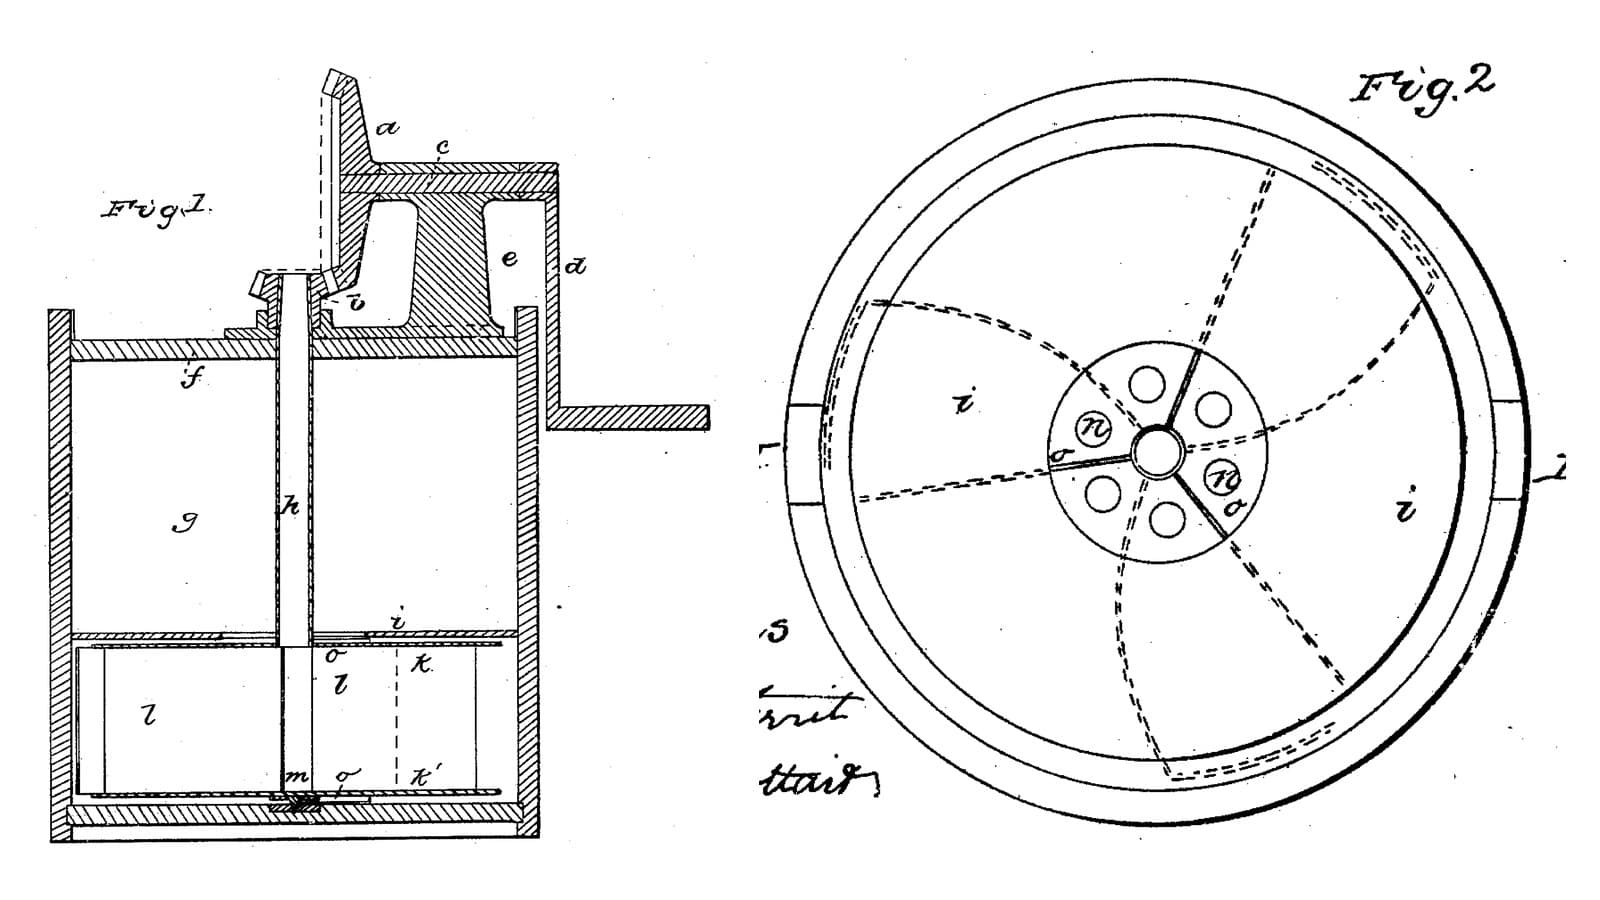
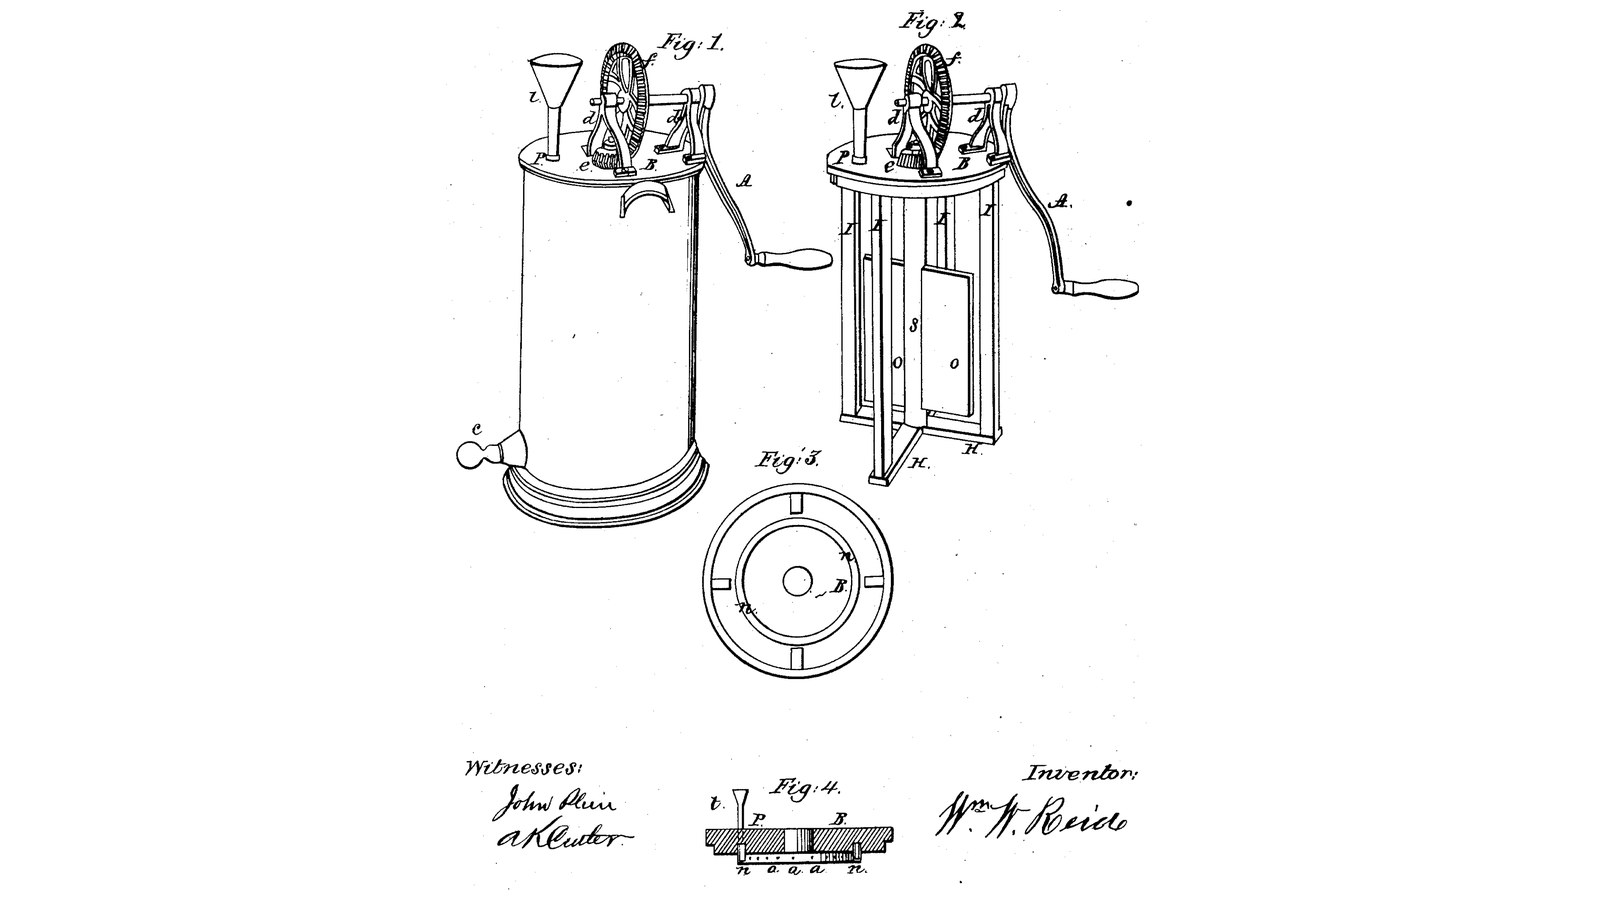
William W. Reid of Rochester, New York, received US 30,424, dated 16 October 1860, for a geared churn whose lid, gearing, two-slat dasher and four upright breaker bars are joined into one frame that lifts out of the body together. Under the lid runs a ring-shaped tube with small holes on both faces: water poured into a funnel on the lid sprays inward onto the dasher and outward onto the bars and wall, rinsing them, or tempering the cream, without lifting the lid. The patent's only size is the holes about an inch apart; every other size here is ours.
Fortgeschritten
About 2 days

Anweisungen

1

The rinsing ring

Jupyter-Notebook wird geladen …
2

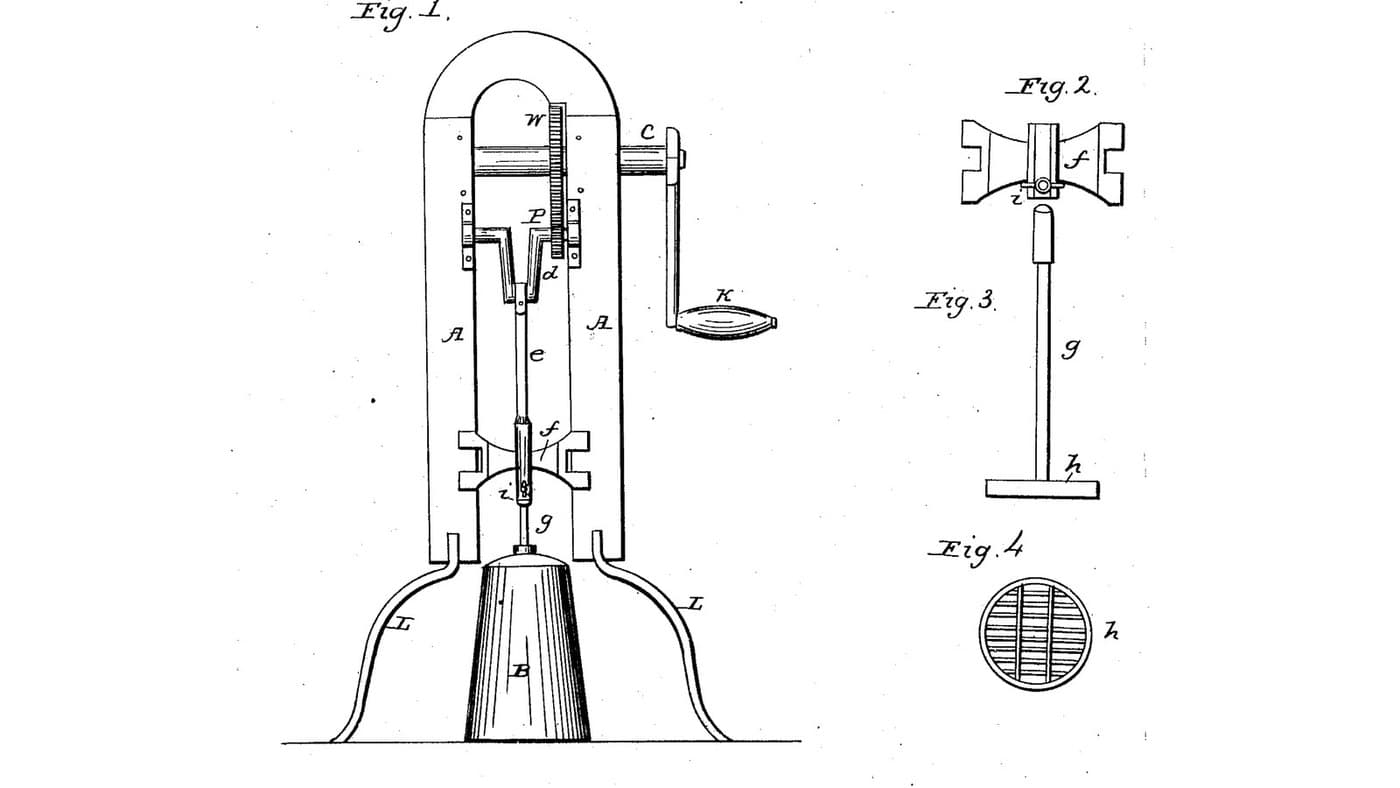
A geared frame that sits on the churn, four months before

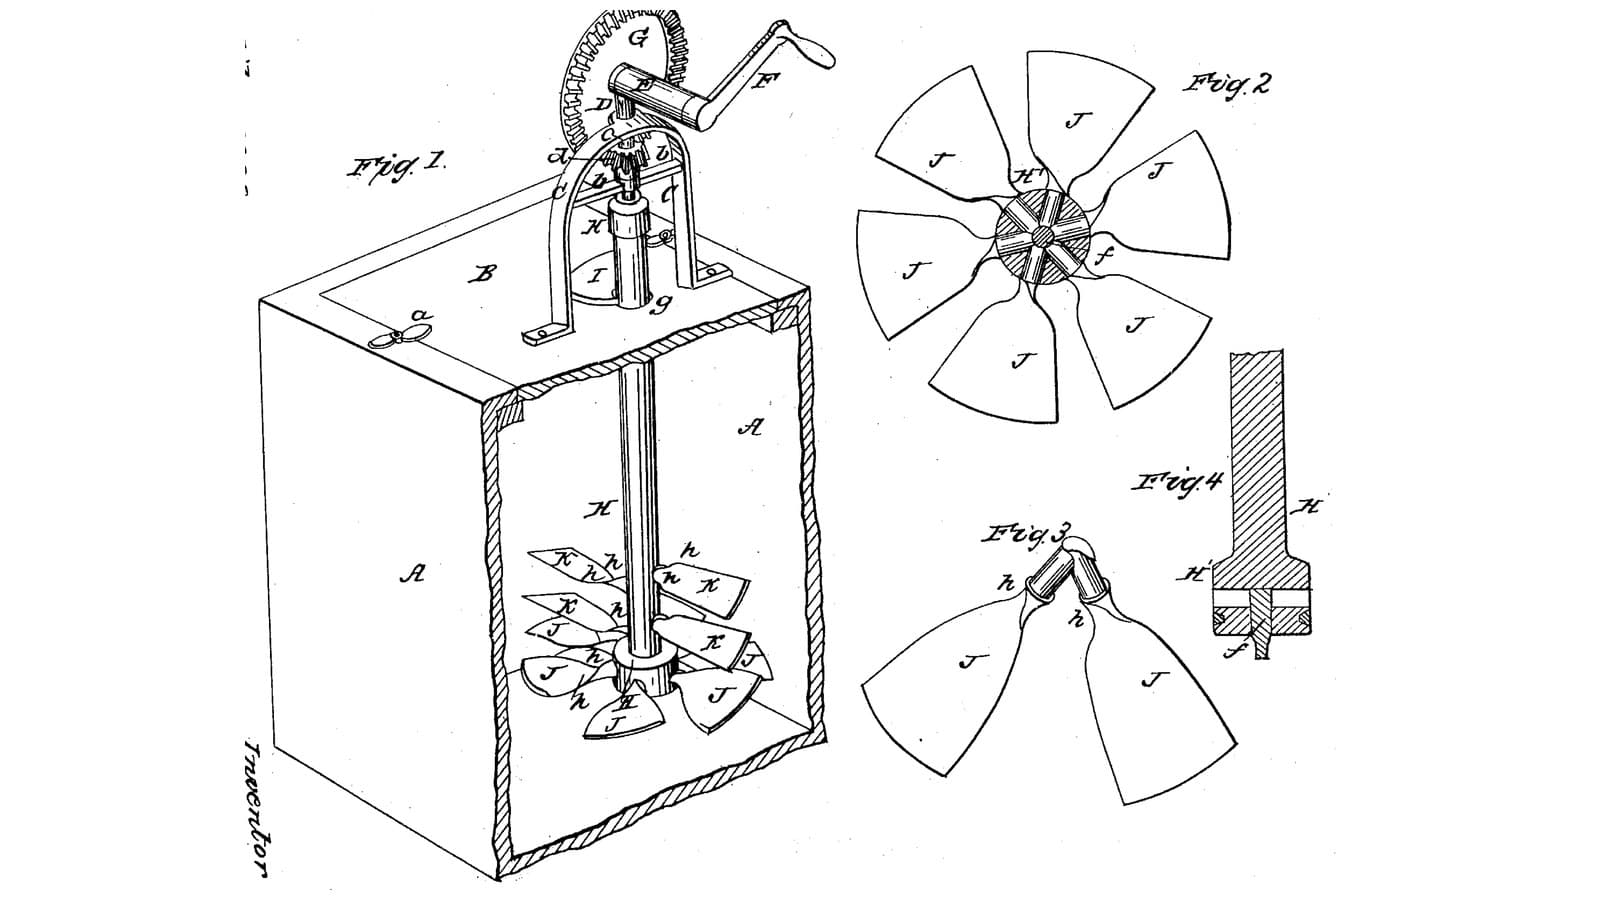
Evans sets his gearing on a frame over the churn. Reid joins gearing, dasher and breakers to the lid so all come out together.
3

Read US 30,424

"The tunnel t, fits into a short tube P, which passes through the lid B, and is inserted into the annular tube n, so that when water is poured into the tunnel t, it is projected in numerous small jets both inwardly upon the dasher and also outwardly against the upright bars I, I, I, I, and sides of the churn, and thus washes off the milk and small particles of butter."
4

Body and faucet C

Use a 20-litre food-grade bucket as the body. Bore a 21 mm hole 40 mm above its floor and fit a brass spigot C with its washers and nut. Screw two hardwood stop blocks 22 x 24 x 25 mm inside the rim, one above the spigot and one opposite, from outside through the wall, so the lid cannot turn.

Materialien für diesen Schritt:

20-Liter-Eimer20-Liter-Eimer1 Stück
MessinghahnMessinghahn1 Stück
HartholzbrettHartholzbrett1 Stück
HolzschraubenHolzschrauben4 Stück

Benötigte Werkzeuge:

Flachfräsbohrer-SatzFlachfräsbohrer-Satz
AkkubohrschrauberAkkubohrschrauber
RollgabelschlüsselRollgabelschlüssel
Schraubendreher-SatzSchraubendreher-Satz
5

Print the ring tube n

The annular tube n: hollow, 16 x 16 mm in section with 2 mm walls, 196 mm across outside and 164 inside, with 23 holes of 2 mm on its inner face and 23 on its outer face, about an inch apart, and an inlet on top for the tube P. Needs a 200 mm bed. PETG, 0.2 mm layers, 30 % infill, 4 walls.
DesigndateiSTLCC0 - Free
6

Lid B, ring n, tube P and funnel t

Cut a 12 mm HDPE lid B to the bucket's top, 304 mm across, bore it 16.6 mm at the centre as the shaft's top bearing, and cut two notches at its edge to drop over the stop blocks. Rout a groove 17 mm wide and 8 mm deep under it, 180 mm across its middle, and seal the ring tube n into it so half the ring stands below. Bore 12.2 mm through the lid over the ring's inlet, 90 mm out from the centre, and seal in a 12 mm stainless tube P 40 mm long standing 30 mm proud; set a small kitchen funnel t in it.

Materialien für diesen Schritt:

HDPE-PlatteHDPE-Platte1 Stück
PETG-FilamentPETG-Filament1 Stück
SilikondichtmasseSilikondichtmasse1 Stück
EdelstahlrohrEdelstahlrohr1 Stück
KüchentrichterKüchentrichter1 Stück

Benötigte Werkzeuge:

FDM-3D-DruckerFDM-3D-Drucker
KompassKompass
StichsägeStichsäge
OberfräseOberfräse
Flachfräsbohrer-SatzFlachfräsbohrer-Satz
AkkubohrschrauberAkkubohrschrauber
BohrersatzBohrersatz
Bügelsäge (Metallsäge)Bügelsäge (Metallsäge)
Feilen (Handfeile)Feilen (Handfeile)
7

Bars H and I, shaft S and dasher O

Halve two hardwood bars H 260 x 40 x 20 mm across each other and glue them; bore a 10.6 mm socket 20 mm deep at the middle. Screw four hardwood bars I 20 mm square and 351 mm long upright on their ends, 120 mm from the centre, and their tops to the lid's underside. Cut a hardwood shaft S 32 mm square and 325 mm long, set a 10 mm stainless pin 15 mm out of its foot and a 16 mm stainless rod 108 mm long 20 mm into its top. Screw two hardwood slats O 95 x 12 x 290 mm on opposite faces of S, reaching out opposite ways, 15 mm above its foot. Stand S in the socket and up through the lid's bearing.

Materialien für diesen Schritt:

HartholzbrettHartholzbrett2 Stück
HolzleimHolzleim1 Stück
HolzschraubenHolzschrauben16 Stück
EdelstahlstabEdelstahlstab2 Stück

Benötigte Werkzeuge:

TischkreissägeTischkreissäge
Stechbeitelsatz für HolzStechbeitelsatz für Holz
AkkubohrschrauberAkkubohrschrauber
BohrersatzBohrersatz
Bügelsäge (Metallsäge)Bügelsäge (Metallsäge)
Schraubzwinge mit SchiebebügelSchraubzwinge mit Schiebebügel
Schraubendreher-SatzSchraubendreher-Satz
Bandmaß (Rollmeter)Bandmaß (Rollmeter)
8

Print the wheel f

The wheel f on the crank shaft: a crown wheel of 42 teeth, module 2.5, 16.2 mm bore. PETG, 0.2 mm layers, 30 % infill, 4 walls.
DesigndateiSTLCC0 - Free
9

Print the pinion e

The pinion e on the top of S: 14 teeth, module 2.5, 16.2 mm bore. PETG, 0.2 mm layers, 30 % infill, 4 walls.
DesigndateiSTLCC0 - Free
10

Supports d, wheel f, pinion e and crank A

Pin the pinion e on the rod of S with its teeth centred 40 mm above the lid. Screw two hardwood supports d 50 x 25 x 118 mm to the lid either side of it, one 60 to 85 mm in front and one 25 to 50 mm behind, bored 16.6 mm across 92 mm up. Run a 16 mm stainless crank shaft 180 mm long through them, pin the wheel f on it meshing e, hold it with a shaft collar, and pin on a crank A of mild steel flat bar, 100 mm throw, with a hardwood handle.

Materialien für diesen Schritt:

EdelstahlstabEdelstahlstab1 Stück
HartholzbrettHartholzbrett1 Stück
Shaft CollarShaft Collar1 Stück
SplintSplint3 Stück
Baustahl-FlachstahlBaustahl-Flachstahl1 Stück
HartholzdübelHartholzdübel1 Stück
HolzschraubenHolzschrauben4 Stück
PETG-FilamentPETG-Filament1 Stück

Benötigte Werkzeuge:

FDM-3D-DruckerFDM-3D-Drucker
TischkreissägeTischkreissäge
AkkubohrschrauberAkkubohrschrauber
BohrersatzBohrersatz
Bügelsäge (Metallsäge)Bügelsäge (Metallsäge)
Feilen (Handfeile)Feilen (Handfeile)
SchraubstockSchraubstock
Schraubendreher-SatzSchraubendreher-Satz
11

The build in 3D

FreeCAD model of this build, the bucket and lid cut open: the crossed bars and four upright bars, the shaft with its two slats, the ring tube under the lid with its holes, the tube and funnel, the spigot and stop blocks, and the gearing and crank on the lid.
DesigndateiBLENDCC0 - Free
12

Churn and rinse

Pour about 12 litres of heavy cream at about 15 °C, checked with the thermometer, into the bucket and lower the whole frame in, the lid's notches over the stop blocks. Turn the crank steadily, timing it; to warm or cool the cream, pour a little warm or cold water into the funnel. When the butter comes, draw the buttermilk off at the spigot into a bowl, then pour cold water into the funnel to rinse the dasher, bars and walls, turning slowly, and draw it off. Lift the frame out, take out the butter, wash it in cold water until it runs clear, salt and weigh it.

Materialien für diesen Schritt:

SchlagsahneSchlagsahne12 l
WasserWasser1 Stück
Grobes MeersalzGrobes Meersalz1 Stück

Benötigte Werkzeuge:

Einsteck-FühlerthermometerEinsteck-Fühlerthermometer
StoppuhrStoppuhr
Digitale KüchenwaageDigitale Küchenwaage
Große Rührschüssel aus EdelstahlGroße Rührschüssel aus Edelstahl
13

Troubleshooting

Rinsing-ring churn troubleshooting.

Flow

Loading...
14

History and honest limits

**William W. Reid** of Rochester, Monroe County, New York, US 30,424, 16 October 1860, "Churn". He claimed "the annular perforated tube n in combination with the bars I I and dasher O". His tube was rectangular tin; ours is printed. His wheel and pinion were bevel gears on cast supports; ours are a printed crown wheel and pinion on wooden supports. The holes about an inch apart are his; every other size here is ours.

Materialien

18

Benötigte Werkzeuge

20

Designdateien

4

CC0 Gemeinfrei

Dieser Blueprint ist unter CC0 veröffentlicht. Sie dürfen dieses Werk für jeden Zweck frei kopieren, ändern, verbreiten und verwenden, ohne um Erlaubnis zu fragen.

Unterstützen Sie den Maker, indem Sie Produkte über seinen Blueprint kaufen, wo er eine Maker-Provision von Anbietern festgelegt, verdient. Oder erstellen Sie eine neue Iteration dieses Blueprints und verbinden Sie ihn in Ihrem eigenen Blueprint, um Einnahmen zu teilen.

Diskussion

(0)

Anmelden um an der Diskussion teilzunehmen

Kommentare werden geladen...