Zusammenarbeit
KUNST
SCHÖNHEIT & WELLNESS
HANDWERK
KULTUR & GESCHICHTE
UNTERHALTUNG
UMFELD
ESSEN & GETRÄNKE
REVERSE ENGINEERING
WISSENSCHAFTEN
SPORT
TECHNOLOGIE
WEARABLES
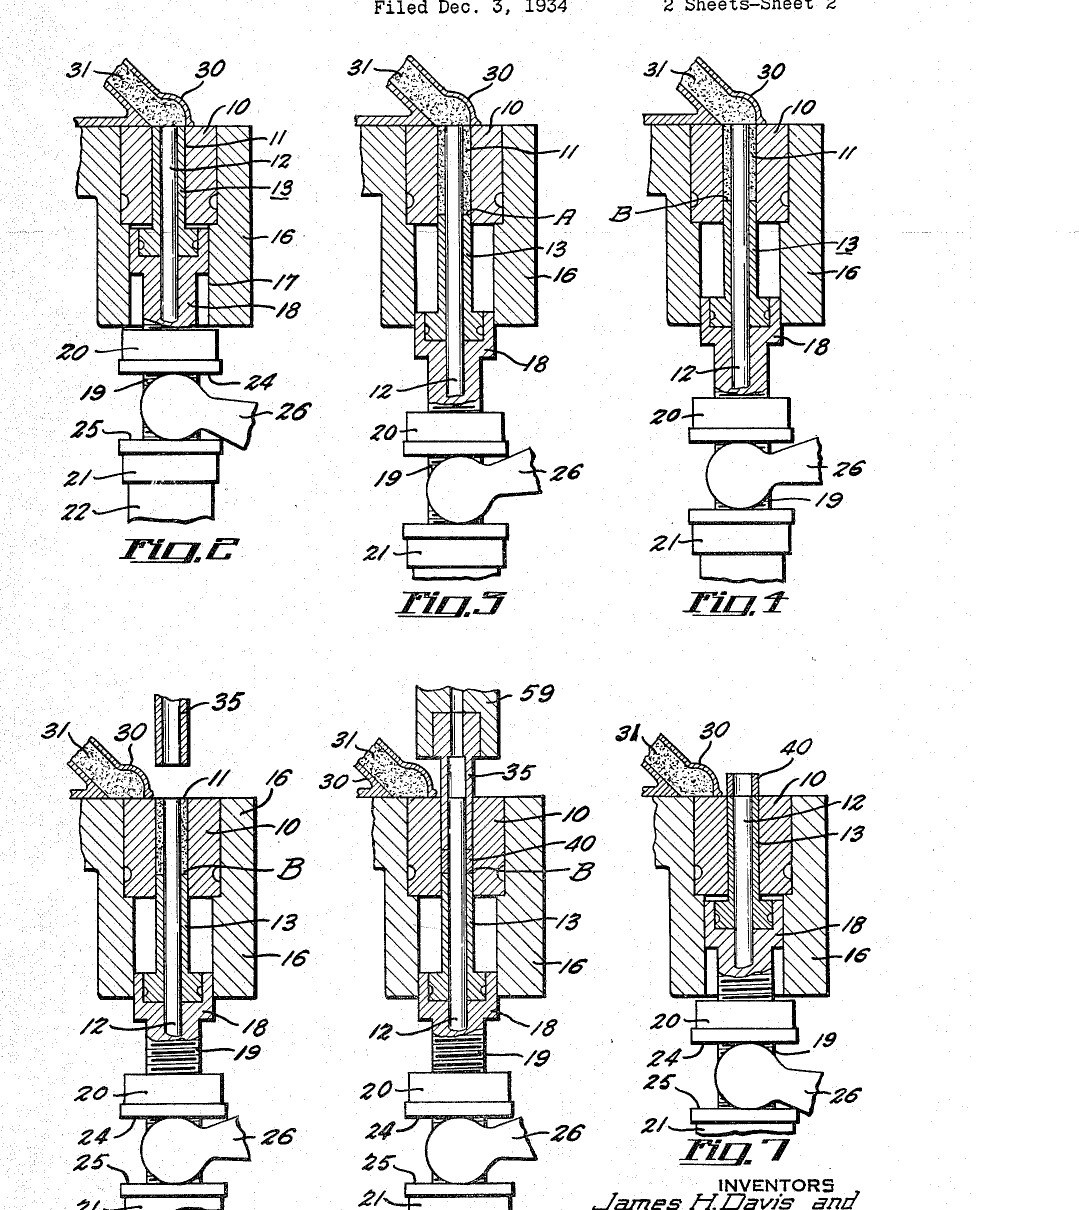

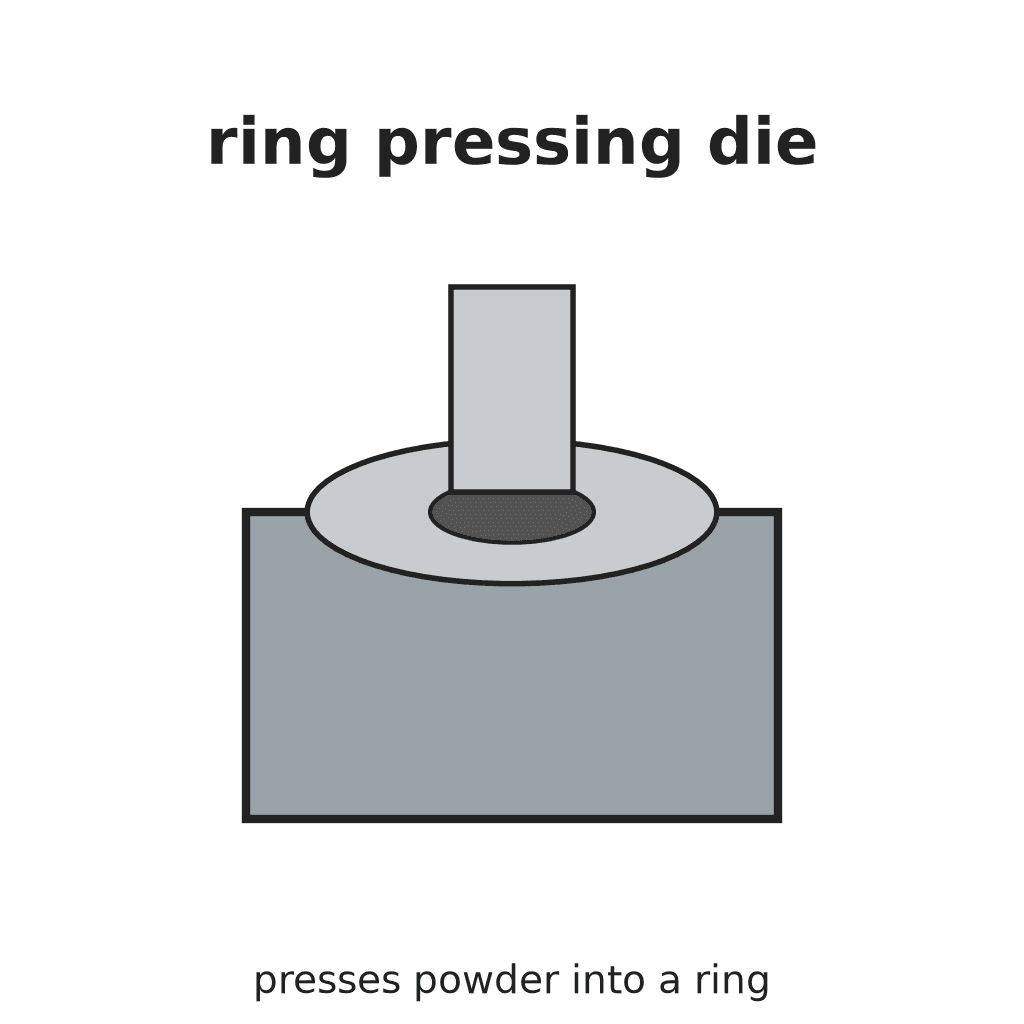
Ring Pressing Die: Core-Rod Die with Tubular Punches and Overfill Filling (Davis & Lemming, GM, US 2,127,994, 1938)
The die set for pressing metal or other powder into rings (bushings, ring cores). A die with a round cavity has a fixed core rod standing up through its middle, so the cavity is ring-shaped; a tube-shaped lower plunger slides up and down round the core rod, and a tube-shaped upper punch comes down to press. Filling is the trick: the lower plunger drops past the pressing point under a shaking shoe of powder, then rises a little to push the surplus back, so every ring gets the same charge with no trapped air.
Result: a die that presses powder into rings of even weight and density, ejected flush with the die top.
Source: J. H. Davis and J. C. Lemming (General Motors), US 2,127,994 (1938). Unknown: steels, sizes, clearances, pressure. Picture: the patent drawing.
Erfahren
Unknown
Anweisungen
1
1
Make the die, core rod and punches
Make the die, core rod and punches
Make a die block with a straight round cavity open at both ends. Make a core rod that stands up through the middle of the cavity, its top flush with the die top, threaded at its foot to be anchored in the base with a lock nut. Make a tube-shaped lower plunger that slides in the cavity round the core rod, and a tube-shaped upper punch to match. Not given: the steel, sizes, clearances. Ours: tool steel, turned and threaded on the lathe.
Materialien für diesen Schritt:
 Werkzeugstahl-Vierkantstab1 die, core rod, punches
 Unbekanntes Metall1 lock nut
Benötigte Werkzeuge:
 Metalldrehmaschine
 Gewindeschneidsatz
 Unbekannte Maße
2
2
Harden and finish
Harden and finish
The powder wears the cavity wall, so harden the die and punches and polish the working faces. Not given: the hardening or finish. Ours: a heat-treating oven and quench, then lapping with rouge along the stroke as for the disc die.
Benötigte Werkzeuge:
 Wärmebehandlungsofen
 Abschreckbottich
 Polierrot
3
3
Set it in the press
Set it in the press
Fix the die in a heavy table, anchor the core rod in the base through the lower plunger, and drive the lower plunger up and down by a cam lever. Fix the upper punch to the press crosshead. Beside the die, pivot a filling shoe full of powder that can swing over the cavity and shake. Ours: a punch press.
Benötigte Werkzeuge:
 Stanzpresse
4
4
Fill, press and eject
Fill, press and eject
Start with the lower plunger right up, filling the cavity. Swing the shaking shoe over and lower the plunger: the powder falls in after it by gravity and suction, so no air is trapped. Take the plunger below the pressing position, then raise it to the pressing position, pushing the surplus back into the shoe so every charge is the same. Swing the shoe away, bring down the upper punch to press the ring between the punches, lift the punch and raise the lower plunger to push the ring out flush with the die top; the returning shoe sweeps it aside. Sinter the rings afterwards.
Benötigte Werkzeuge:
StanzpresseMaterialien
2- 1 die, core rod, punchesPlatzhalter
- 1 lock nutPlatzhalter
Benötigte Werkzeuge
7- Platzhalter
- Platzhalter
- Platzhalter
- Platzhalter
- Platzhalter
- Platzhalter
- Platzhalter
Materialien verbundener Blueprints
10% Zuordnung
Tool-Steel Bar: Crucible Steel Drawn Out at a Cherry-Red Heat
von Forge
Schmied
32
0
0
0
5
0

10% Zuordnung
Building a Screw-Cutting Lathe — The Machine That Makes Other Machines
von Gimli
Metallbearbeitung
57
0
0
0
4
0

10% Zuordnung
Taps and Dies Cut on the Lathe, with Wrench and Stock
von Martin
Metallbearbeitung
25
0
0
0
6
0
Dieser Bauplan stellt her
CC0 Gemeinfrei
Dieser Blueprint ist unter CC0 veröffentlicht. Sie dürfen dieses Werk für jeden Zweck frei kopieren, ändern, verbreiten und verwenden, ohne um Erlaubnis zu fragen.
Unterstützen Sie den Maker, indem Sie Produkte über seinen Blueprint kaufen, wo er eine Maker-Provision von Anbietern festgelegt, verdient. Oder erstellen Sie eine neue Iteration dieses Blueprints und verbinden Sie ihn in Ihrem eigenen Blueprint, um Einnahmen zu teilen.