
KUNST
SCHÖNHEIT & WELLNESS
HANDWERK
KULTUR & GESCHICHTE
UNTERHALTUNG
UMFELD
ESSEN & GETRÄNKE
REVERSE ENGINEERING
WISSENSCHAFTEN
SPORT
TECHNOLOGIE
WEARABLES
Plastic Syringe Set: Moulded Barrel and a Soft Polyethylene Piston
Emma

Erstellt von

Emma

26. Oktober 2026SE
3
0
0
0
0

Plastic Syringe Set: Moulded Barrel and a Soft Polyethylene Piston

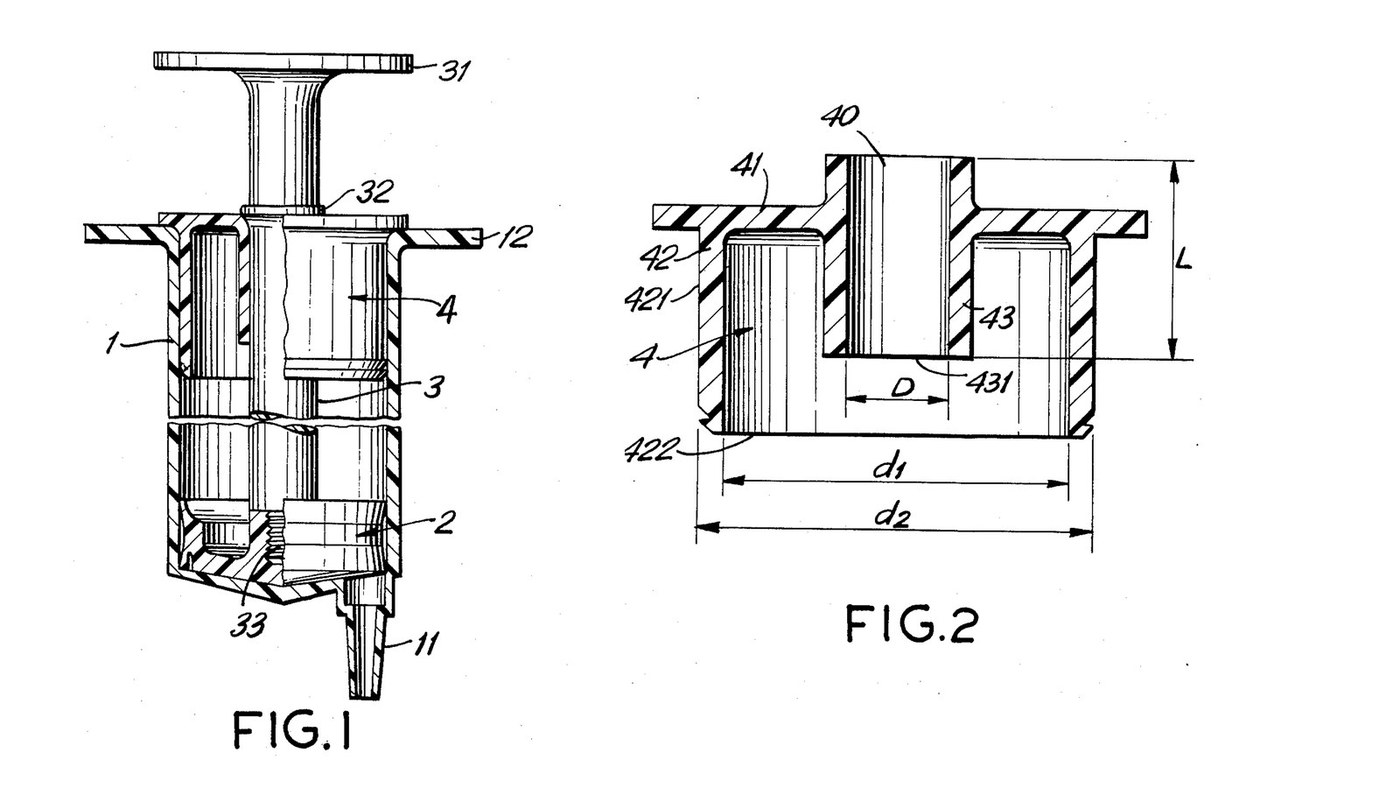
Four moulded parts make a plastic syringe with no rubber seal and no grease: a stiff barrel with a taper nozzle, a bell-shaped piston whose thin polyethylene lips seal against the wall, a slim plunger shaft, and a cap whose long sleeve guides the shaft so it cannot bend and tilt the piston (Adorján & Dávid, US 4,704,105, 1987). Mould one set of moulds per size for a set of syringes for hydraulic models. The piston figures are the patent's. Polypropylene, LDPE, the sizes and the mould making are ours. Not for medical use. The picture: Figs. 1-2.
Erfahren
3 days (moulds) + 1 hour per batch

Anweisungen

1

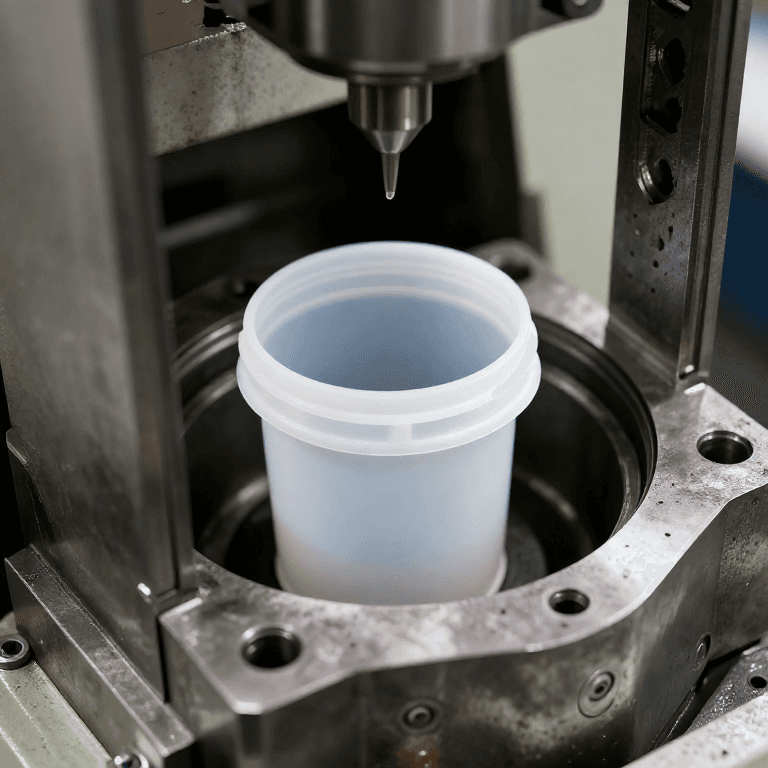
The moulding process

Drying, mould, injection, cooling and inspection all follow this blueprint. The steps below add only what the syringe needs.
2

Mill the barrel mould

Mill a two-plate mould for the barrel (1): a stiff-walled tube closed at one end by a nozzle (11) with a standard needle taper (ours: the Luer taper), and two finger grips (12) at the open end. One mould per syringe size you want, for example 5, 50 and 60 ml (ours).

Benötigte Werkzeuge:

FräsmaschineFräsmaschine
Aluminium-Rohling für Spritzgussform (2-Platten)Aluminium-Rohling für Spritzgussform (2-Platten)
SpritzgießformrahmenSpritzgießformrahmen
3

Mill the piston mould

The piston (2) is a bell: a rim 5-7 mm high whose two edges flare out into lips 0.3-0.5 mm thick, a front groove 0.3-0.5 mm wide and 2-2.5 mm deep, and a central shank. The lips must come out 0.2-0.6 mm wider than the barrel bore; the rim between them no wider than the bore.

Benötigte Werkzeuge:

FräsmaschineFräsmaschine
Aluminium-Rohling für Spritzgussform (2-Platten)Aluminium-Rohling für Spritzgussform (2-Platten)
SpritzgießformrahmenSpritzgießformrahmen
Digitaler Messschieber 6 ZollDigitaler Messschieber 6 Zoll
4

Mill the shaft and cap moulds

Shaft (3): thumb rest (31), a bead (32) and an end projection (33) a little larger than the piston's bore. Cap (4): a disc with an outer collar (42) that force-fits the barrel and an inner sleeve (43) at least as long as the shaft is thick.

Benötigte Werkzeuge:

FräsmaschineFräsmaschine
Aluminium-Rohling für Spritzgussform (2-Platten)Aluminium-Rohling für Spritzgussform (2-Platten)
SpritzgießformrahmenSpritzgießformrahmen
5

Mould the barrels

Mould the barrels from virgin plastic. The patent asks only for a rigid plastic; ours: polypropylene.

Materialien für diesen Schritt:

PolypropylengranulatPolypropylengranulat1 batch

Benötigte Werkzeuge:
GranulattrocknerGranulattrockner
SpritzgießmaschineSpritzgießmaschine
6

Mould the pistons

Mould the pistons from virgin polyethylene, which the patent wants at 65-90 degrees Shore (scale not stated). Ours: LDPE; check your grade's data sheet.

Materialien für diesen Schritt:

LDPE-GranulatLDPE-Granulat1 batch

Benötigte Werkzeuge:

GranulattrocknerGranulattrockner
SpritzgießmaschineSpritzgießmaschine
7

Mould the shafts and caps

Mould shafts and caps. These may be reprocessed plastic, as they never touch the liquid. Ours: polypropylene.

Materialien für diesen Schritt:

PolypropylengranulatPolypropylengranulat1 batch

Benötigte Werkzeuge:

SpritzgießmaschineSpritzgießmaschine
8

Check the lip size

Measure the barrel bore and a piston's lips. The lips must be 0.2-0.6 mm wider than the bore. Adjust the mould if not.

Benötigte Werkzeuge:

Digitaler Messschieber 6 ZollDigitaler Messschieber 6 Zoll
9

Snap the shaft into the piston

Push the shaft's projection through the small bore at the back of the piston until it snaps into the wider cavity behind it.
10

Assemble

Push the piston into the barrel. Thread the shaft through the cap's sleeve and force the cap's outer collar into the open end of the barrel. Its end face now stops the piston when you draw it fully back.
11

Lock the cap

Press two dents, opposite each other, through the barrel wall into the cap collar with a hot tool so the cap cannot pull out. Ours: a soldering iron tip.

Benötigte Werkzeuge:

Elektrischer LötkolbenElektrischer Lötkolben
12

Test the seal

Draw water and push it out, along the whole stroke, with no grease. It should move smoothly from the start and not leak past the lips. Note the size and file it into your set.

Benötigte Werkzeuge:

WasserWasser
BecherglasBecherglas

Materialien

2

Benötigte Werkzeuge

9

CC0 Gemeinfrei

Dieser Blueprint ist unter CC0 veröffentlicht. Sie dürfen dieses Werk für jeden Zweck frei kopieren, ändern, verbreiten und verwenden, ohne um Erlaubnis zu fragen.

Unterstützen Sie den Maker, indem Sie Produkte über seinen Blueprint kaufen, wo er eine Maker-Provision von Anbietern festgelegt, verdient. Oder erstellen Sie eine neue Iteration dieses Blueprints und verbinden Sie ihn in Ihrem eigenen Blueprint, um Einnahmen zu teilen.

Diskussion

(0)

Anmelden um an der Diskussion teilzunehmen

Kommentare werden geladen...