KUNST
SCHÖNHEIT & WELLNESS
HANDWERK
KULTUR & GESCHICHTE
UNTERHALTUNG
UMFELD
ESSEN & GETRÄNKE
REVERSE ENGINEERING
WISSENSCHAFTEN
SPORT
TECHNOLOGIE
WEARABLES



The Clapboard Gauge: One Man, Straight Siding, Even in the Wind
Siding put on with compasses and set-nails takes two men, mars the boards with nail holes, and lets each course drift a little from the last.
Stephen Inman of Rockford, Illinois, received US 33,199, dated 3 September 1861, for a combined siding hook and gauge "so arranged as to combine in one and to answer the purpose of a square, siding-hook, chalk-line, compasses, and set-nails used in siding up buildings". Its lip catches under the course already nailed, a cross-piece squares it to the board, an adjustable slider sets the exposure, and springs hold the next board in place, so "only one is required, for the springs N keep the siding in place."
This rung works out how much straighter a gauge keeps the courses, then builds two gauges from hardwood and lays strips on a mock wall.
Fortgeschritten
About 4 hours
Anweisungen
1
1
Course error, measured against gauged
Course error, measured against gauged
Jupyter-Notebook wird geladen …
2
2
Square to the board
Square to the board
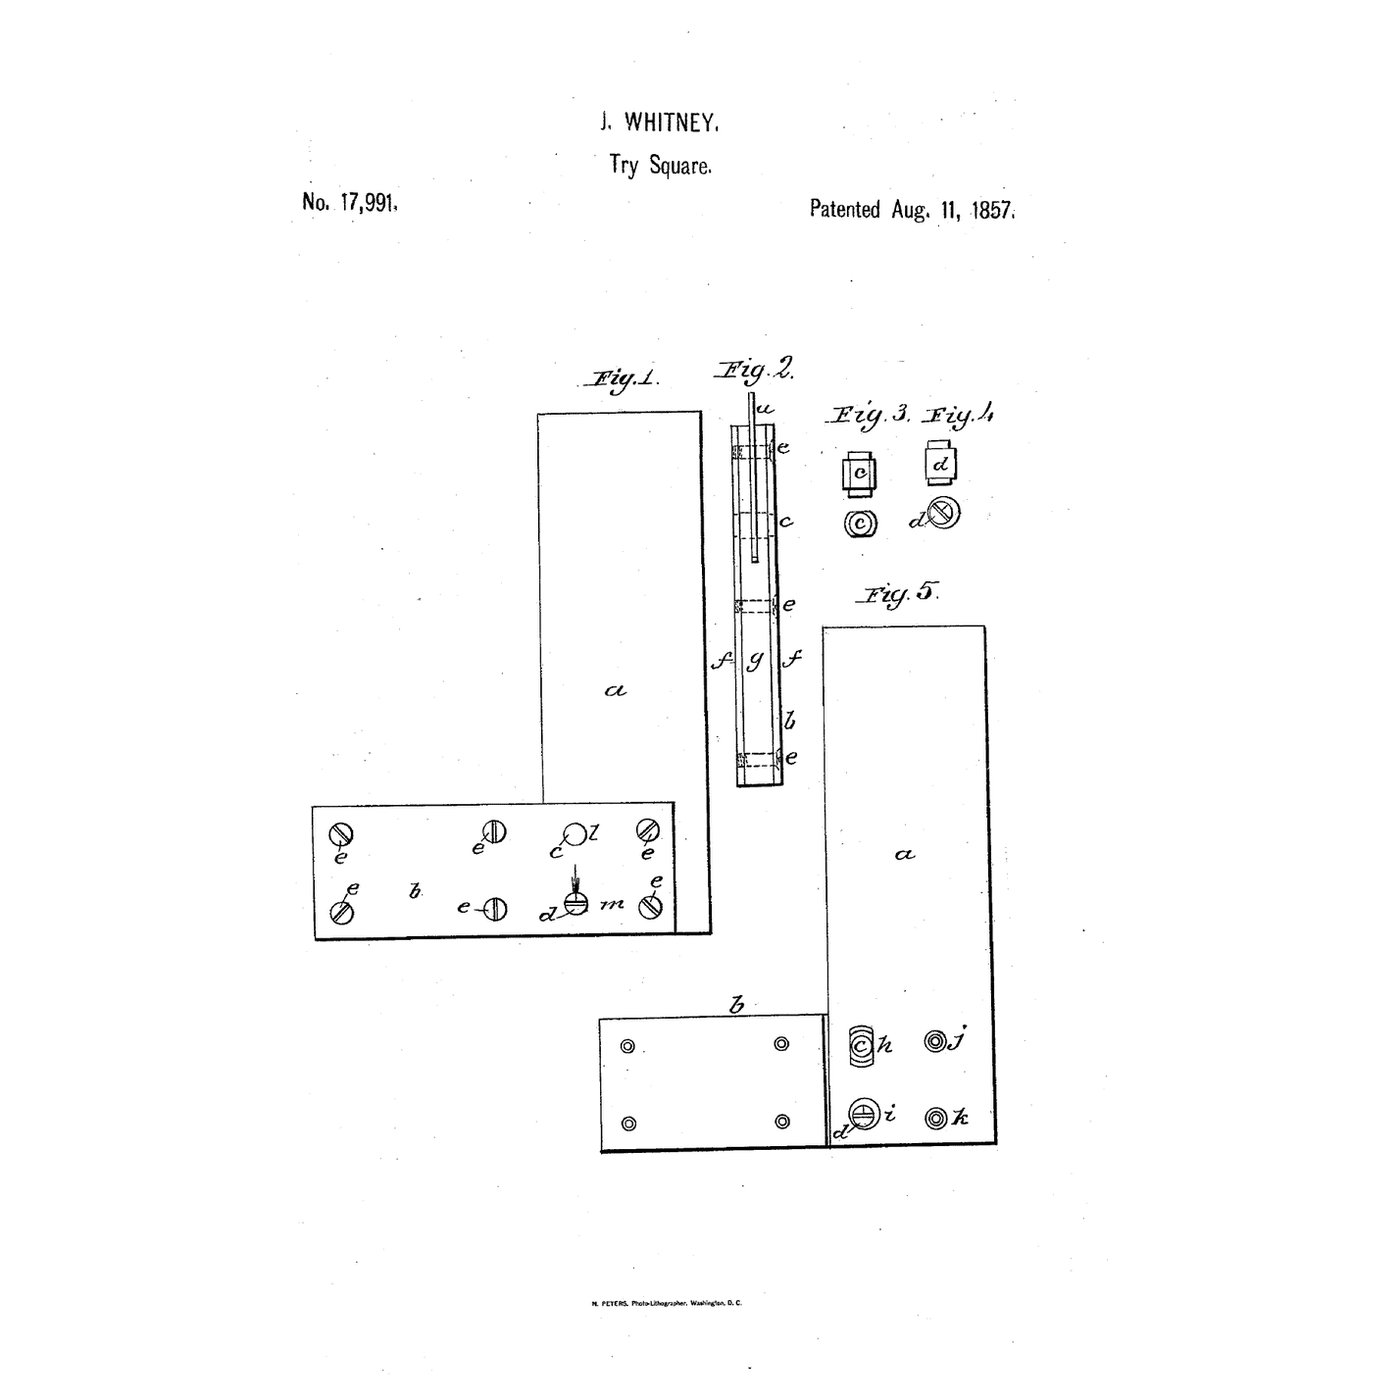
The embedded blueprint trues a try square. Inman's cross-piece does the square's job on the wall, bringing the gauge at right angles to the siding.
3
3
Read US 33,199
Read US 33,199
"In Fig. 1, E is a shank, to the upper part of which is secured the wedge or lip F, that is forced up between two pieces of siding to hold the hook in place. On the outside of this shank is secured by means of the thumb-screw J the slider or standard H, that forms a rest K on the top and terminates in the piece L, to which is jointed the gage M."
"In the way siding is usually put on, compasses have to be used to measure the distance and then set-nails driven in, which consumes much time and mars the siding with the holes after the nails are withdrawn, and does not insure as much accuracy of measurement as where two or more of these hooks are used, if they are adjusted and placed in the siding just alike."
4
4
Build two gauges and side a mock wall
Build two gauges and side a mock wall
**Shank and lip.** For each gauge, saw a shank 30 × 3 cm from hardwood board and glue a thin wedge-shaped lip across its top face to slip up under the bottom edge of a board. Screw a cross-piece across the shank just below the lip so it bears against the face of the course below and squares the gauge.
**Slider.** Saw a slider 12 × 3 cm, cut a slot 6 cm long down it with the coping saw, and hold it on the shank with a bolt and nut through the slot, so it can be set to the exposure. Screw a block across its top as the rest the next board sits on.
**Spring.** Screw a curved strip of spring steel to the slider so it presses the new board against the wall.
**Test.** Screw a plywood sheet upright as the wall and cut strips 10 cm wide from pine board as siding. Nail the first strip level. Set both gauges to 7 cm exposure, hook them under it, rest the next strip on them, and nail it. Repeat for eight courses. Side a second sheet by marking each course with the ruler and pencil. Measure each course's exposure with the caliper on both walls and compare the spread.
Materialien für diesen Schritt:
 Hartholzbrett1 Stück
 Sperrholzplatte1 Stück
 Kiefernbrett2 Stück
 Federstahlband1 Stück
 Sechskantschrauben-Sortiment1 Stück
 Sechskantmutter2 Stück
 Holzschrauben12 Stück
 Holzleim5 ml
 Nägel40 Stück
Benötigte Werkzeuge:
 Handsäge
 Laubsäge (Schweifsäge)
 Akkubohrschrauber
 Bohrersatz
 Schraubendreher-Satz
 Rollgabelschlüssel
 Hammer
 Anschlagwinkel
 Lineal
 Digitaler Messschieber 6 Zoll
 Bleistift
5
5
Siding that runs out of level, slips or gaps
Siding that runs out of level, slips or gaps
Clapboard gauge troubleshooting.
Flow
Loading...
6
6
History and honest limits
History and honest limits
**Stephen Inman** of Rockford, Winnebago County, Illinois, received US 33,199, dated 3 September 1861. His slider was adjusted by ratchets and a hand-screw, the gauge was jointed so it could be lifted when a board had to be scribed round a window, and he did not claim the metal siding hook itself, only the cross-piece combined with the gauge.
**Honest limits.** Hardwood, a slotted slider and a spring-steel strip stand in for his hook, ratchet slider and springs, and a plywood mock wall for a building. The notebook's per-course errors are examples, not measurements. Your caliper readings are the result.
Materialien
9- 1 StückPlatzhalter
- 1 StückPlatzhalter
- 2 StückPlatzhalter
- 1 StückPlatzhalter
- 1 StückPlatzhalter
- 2 StückPlatzhalter
- 12 StückPlatzhalter
- 5 mlPlatzhalter
- 40 StückPlatzhalter
Benötigte Werkzeuge
11- Platzhalter
- Platzhalter
- 1 vendor sell this, none ship to you yetPlatzhalter
- Platzhalter
- Platzhalter
- Platzhalter
- Platzhalter
- Platzhalter
- Platzhalter
- Platzhalter
- 1 vendor sell this, none ship to you yetPlatzhalter
Verwandte Blueprints
Diese Blueprints teilen Wissen — Techniken, Materialien oder Prinzipien


CC0 Gemeinfrei
Dieser Blueprint ist unter CC0 veröffentlicht. Sie dürfen dieses Werk für jeden Zweck frei kopieren, ändern, verbreiten und verwenden, ohne um Erlaubnis zu fragen.
Unterstützen Sie den Maker, indem Sie Produkte über seinen Blueprint kaufen, wo er eine Maker-Provision von Anbietern festgelegt, verdient. Oder erstellen Sie eine neue Iteration dieses Blueprints und verbinden Sie ihn in Ihrem eigenen Blueprint, um Einnahmen zu teilen.