KUNST
SCHÖNHEIT & WELLNESS
HANDWERK
KULTUR & GESCHICHTE
UNTERHALTUNG
UMFELD
ESSEN & GETRÄNKE
REVERSE ENGINEERING
WISSENSCHAFTEN
SPORT
TECHNOLOGIE
WEARABLES
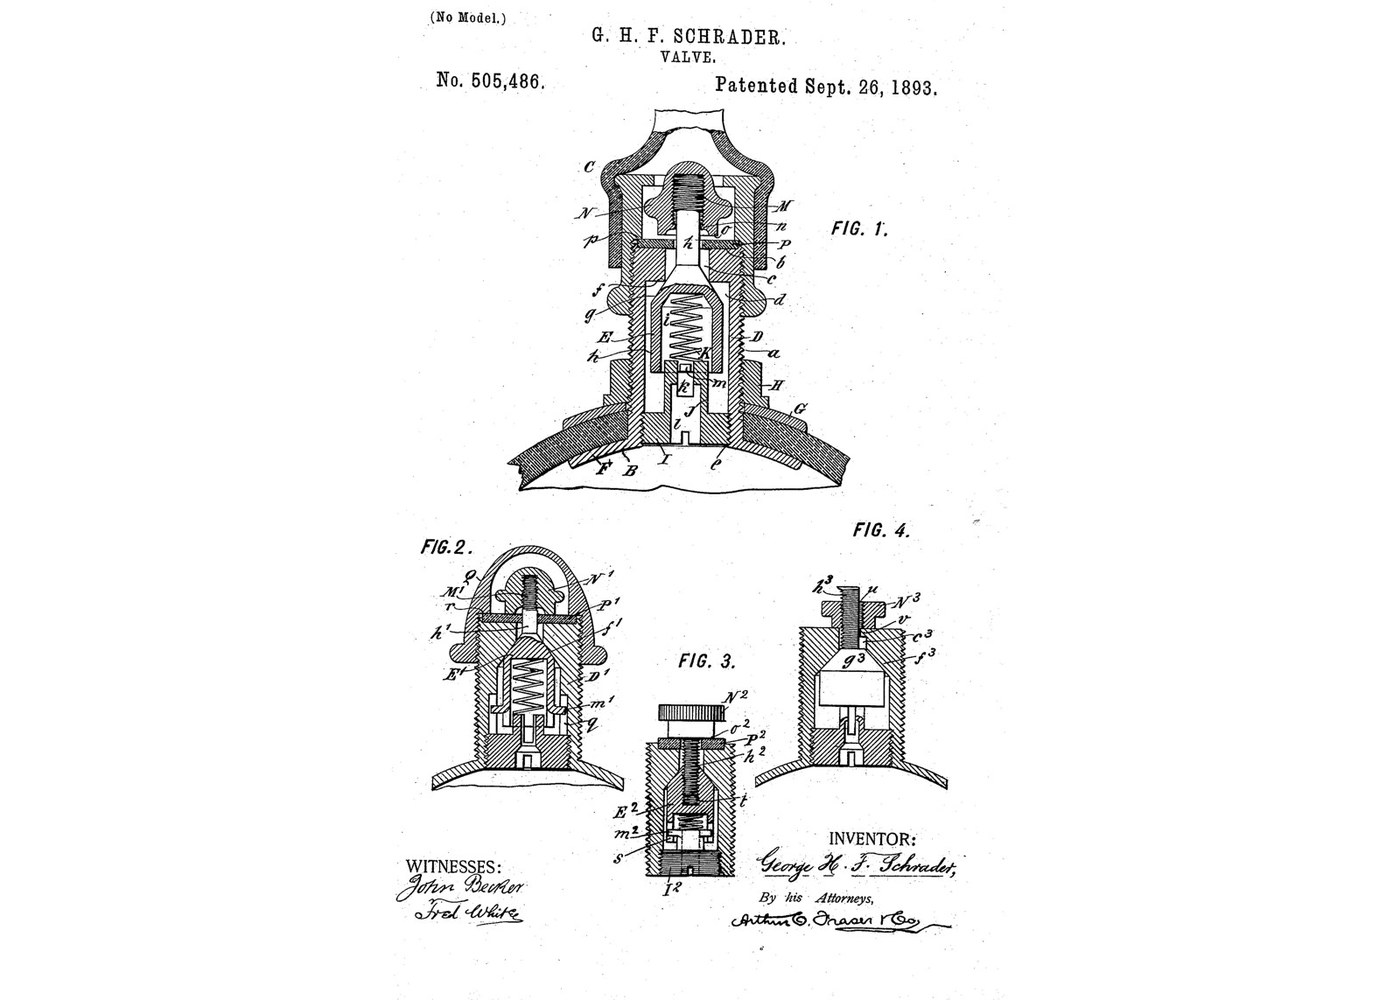


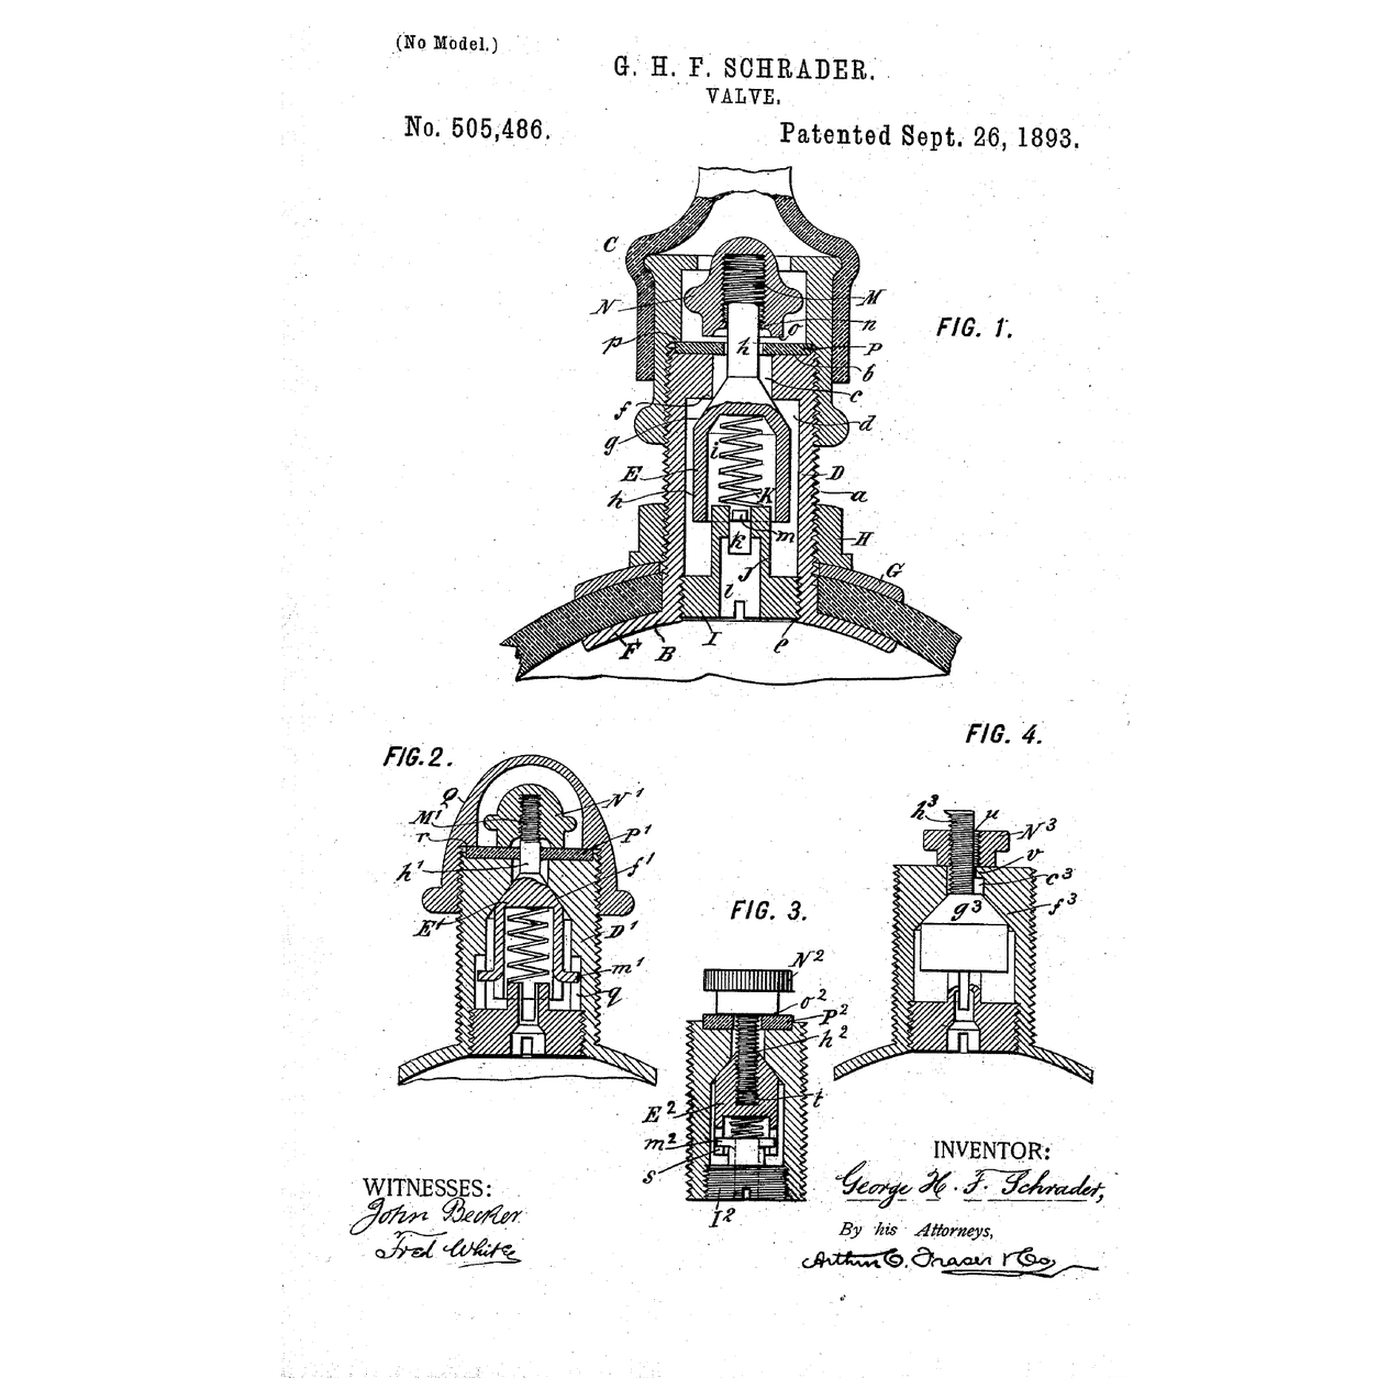
Tire Valve: Spring-Closed Plunger and Locking Hand Nut (Schrader 1893)
Schrader's bicycle-tire valve: a plunger in a tube, pushed onto its seat by a spring and by the air in the tyre. The pump's air lifts it, the tyre's air closes it. A hand nut on the stem then screws down on a washer to lock it tight, and a lip on the nut stops it coming off the stem.
Source: George H. F. Schrader, US 505,486 (1893), Fig. 1. Unknown: the metals, the packing and the sizes. Schrader gives none of them, so they are linked to unknown heads. Lathe work and grinding the seat are ours. Picture: the patent's drawing.
Erfahren
2 days
Anweisungen
1
1
Turn the casing
Turn the casing
Turn a tube with a flange at its lower end and a thread up its outside, ending in a socketed top face. Bore a narrow aperture down from that face into a wider space, leaving a square-cornered shoulder between them: that corner is the seat. Thread the inside of the lower end. Turn a nut for the outer thread. Unknown: the metal and the sizes.
Materialien für diesen Schritt:
 Unbekanntes Metall1 as required
Benötigte Werkzeuge:
 Metalldrehmaschine
 Drechselwerkzeug-Set (HSS)
 Gewindeschneidsatz
 Messschieber
 Unbekannte Maße
2
2
Turn the plunger and its plug
Turn the plunger and its plug
Turn the plunger: a conical face that meets the seat, a smooth stem above it rising through the aperture with a threaded head at its end, and below it a hollow cylinder nearly filling the casing, open at the bottom. Turn a plug that screws into the casing's lower end, with a stub that fits loosely inside the hollow, a cross groove across the stub and a hole through the plug. Strike a lug in from the plunger's lower edge so it rides in the groove and stops the plunger turning.
Materialien für diesen Schritt:
Unbekanntes Metall1 as requiredBenötigte Werkzeuge:
MetalldrehmaschineDrechselwerkzeug-Set (HSS)Gewindeschneidsatz FeilensatzUnbekannte Maße
3
3
Make the spring, washers and hand nut
Make the spring, washers and hand nut
Wind a spring to fit inside the plunger's hollow. Cut a packing washer for the socket on top of the casing and a washer for the tyre side. Turn a hand nut that screws onto the stem head, with a seating face underneath, and turn its lip inwards round the stem so it overhangs the head. Unknown: the spring metal and the packing.
Materialien für diesen Schritt:
Unbekanntes Metall1 as required Unbekannte Packung2 Stück
Benötigte Werkzeuge:
Metalldrehmaschine KombizangeUnbekannte Maße
4
4
Grind the seat and assemble
Grind the seat and assemble
Grind the plunger's conical face onto the casing seat, as Schrader recommends alongside the washer. Put the spring in the plunger and screw in the plug from below, the lug in the groove. Fit the packing washer in the socket and the hand nut on the stem. Clamp the casing through the tyre between its flange and the outer washer and nut. Pump: the air lifts the plunger. Stop: spring and tyre pressure close it. Screw the hand nut down onto the washer to lock it.
Benötigte Werkzeuge:
Kombizange Schutzbrille
Materialien
2- 1 as requiredPlatzhalter
- 2 StückPlatzhalter
Benötigte Werkzeuge
8- Platzhalter
- Platzhalter
- Platzhalter
- Platzhalter
- Platzhalter
- Platzhalter
- Platzhalter
- Platzhalter
Dieser Bauplan stellt her

Verwandte Blueprints
Diese Blueprints teilen Wissen — Techniken, Materialien oder Prinzipien
CC0 Gemeinfrei
Dieser Blueprint ist unter CC0 veröffentlicht. Sie dürfen dieses Werk für jeden Zweck frei kopieren, ändern, verbreiten und verwenden, ohne um Erlaubnis zu fragen.
Unterstützen Sie den Maker, indem Sie Produkte über seinen Blueprint kaufen, wo er eine Maker-Provision von Anbietern festgelegt, verdient. Oder erstellen Sie eine neue Iteration dieses Blueprints und verbinden Sie ihn in Ihrem eigenen Blueprint, um Einnahmen zu teilen.