KUNST
SCHÖNHEIT & WELLNESS
HANDWERK
KULTUR & GESCHICHTE
UNTERHALTUNG
UMFELD
ESSEN & GETRÄNKE
REVERSE ENGINEERING
WISSENSCHAFTEN
SPORT
TECHNOLOGIE
WEARABLES
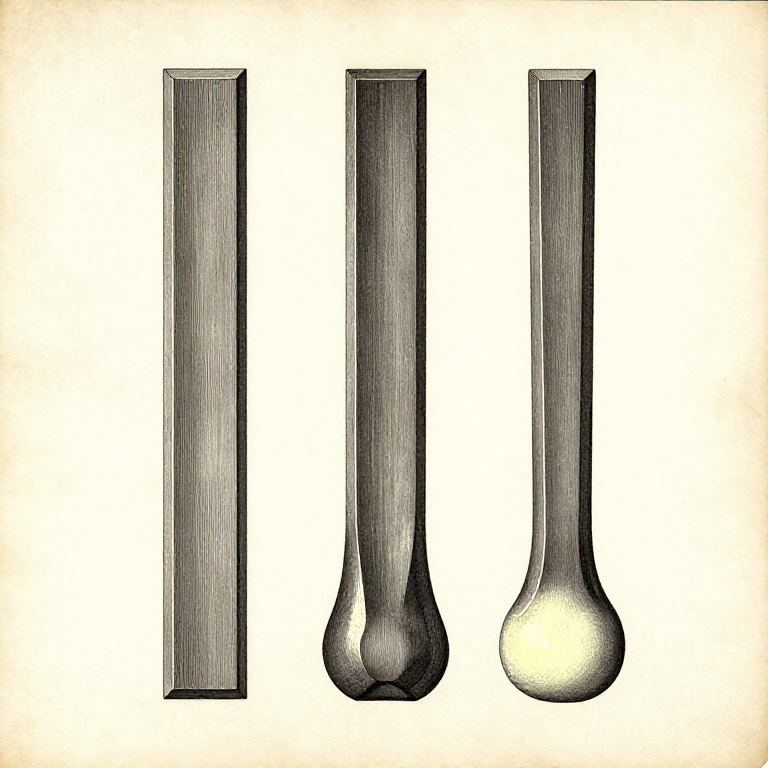


Upsetting: Making It Thicker by Making It Shorter
Upsetting is drawing out in reverse: shortening a bar to make part of it thicker. It is how you get a head on a bolt, a boss in the middle of a bar, or extra material where a joint needs it.
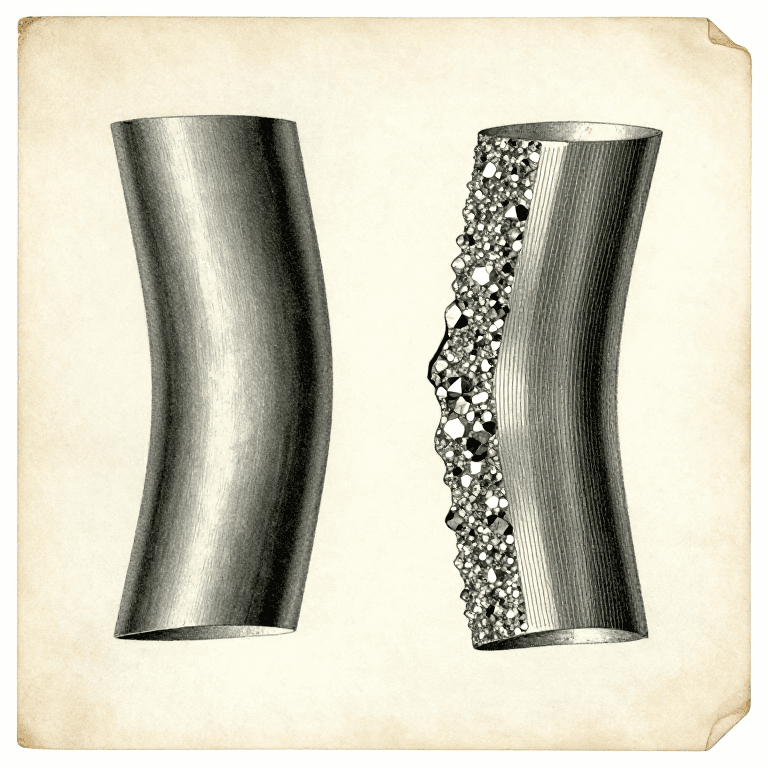
It is also the hardest basic operation, because a hot bar struck on its end wants to BUCKLE sideways rather than compress. Control that and upsetting works; lose it and you get an S-bend that has to be straightened out or cut off.
The answer is localised heat and short unsupported length — the same two levers, used deliberately.
Erfahren
3 hours
Anweisungen
1
1
Heat ONLY the part you want to thicken
Heat ONLY the part you want to thicken
Bring a short section to a bright forging heat and leave the rest of the bar dark. Cold metal will not move, so the cold section acts as a rigid column and the deformation is confined to the hot part.
This is the heating-evenly rung used in reverse: there you were fighting uneven heat, here you are creating it on purpose. Quench the neighbouring section in water if it has picked up too much heat — a few seconds is enough.
The length of hot metal is what you are controlling. A long hot section buckles; a short one upsets. As a rule of thumb, keep the unsupported hot length under about two and a half times the bar's thickness.
Materialien für diesen Schritt:
 Baustahl-Flachstange1 Stück
 Wasser1 Stück
Benötigte Werkzeuge:
 Schmiedeesse
 Schmiedezange
 Getönte Schmiedeschutzbrille
 Lederstulpenhandschuhe
2
2
Strike along the axis, dead square
Strike along the axis, dead square
Stand the bar on end on the anvil face and strike straight down its axis, or hold it vertically and hammer the top. Every blow must be along the length of the bar, not at an angle.
An angled blow bends rather than upsets, and once a bend has started every subsequent blow makes it worse, because the bar is now a lever. Stop at the first sign of it and straighten before continuing.
For a heavy bar, reverse the method: heat the end, then drop the bar end-down onto the anvil so its own weight does the upsetting. The mass of the bar delivers far more energy than a hammer can, and it is automatically axial.
Materialien für diesen Schritt:
Baustahl-Flachstange1 StückBenötigte Werkzeuge:
 Amboss
 SchmiedehammerSchmiedezangeLederstulpenhandschuhe
3
3
Straighten early and often
Straighten early and often
Check for straightness every few blows by sighting along the bar, and correct any bend immediately while the section is still hot.
A small bend corrected now takes two blows. The same bend after ten more upsetting blows has become a fold, and a fold in hot steel welds shut on itself and becomes a permanent internal flaw — a COLD SHUT — which is a crack waiting to open under load.
That is why upsetting is rated harder than drawing out. Drawing out forgives inattention; upsetting punishes it with a defect you often cannot see until the piece fails.
Materialien für diesen Schritt:
Baustahl-Flachstange1 StückBenötigte Werkzeuge:
AmbossSchmiedehammer Lineal
 Einschlaglupe
4
4
Or design so you never have to
Or design so you never have to
The honest professional answer to upsetting is often to avoid it. Start with a bar thick enough for the biggest section and DRAW DOWN everything else, rather than starting thin and upsetting a lump.
That is usually less work, always more controllable, and it is what the volume arithmetic in the drawing-out rung is for: pick the stock from the thickest part of the finished piece.
Upsetting earns its place where the thick section is in the MIDDLE of a long bar, or where drawing down would waste an unreasonable amount of material. Knowing which situation you are in before lighting the fire is the real skill here.
Materialien für diesen Schritt:
Baustahl-Flachstange2 StückBenötigte Werkzeuge:
 RechnerLineal
Verwandte Blueprints
Diese Blueprints teilen Wissen — Techniken, Materialien oder Prinzipien
CC0 Gemeinfrei
Dieser Blueprint ist unter CC0 veröffentlicht. Sie dürfen dieses Werk für jeden Zweck frei kopieren, ändern, verbreiten und verwenden, ohne um Erlaubnis zu fragen.
Unterstützen Sie den Maker, indem Sie Produkte über seinen Blueprint kaufen, wo er eine Maker-Provision von Anbietern festgelegt, verdient. Oder erstellen Sie eine neue Iteration dieses Blueprints und verbinden Sie ihn in Ihrem eigenen Blueprint, um Einnahmen zu teilen.