
Zusammenarbeit
KUNST
SCHÖNHEIT & WELLNESS
HANDWERK
KULTUR & GESCHICHTE
UNTERHALTUNG
UMFELD
ESSEN & GETRÄNKE
REVERSE ENGINEERING
WISSENSCHAFTEN
SPORT
TECHNOLOGIE
WEARABLES
Sprung-Leg Tubing Cutter: a Bent Rod With a Disk Outside and a Roller Inside, the Handle's Screw Bends One Leg In (Zeiler, 1958)
Forge

Erstellt von

Forge

13. November 2026NO
0
0
0
0
0

Sprung-Leg Tubing Cutter: a Bent Rod With a Disk Outside and a Roller Inside, the Handle's Screw Bends One Leg In (Zeiler, 1958)

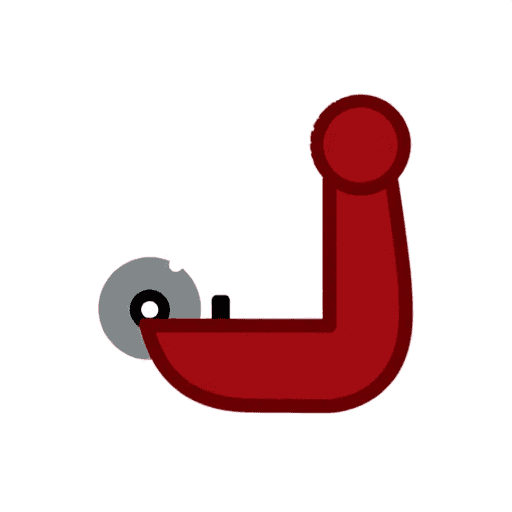
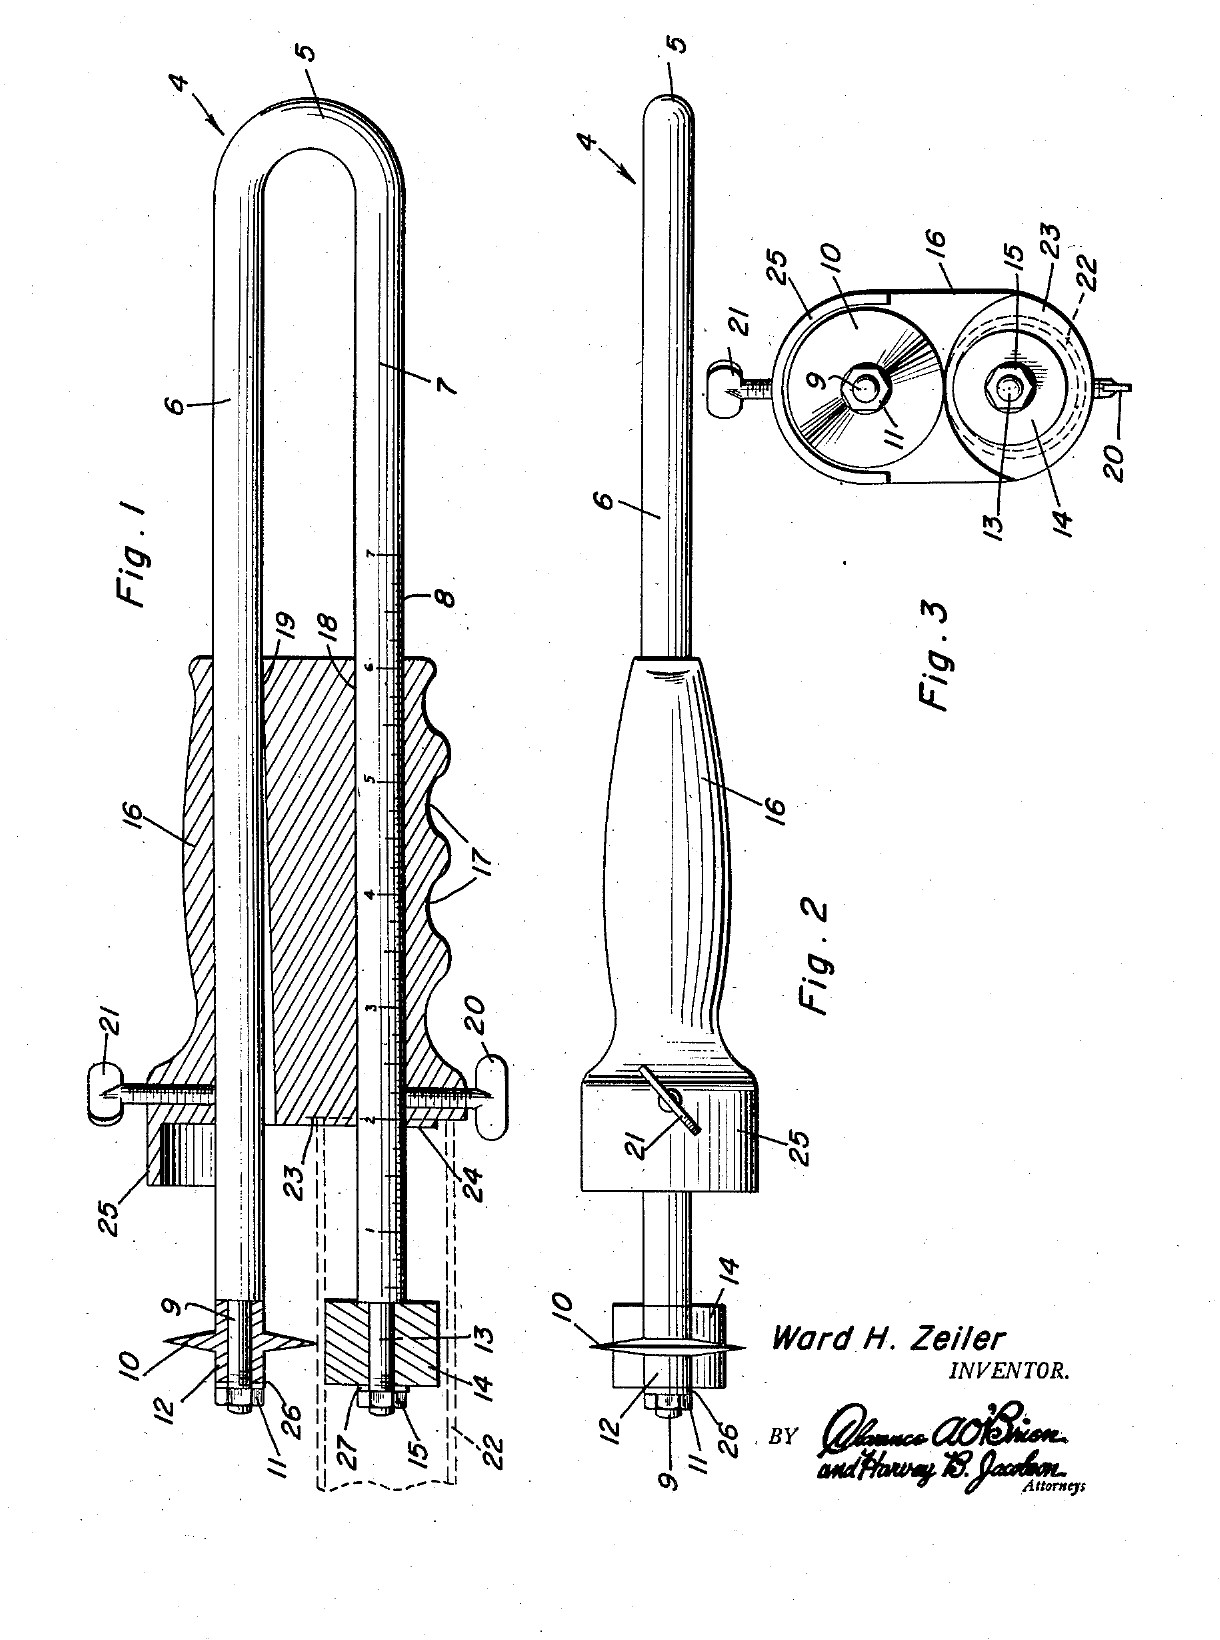
Ward H. Zeiler of Holyoke, Colorado, received US 2,821,781, dated 4 February 1958, for a plumber's tubing cutter that cuts a tube square, to length, near its end. The frame is one springy rod bent into a U. The lower leg goes into the tube and carries a roller. The upper leg carries a cutting disk outside the tube. A handle slides along both legs. Its front end stops against the tube end, so the cut length is read off a scale on the lower leg. A screw in the handle bends the upper leg in and presses the disk onto the tube, and turning the tool cuts it off. All sizes are ours.
Fortgeschritten
About 2 days

Anweisungen

1

Why the frame must spring

Jupyter-Notebook wird geladen …
2

Read US 2,821,781

"The leg 7 is then inserted in the tube 22 and the roller 14 and the projection 24 are engaged in the upper portion of said tube. The screw 21 is then tightened for bending the leg 6 of the frame 4, thus engaging the knife 10 with the periphery of the tube 22."
3

Print the template

The bent frame, its ends, the disk, roller and handle at 1:1, with the oval bore, the screws and the scale. print at 100 % (check the 50 mm bar).
DesigndateiPDFCC0 - Free
4

Bend the frame

Cut 470 mm of 6 mm spring steel wire. Heat the middle 40 mm red with the torch and bend it round a 10 mm bar into a U with the legs 16 mm apart, and straighten the legs parallel. Heat the last 25 mm of each leg red and let it cool slowly in the dying forge, so the ends are soft enough to file and thread. Leave the rest of the legs as they are: they must spring.

Materialien für diesen Schritt:

FederstahldrahtFederstahldraht1 Stück

Benötigte Werkzeuge:
HartlötbrennerHartlötbrenner
EsseEsse
SchmiedezangeSchmiedezange
SchraubstockSchraubstock
Schlosserhammer mit KugelfinneSchlosserhammer mit Kugelfinne
Bügelsäge (Metallsäge)Bügelsäge (Metallsäge)
SchweißerhandschuheSchweißerhandschuhe
SchutzbrilleSchutzbrille
5

Thread the leg ends

Turn or file the last 24 mm of each leg to 5 mm, leaving a square shoulder, and cut an M5 thread on the last 8 mm with the die.

Benötigte Werkzeuge:

MetalldrehmaschineMetalldrehmaschine
Dreibackenfutter für die DrehmaschineDreibackenfutter für die Drehmaschine

DrehmeißelDrehmeißel
FeilensatzFeilensatz
GewindeschneidsatzGewindeschneidsatz
Digitaler Messschieber 6 ZollDigitaler Messschieber 6 Zoll
SchneidölSchneidöl
6

Turn the disk and the roller

Disk: chuck a tool steel bar, turn 12 mm of it to 18 mm, drill it 5 mm, and turn the front 6 mm to a 50 degree edge, sharp in its middle. Turn the next 4 mm down to a 10 mm hub and part it off. Roller: turn 10 mm mild steel bar 16 mm long and drill it 5.2 mm, so it spins freely on the leg.

Materialien für diesen Schritt:

WerkzeugstahlstangeWerkzeugstahlstange1 Stück
Rundstahl aus BaustahlRundstahl aus Baustahl1 Stück

Benötigte Werkzeuge:

MetalldrehmaschineMetalldrehmaschine
Dreibackenfutter für die DrehmaschineDreibackenfutter für die Drehmaschine
DrehmeißelDrehmeißel
AbstechstahlAbstechstahl
Satz ZentrierbohrerSatz Zentrierbohrer
BohrersatzBohrersatz
Digitaler Messschieber 6 ZollDigitaler Messschieber 6 Zoll
SchutzbrilleSchutzbrille
7

Harden and temper

Heat the disk to a cherry red, until a magnet no longer sticks, and quench it in water, moving it about. Rub it bright with a stone, warm it on a piece of steel plate over the fire, and quench again as soon as it turns a light straw colour.

Benötigte Werkzeuge:

EsseEsse
SchmiedezangeSchmiedezange
Kleiner MagnetKleiner Magnet
AbschreckbottichAbschreckbottich
WasserWasser
SchleifsteinSchleifstein
SchweißerhandschuheSchweißerhandschuhe
SchutzbrilleSchutzbrille
8

Make the handle

Saw 90 mm of 32 mm aluminium bar and face the ends. Drill two 6.2 mm holes through it lengthways, 16 mm apart, each 8 mm off the centre. With a round file, open the front 70 mm of the upper hole towards the lower one, 1.8 mm at the front face, tapering to nothing. Drill and tap M6 into the upper hole from the top, 12 mm from the front, and into the lower hole from below, 14 mm from the front. Saw and file away the lower half of the front 8 mm, leaving a 10 mm round boss round the lower hole. File three finger grooves underneath.

Materialien für diesen Schritt:

Aluminium-RundstangeAluminium-Rundstange1 Stück

Benötigte Werkzeuge:

Bügelsäge (Metallsäge)Bügelsäge (Metallsäge)
MetalldrehmaschineMetalldrehmaschine
Dreibackenfutter für die DrehmaschineDreibackenfutter für die Drehmaschine
StandbohrmaschineStandbohrmaschine
MaschinenschraubstockMaschinenschraubstock
BohrersatzBohrersatz
GewindeschneidsatzGewindeschneidsatz
FeilensatzFeilensatz
NadelfeilensatzNadelfeilensatz
Digitaler Messschieber 6 ZollDigitaler Messschieber 6 Zoll
9

Make the guard

Cut a strip of brass sheet 12 mm wide and 50 mm long, bend it into a half round hood that reaches 12 mm past the handle's front over the disk, and fix its back end on top of the handle with two small screws.

Materialien für diesen Schritt:

MessingblechMessingblech1 Stück
Zylinderschraube mit InnensechskantZylinderschraube mit Innensechskant2 Stück

Benötigte Werkzeuge:

Bügelsäge (Metallsäge)Bügelsäge (Metallsäge)
FeilensatzFeilensatz
StandbohrmaschineStandbohrmaschine
BohrersatzBohrersatz
GewindeschneidsatzGewindeschneidsatz
SchraubstockSchraubstock
10

Assemble

Slide the handle onto the legs from the open end, the upper leg in the oval bore. Put the disk on the upper leg's end, hub outwards, then a washer and an M5 nut, snug enough that the disk still turns. Fit the roller the same way on the lower leg. Screw in the M6 feed screw on top and the setscrew below.

Materialien für diesen Schritt:

UnterlegscheibeUnterlegscheibe2 Stück
SechskantmutterSechskantmutter2 Stück
Zylinderschraube mit InnensechskantZylinderschraube mit Innensechskant1 Stück

Madenschraube mit RingschneideMadenschraube mit Ringschneide1 Stück

Benötigte Werkzeuge:

RollgabelschlüsselRollgabelschlüssel
Innensechskant-SchlüsselsatzInnensechskant-Schlüsselsatz
11

Mark the scale

Slide the handle so its recess face is 20 mm from the disk's edge and lock it. File a nick across the lower leg at the handle's back face and mark it 20. File a nick every 10 mm towards the bend, deeper every 50 mm. The handle's back face now reads the cut length.

Benötigte Werkzeuge:

NadelfeilensatzNadelfeilensatz
Digitaler Messschieber 6 ZollDigitaler Messschieber 6 Zoll
12

Cut a tube to length

Set the handle to the length you want and lock the setscrew. Push the lower leg into the tube until the end bears in the recess, with the roller and boss against the inside. Tighten the feed screw until the disk touches. Turn the tool round the tube, giving the screw a little more each turn, until the end drops off. Clean the cut with a deburring tool.

Materialien für diesen Schritt:

KupferrohrKupferrohr1 Stück

Benötigte Werkzeuge:

SchraubstockSchraubstock

EntgraterEntgrater
Innensechskant-SchlüsselsatzInnensechskant-Schlüsselsatz
Digitaler Messschieber 6 ZollDigitaler Messschieber 6 Zoll
13

Troubleshooting

Sprung-leg tubing cutter troubleshooting.

Flow

Loading...
14

History and honest limits

**Ward H. Zeiler** of Holyoke, Colorado, US 2,821,781, dated 4 February 1958, filed 23 November 1956. He claimed "a substantially U-shaped resilient frame including legs extending slidably through the bores" and "a feed screw ... for bending said one leg within the confines of the handle for engaging the cutting disk with the tube". His frame was "suitable resilient metal"; ours is spring steel wire. His handle was a metal sleeve with a guard formed on it; ours is aluminium bar with a brass guard. The patent gives no sizes; all of ours are ours.

Materialien

10

Benötigte Werkzeuge

28

Designdateien

1

Dieser Bauplan stellt her

CC0 Gemeinfrei

Dieser Blueprint ist unter CC0 veröffentlicht. Sie dürfen dieses Werk für jeden Zweck frei kopieren, ändern, verbreiten und verwenden, ohne um Erlaubnis zu fragen.

Unterstützen Sie den Maker, indem Sie Produkte über seinen Blueprint kaufen, wo er eine Maker-Provision von Anbietern festgelegt, verdient. Oder erstellen Sie eine neue Iteration dieses Blueprints und verbinden Sie ihn in Ihrem eigenen Blueprint, um Einnahmen zu teilen.

Diskussion

(0)

Anmelden um an der Diskussion teilzunehmen

Kommentare werden geladen...