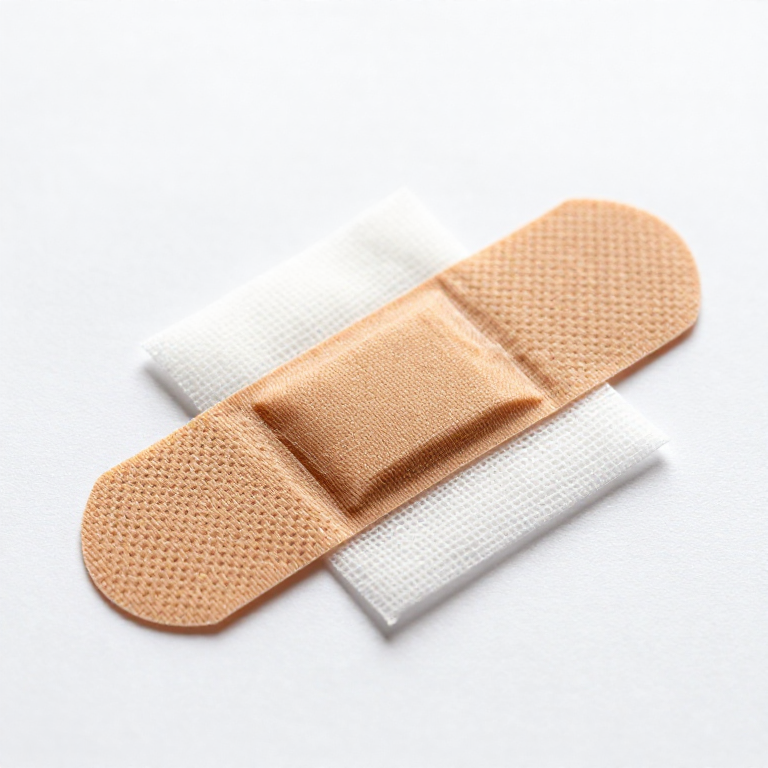


Adhesive Bandage
Dressing a small cut used to take two hands and two materials: a pad of gauze held in place while the other hand wound tape around it. If the cut was on the hand doing the holding, you needed somebody else.
Earle Dickson's insight was to assemble the dressing in advance. Pad and tape combined into one sterile unit, ready to apply with a single hand — and, crucially, with a crinoline gauze cover over the adhesive so the roll would not stick to itself before use. That cover is the part everyone forgets and the part without which the product does not exist.
US Patent 1,612,267, "Surgical Dressing", filed 29 December 1925 and granted 28 December 1926. Dickson was a cotton buyer at Johnson & Johnson; he made the first ones for his wife, who cut herself frequently in the kitchen.
Instructions
A home-made dressing is a teaching object, not a medical product
A home-made dressing is a teaching object, not a medical product
Nothing you make here is sterile. Build it to understand the design, and use a commercial sterile dressing on any actual wound.
Read US 1,612,267 and count the layers
Read US 1,612,267 and count the layers
Dickson claims tape, pad and a removable covering over the adhesive. Three layers, and the third is what makes it storable.
Try the old method one-handed
Try the old method one-handed
Hold a gauze square on your own palm and try to tape it down using only that hand. It cannot be done — that failure is the entire brief.
Cut a strip of woven cotton tape
Cut a strip of woven cotton tape
Cut a length of closely woven cotton about 20 mm wide. It must flex around a knuckle without tearing along the weave.
Materials for this step:
 Cotton Twill Tape1 meter
Round the corners of the strip
Round the corners of the strip
Trim each corner to a curve. Square corners catch on clothing and start peeling — the first place any dressing lifts.
Tools needed:
 Craft Knife
Coat the strip with a zinc oxide adhesive
Coat the strip with a zinc oxide adhesive
Spread a thin even film of adhesive over one whole face. Uneven coating gives a dressing that grips at one end and lifts at the other.
Materials for this step:
 Zinc Oxide Powder50 g
Cut an absorbent pad narrower than the tape
Cut an absorbent pad narrower than the tape
Cut gauze smaller than the strip so adhesive is exposed all the way round it. The pad must be fully framed by tape or it will not seal.
Materials for this step:
 Cotton Gauze1 meter
Centre the pad on the adhesive face
Centre the pad on the adhesive face
Press it down in the middle. Off-centre placement leaves too little tape on one side and the dressing pivots off the wound.
Understand why the pad must not stick to the wound
Understand why the pad must not stick to the wound
Plain gauze bonds into drying exudate and tears new tissue off on removal. A perforated or coated facing is what stops the dressing becoming part of the scab.
Lay crinoline gauze over the whole adhesive face
Lay crinoline gauze over the whole adhesive face
Cover the exposed adhesive with stiffened open-weave fabric. This is Dickson's third element and it is why the product can be rolled, cut and stored.
Test that the cover peels but does not fall off
Test that the cover peels but does not fall off
The release layer must hold in the packet and come away cleanly in one pull. Too sticky and it drags the pad; too loose and it separates in storage.
Perforate the tape
Perforate the tape
Punch fine holes through the tape either side of the pad. Skin under an occlusive strip macerates — the holes let it breathe.
Apply one to your own knuckle single-handed
Apply one to your own knuckle single-handed
Peel, place, press — one hand, three seconds. That is the whole invention working, and the contrast with step 3 is the point.
Wear it for a day and record how it fails
Wear it for a day and record how it fails
Note whether it lifts at a corner, slides on a joint, or the pad soaks through. Each failure maps to a specific design choice you made.
Compendium — the release liner is the invention
Compendium — the release liner is the invention
The patent. US 1,612,267, "Surgical Dressing", filed 29 December 1925, granted 28 December 1926 to Earle Dickson. Dickson was a cotton buyer at Johnson & Johnson, and the origin story is unusually well documented: his wife Josephine cut and burned herself often while cooking, and he prepared ready-made dressings in advance so she could apply them alone. He laid strips of surgical tape out, placed gauze squares along them at intervals, and covered the adhesive with crinoline so the whole thing could be rolled up and cut to length as needed.
Why the third layer matters most. Tape plus pad is obvious and had existed for years. The unsolved problem was storage: an adhesive strip with an exposed sticky face bonds to itself, to the packet and to everything else, so it cannot be pre-made. The crinoline cover — a stiffened open-weave fabric — is a release liner, and it converts an assembly step done at the moment of injury into one done in a factory. That is the actual novelty, and it is a general pattern: the enabling component of a pre-assembled product is very often the part that stops it assembling itself too early.
The commercial history is instructive. Johnson & Johnson launched it in 1920 as BAND-AID, hand-made and sold in 18-inch strips the user cut themselves. It sold badly — about 3,000 dollars in the first year. Machine production from 1924 in pre-cut sizes, plus the distribution of millions of free samples to Boy Scout troops and to butchers, is what built the market. Dickson eventually became a vice-president of the company. A good invention took four years and a distribution strategy to become a product.
What has changed since. Modern dressings use non-woven or plastic backings, acrylic adhesives instead of zinc oxide rubber, and non-adherent pad facings so removal does not disturb healing tissue. Perforation for breathability and the waterproof variants came later. The three-layer architecture Dickson claimed — backing, pad, release liner — is unchanged in every one of them, and in transdermal drug patches, which are the same patent applied to a different payload.
Materials
3- 1 meterPlaceholder
- Placeholder
- 1 meterPlaceholder
Tools Required
1- Placeholder
Related Blueprints
These blueprints share knowledge with this one — techniques, materials, or principles that connect them in the learning graph.

CC0 Public Domain
This blueprint is released under CC0. You are free to copy, modify, distribute, and use this work for any purpose, without asking permission.
Support the Maker by purchasing products through their Blueprint where they earn a Maker Commission set by Vendors, or create a new iteration of this Blueprint and include it as a connection in your own Blueprint to share revenue.