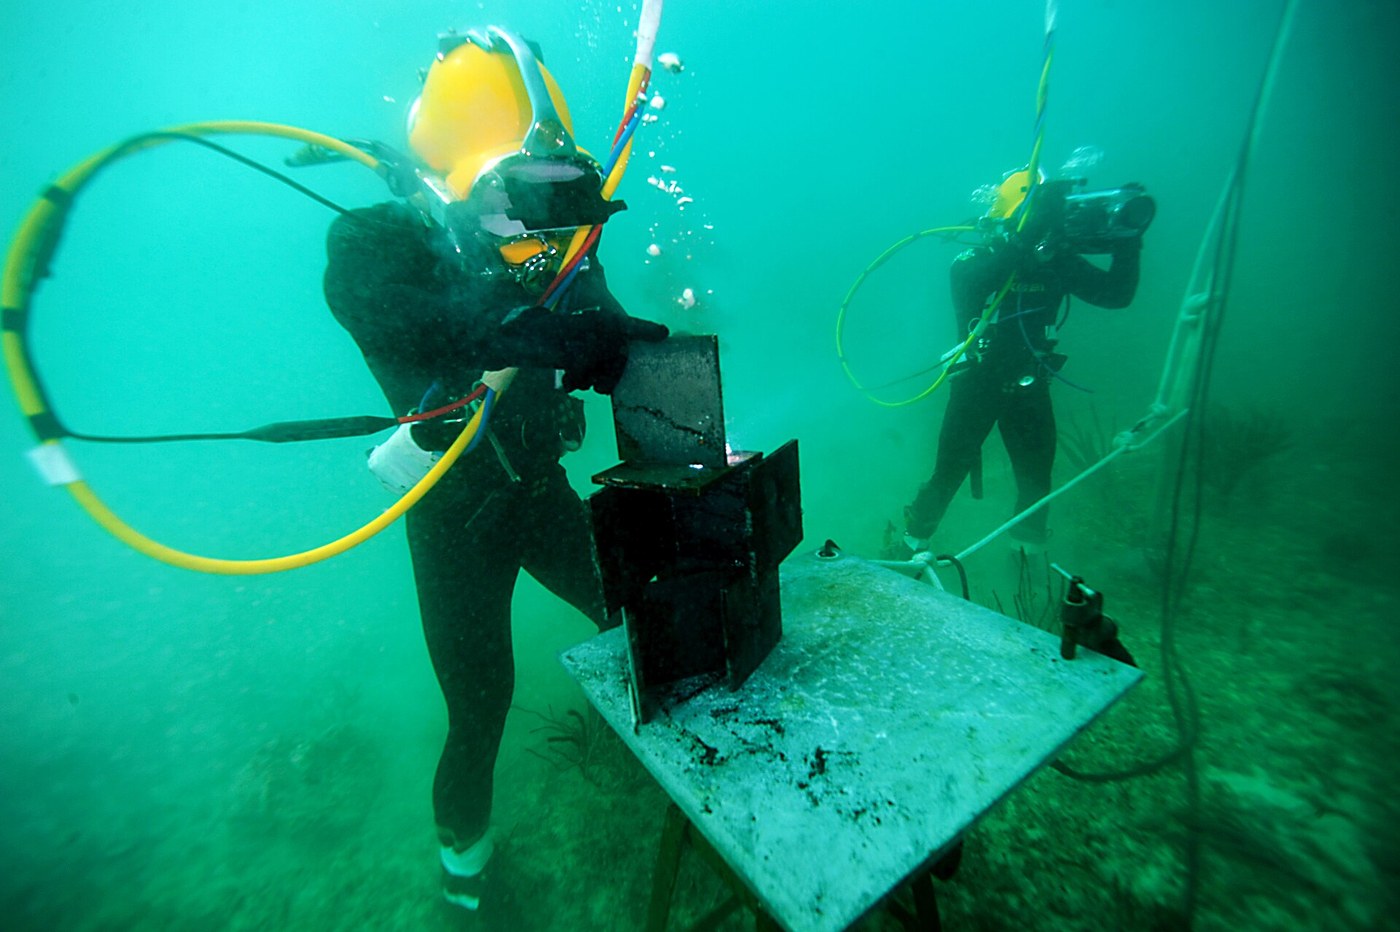


Underwater Cutting and Welding
Instructions
Read the hazards — three, and the third is the one that kills
Read the hazards — three, and the third is the one that kills
This blueprint combines electricity, a diver and an explosive gas. Each is manageable; the combination demands a plan.
- Electric shock. Use DC only, never AC — AC causes muscle tetany, so a diver cannot let go. Use a knife switch on the surface that is CLOSED only while the diver calls for current and opened the instant they stop.
- Hydrogen and oxygen accumulation. Never cut or weld upward into an enclosed space, under an overhang, or inside a compartment where gas can collect. Vent the space first.
- Decompression. The work is at depth and takes time; the diver is on a schedule. Read the Haldane blueprint in this batch before planning any of it.
- Insulated gloves, dry suit where possible, and never a bare hand on the electrode holder.
The gas is the hazard people underestimate — the arc splits water continuously, and hydrogen collecting in a closed-topped space has caused fatal explosions in salvage work for a century.
The electrical rule is worth stating twice: the surface operator, not the diver, controls the current, and the circuit is dead except during an actual cut. A diver who is holding a live electrode while repositioning is a diver waiting for an accident.Materials for this step:
 Knife Switch (Heavy Duty DC)1 piece
Tools needed:
 Face Shield
 Clear Safety Glasses
 Digital Multimeter (Lab Grade)
 Fire Extinguisher
 Insulated Welding Gloves
The steam bubble that keeps the arc alive
The steam bubble that keeps the arc alive
Understand why the arc does not simply go out, because the mechanism explains every technique that follows.
- Strike an arc under water in a shallow tank, observing from a safe distance behind a shield.
- Film it and look at the region immediately around the arc.
- Note the gas rising continuously from the work.
The arc vaporises water instantly and burns inside a bubble of its own steam and dissociated gas, so it is not actually in contact with liquid water at all. The bubble is continuously created and continuously collapsing, which is why the arc is noisier and less stable than in air.
The gas rising is not steam alone. The arc dissociates water into hydrogen and oxygen — the arc is running a small electrolysis cell as a side effect, and that is where the explosion hazard comes from.
This is the same self-sustaining pattern as the oil circuit breaker, where the arc cracks the oil into hydrogen and blasts itself apart. There the self-created gas extinguishes the arc; here it sustains it. Same physics, opposite use, and worth holding both in mind.Materials for this step:
 Welding Electrode (Waterproofed, E6013)5 pieces
Tools needed:
Face Shield Smartphone with Slow-Motion VideoDigital Multimeter (Lab Grade)Clear Safety Glasses
The hydrogen accumulation chain
The hydrogen accumulation chain
Trace the middle path. The gases the arc makes are exactly the two that recombine explosively, in exactly the right ratio, because they came from splitting water. Nothing needs to go wrong for the pocket to form — it forms because the work is going well.
The safe path and the dangerous path differ only in GEOMETRY, not in technique. The same electrode, the same current and the same diver are safe in open water and lethal under a plate.
This is why underwater cutting is planned as a sequence: survey the space, identify every high point where gas could collect, vent them, then cut — and re-vent before returning. The plan is the safety device, and there is no equipment that substitutes for it.Flow
Tools needed:
 Desktop Computer
Oxy-arc cutting — burn the steel rather than melt it
Oxy-arc cutting — burn the steel rather than melt it
Cutting underwater does not use the arc's heat to remove metal. It uses the arc to start a chemical reaction.
- Set up a tubular cutting electrode with an oxygen line running through its centre.
- Strike the arc to bring the steel to bright heat at one spot.
- Open the oxygen valve and observe what happens.
- Cut a plate and examine the kerf and the slag.
Once steel is hot enough, oxygen makes it BURN — and the reaction is strongly exothermic, so it supplies most of the energy for the cut itself. The arc is only the match; the oxygen jet does the work and simultaneously blows the molten oxide out of the kerf.
That is why oxy-arc cuts thick steel underwater far faster than any purely electrical process could. It is also why it only works on steel: aluminium and stainless form refractory oxides that do not burn away cleanly.
Reverse-engineering note: the electrode is consumable and tubular, usually with a waterproof coating, and the oxygen flows continuously while cutting. The diver controls oxygen at the torch and current at the surface — two separate authorities, deliberately, so no single mistaken action can both energise and feed the cut.Materials for this step:
 Oxy-Arc Cutting Electrode (Tubular)5 pieces
 Steel Sheet1 sheet
Tools needed:
Face Shield Pressure GaugeDigital Multimeter (Lab Grade)Clear Safety GlassesFire Extinguisher
Wet welds are brittle, and why habitats exist
Wet welds are brittle, and why habitats exist
A weld made underwater is a compromise, and it is worth knowing exactly which one.
- Make a test weld in air and another underwater in the same steel.
- Section both, polish and etch them, and compare the grain structure near the fusion line.
- Bend-test coupons from each to failure.
The wet weld cools far faster — water is an aggressive quench — producing a hard, brittle martensitic zone, and it picks up hydrogen from the dissociated water, which causes cracking days after the work is finished. Fast cooling plus dissolved hydrogen is the classic recipe for hydrogen embrittlement.
So wet welding is used for what it is good at: temporary repair, salvage patches, and structures where a brittle weld is acceptable because it is holding rather than carrying.
Where a real structural weld is needed, the answer is to remove the water: a habitat is sealed around the joint and the water blown out with gas, so the welder works dry at ambient pressure. The weld is then nearly as good as a surface weld, at enormous cost in setup.
The intermediate option is a small gas-filled cofferdam covering just the joint. It is the same reasoning as the diving bell that opened this batch — trap a bubble and work inside it — applied to a weld pool instead of a person, four hundred years later.Materials for this step:
Steel Sheet2 sheetsWelding Electrode (Waterproofed, E6013)5 piecesTools needed:
 TIG Welder
 Bench Vise
 Belt Sander (3x21 inch)
 P100 RespiratorFace Shield
 Nitrile Rubber Gloves
 Nitric Acid Etchant (Nital 2%)
Materials
4- 1 piecePlaceholder
- Placeholder
- Placeholder
- Placeholder
Tools Required
14- Placeholder
- Placeholder
- Placeholder
- Placeholder
- Placeholder
- Placeholder
- Placeholder
- Placeholder
- Placeholder
- Placeholder
- Belt Sander — 3x21in3% commissionMagento Legacy Storeships internationallyPlaceholder
- Placeholder
- Placeholder
- Placeholder
Related Blueprints
These blueprints share knowledge with this one — techniques, materials, or principles that connect them in the learning graph.


CC0 Public Domain
This blueprint is released under CC0. You are free to copy, modify, distribute, and use this work for any purpose, without asking permission.
Support the Maker by purchasing products through their Blueprint where they earn a Maker Commission set by Vendors, or create a new iteration of this Blueprint and include it as a connection in your own Blueprint to share revenue.