ARTE
BELLEZA Y BIENESTAR
ARTESANÍA
CULTURA E HISTORIA
ENTRETENIMIENTO
MEDIO AMBIENTE
COMIDA Y BEBIDAS
INGENIERÍA INVERSA
CIENCIAS
DEPORTES
TECNOLOGÍA
TECNOLOGÍA VESTIBLE
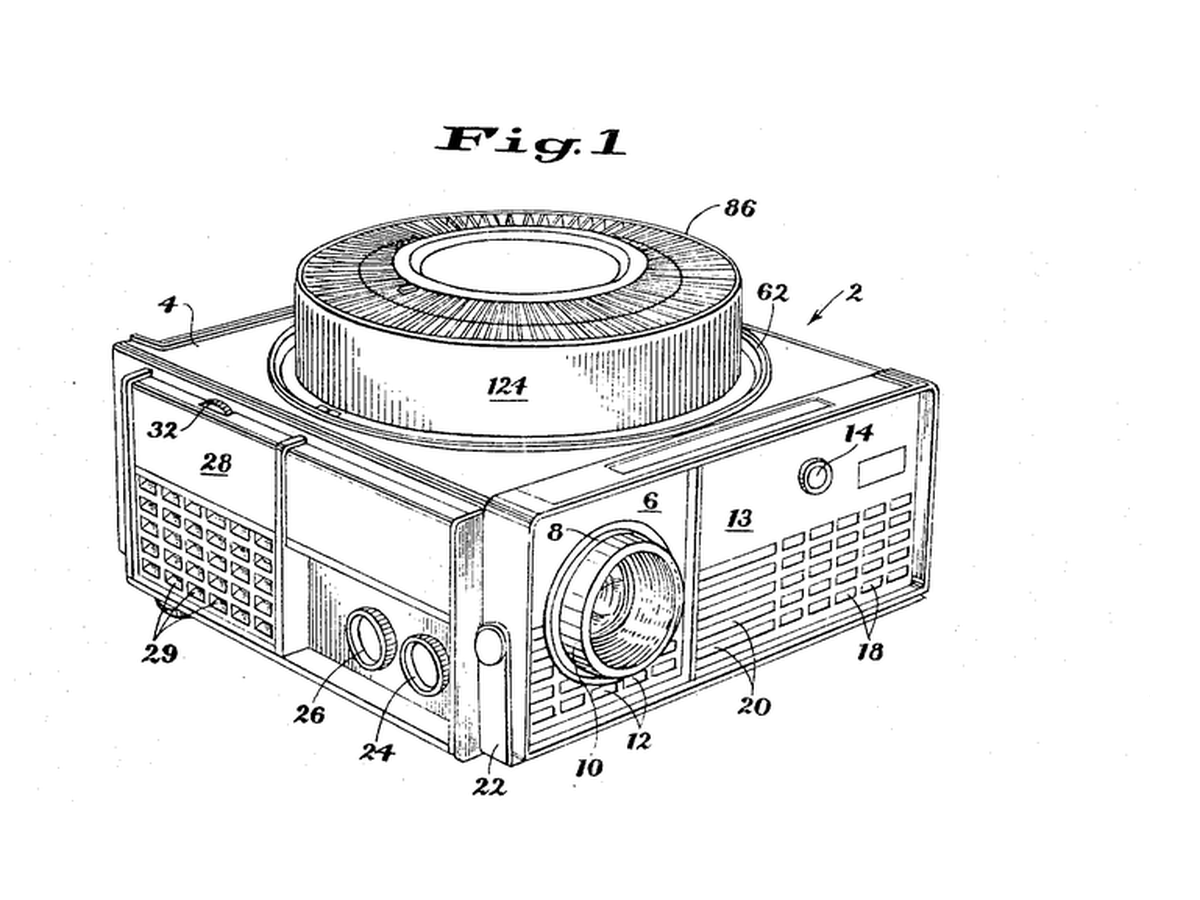


Rotary Gravity Slide Projector
Straight slide magazines pushed slides sideways and jammed. Kodak's round tray, designed by David E. Hansen, stood the slides on edge in a ring above the projector: each one fell into the gate by gravity when it reached the drop point and was lifted back when the tray moved on, so nothing had to push a slide sideways.
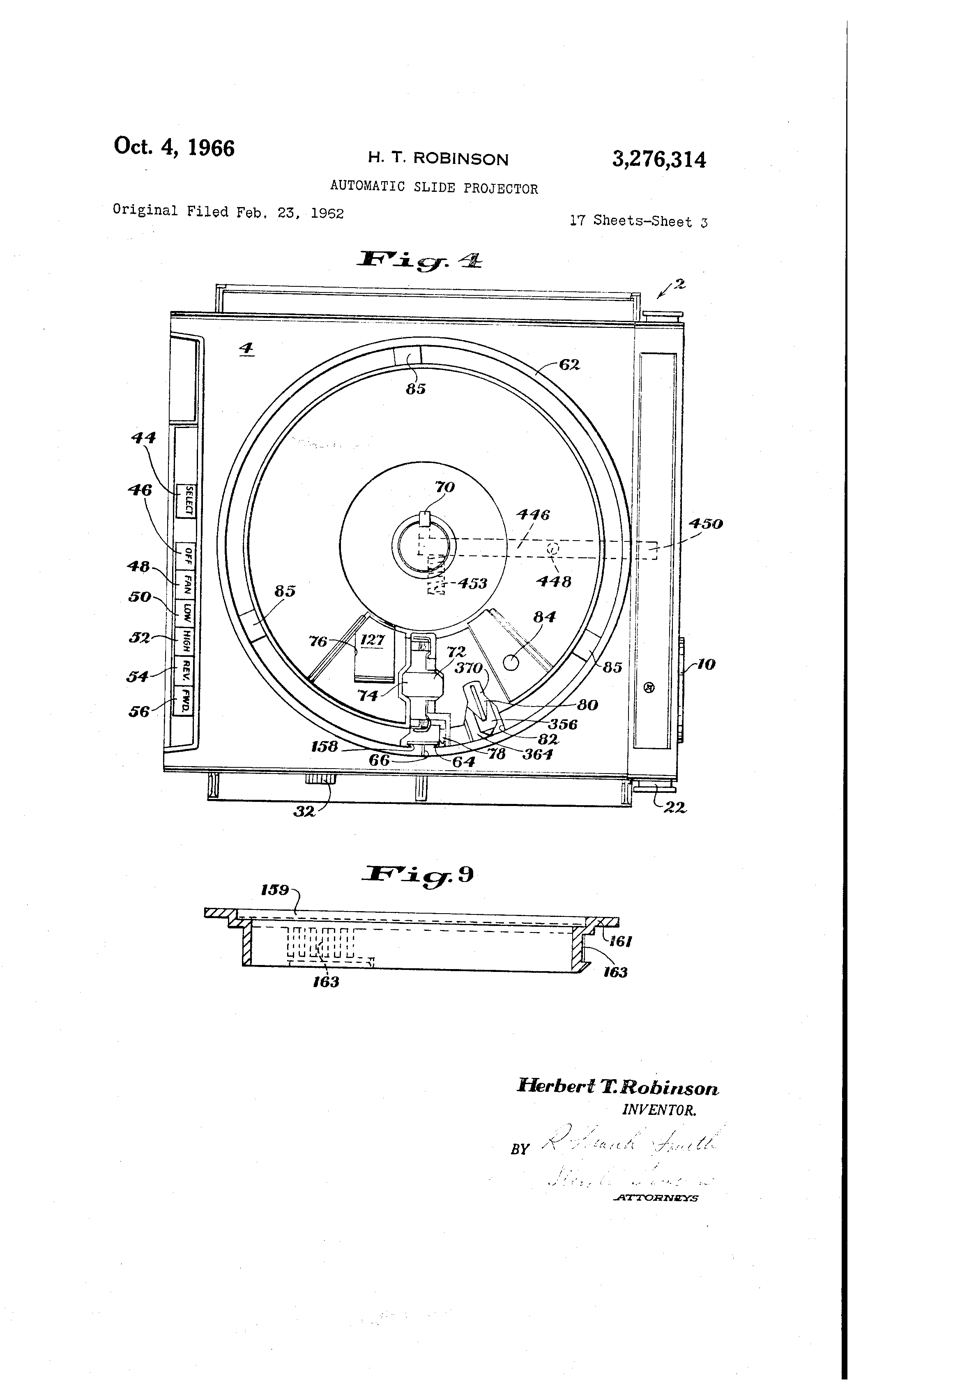
**US 3,276,314**, "Automatic slide projector", Herbert T. Robinson, assigned to Eastman Kodak, filed 1. June 1965 (continuing an application of 23. February 1962), granted 4. October 1966: a tray of two relatively movable portions with a passageway "through which the slides are adapted to pass substantially vertically, one at a time, in coordination with relative movement of the portions".
**You build the mechanism**: a 12-slot tray turned by a stepper, a servo that lifts each slide back, a torch and a lens to project it.
Avanzado
6 hours
Instrucciones
1
1
Make twelve slides
Make twelve slides
Cut 50 x 50 mm frames from black card with a 36 x 24 mm window. Draw or print images on transparency film and tape one behind each window. Number them 0 to 11.
Materiales para este paso:
 Cartulina negra2 hojas
 Transparencia para inyección de tinta2 hojas
Herramientas necesarias:
 Cúter de precisión
 Rotulador permanente
 Regla
2
2
Build the tray
Build the tray
Glue two 240 mm foam-board discs together. Cut 12 radial slots 4 mm wide and 55 mm long, 30 degrees apart, open underneath so a slide can fall through. Glue a hub on the motor shaft and the tray on the hub.
Materiales para este paso:
 Cartón pluma para maquetas2 hojas
 Motor paso a paso1 pieza
Herramientas necesarias:
Cúter de precisión Pistola de cola caliente
3
3
Base, gate and lift
Base, gate and lift
On a plywood base cut one drop slot under the tray. Below it, build a foam-board gate channel that holds a dropped slide upright between the torch and a 100 mm convex lens. Mount the servo so its arm, raised, pushes the slide back up into the tray.
Materiales para este paso:
 Tablero contrachapado1 pieza
 Micromotor servo SG90 (5 unidades)1 paquete
 Juego de lentes convergentes1 juego
Herramientas necesarias:
 SerruchoPistola de cola caliente
 Linterna LED de inspección
4
4
Wire and flash
Wire and flash
EasyDriver STEP to D3, DIR to D4, motor coils to A and B, 12 V supply to its power input, GND shared with the Uno. Servo signal D9. Button between D2 and GND. Set the EasyDriver current adjuster low - the tray is light. Turn the tray by hand so slot 0 is over the gate before powering up.
rotary_slide_tray.inocpp
Materiales para este paso:
 Controlador de motor paso a paso1 pieza
 Microrruptor (accionado por palanca)1 pieza
 Juego de cables Dupont (macho-hembra)1 juego
Herramientas necesarias:
 Arduino Uno R3
 Fuente de alimentación de corriente continua
 Placa de pruebas
 Cable USB-B
5
5
Why the steps must not drift
Why the steps must not drift
Cargando el cuaderno de Jupyter…
6
6
Show
Show
Load the slides upside down and reversed (a projector inverts the image). Darken the room, focus the lens on a wall, and press to advance. Count misfeeds over two full turns.
Herramientas necesarias:
 Cinta métrica
7
7
History & Context
History & Context
**What the patent specifies:** a projector for a tray of two relatively movable portions, slides passing substantially vertically through a passageway one at a time in step with the tray's movement. **Modern build (derived):** foam-board tray, stepper, servo lift and a torch.
Kodak made Carousel projectors from 1961 until 2004; a round tray held 80 slides. The limits: bent or thick mounts jam the gate, and the gravity drop needs the projector level.
Materiales
10- 2 hojasMarcador de posición
- Marcador de posición
- 2 hojasMarcador de posición
- Marcador de posición
- 1 piezaMarcador de posición
- 1 paqueteMarcador de posición
- 1 juegoMarcador de posición
- Marcador de posición
- Marcador de posición
- Marcador de posición
Herramientas requeridas
11- Marcador de posición
- Marcador de posición
- Marcador de posición
- Marcador de posición
- Marcador de posición
- Marcador de posición
- 1 vendor sell this, none ship to you yetMarcador de posición
- Marcador de posición
- 1 vendor sell this, none ship to you yetMarcador de posición
- 1 vendor sell this, none ship to you yetMarcador de posición
- 1 vendor sell this, none ship to you yetMarcador de posición
Blueprints relacionados
Estos blueprints comparten conocimiento — técnicas, materiales o principios

CC0 Dominio público
Este Blueprint se publica bajo CC0. Eres libre de copiar, modificar, distribuir y usar este trabajo para cualquier propósito, sin pedir permiso.
Apoya al Maker comprando productos a través de su Blueprint, donde gana una Comisión del Maker establecida por los vendedores, o crea una nueva iteración de este Blueprint e inclúyela como conexión en tu propio Blueprint para compartir ingresos.