ARTE
BELLEZA Y BIENESTAR
ARTESANÍA
CULTURA E HISTORIA
ENTRETENIMIENTO
MEDIO AMBIENTE
COMIDA Y BEBIDAS
INGENIERÍA INVERSA
CIENCIAS
DEPORTES
TECNOLOGÍA
TECNOLOGÍA VESTIBLE
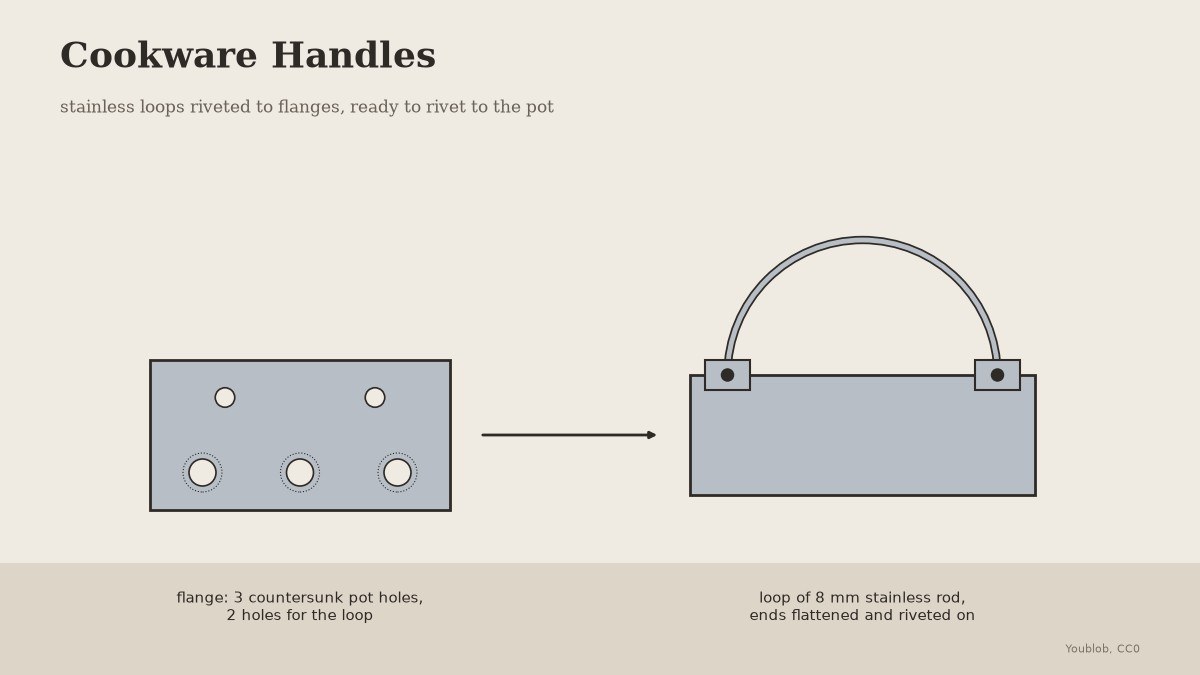


Cookware Handles: Stainless Loops on Flanges Drilled for Rivets
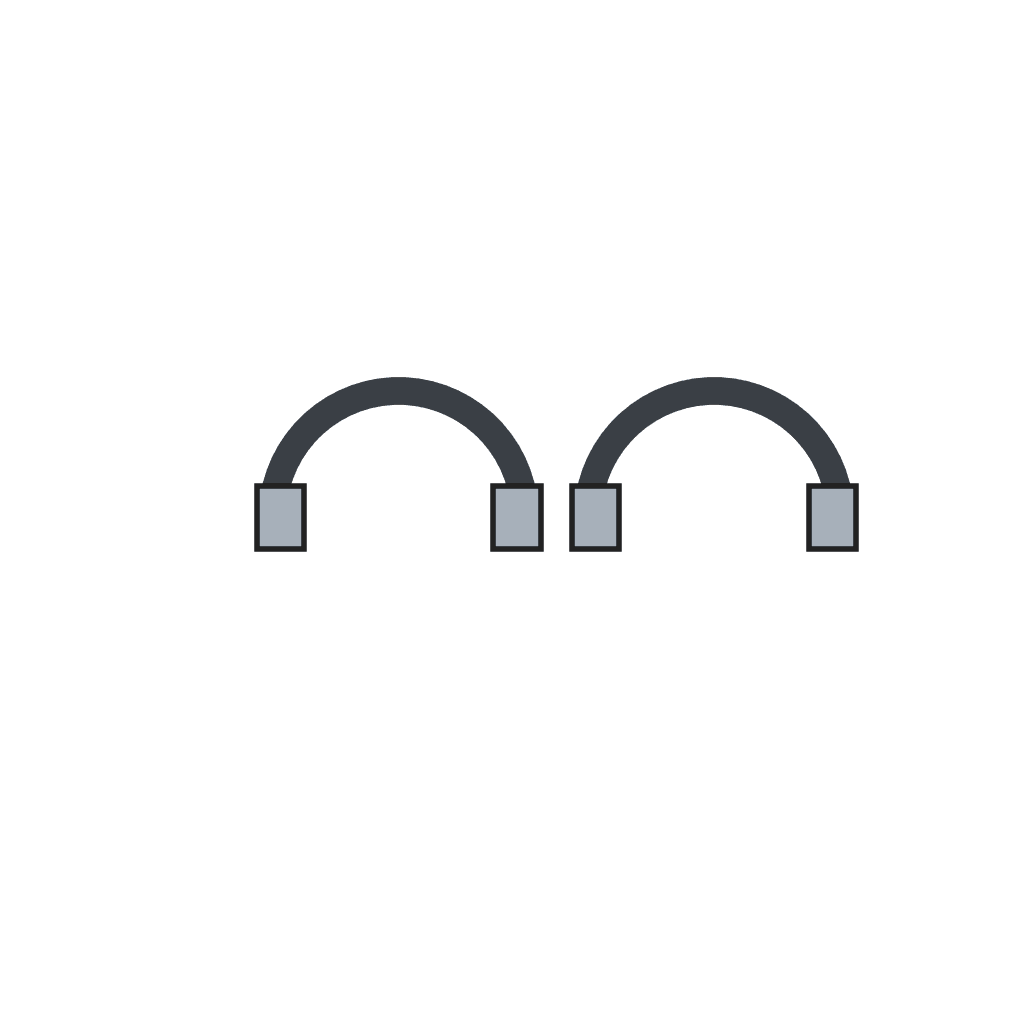
Pot handles are often riveted on: the handle has a flange with a pattern of holes, bevelled on the side against the pot, so the rivets spread into the bevel and lock the handle to the pot (US 7,966,710). These are a pair of loop handles bent from stainless rod and riveted to stainless flange plates, ready to rivet to a pot. Design and sizes are ours.
The picture: our drawing.
Intermedio
Half a day
Instrucciones
1
1
Cut the flanges
Cut the flanges
Cut two flange plates 70 × 35 mm from 2 mm stainless sheet and curve each slightly to fit the pot's side wall. Drill each with three holes for the pot rivets, countersunk on the face that will sit against the pot, and two plain holes for fixing the loop.
Materiales para este paso:
 Chapa de acero inoxidable1 pieza
Herramientas necesarias:
 Tijeras de chapa
 Sierra para metales
 Tornillo de banco
 Taladro de columna
 Juego de brocas
 Juego de brocas avellanadoras
 Aceite de corte
 Juego de limas
 Gafas de seguridad
2
2
Bend the loops
Bend the loops
Cut two 180 mm lengths of 8 mm stainless rod. Heat the ends red and flatten them on the anvil into tabs, then bend each rod into a loop that stands clear of the pot wall by a hand's thickness.
Materiales para este paso:
 Varilla de acero inoxidable400 mm
Herramientas necesarias:
Sierra para metales Fragua de herrero
 Yunque
 Martillo de peña transversal
 Tenazas de herreroTornillo de banco
 Guantes de soldador
3
3
Drill and rivet the loops
Drill and rivet the loops
Drill the flattened tabs to match the two plain holes and rivet each loop to the outer face of its flange. The three countersunk holes are left for riveting the handle to the pot.
Materiales para este paso:
 Remaches de acero4 piezas
Herramientas necesarias:
Taladro de columnaJuego de brocasYunqueMartillo de peña transversalGafas de seguridad4
4
Finish
Finish
File all edges smooth so nothing catches the hand, and check both handles sit flat on the pot wall.
Herramientas necesarias:
Juego de limas Calibre digital de 6 pulgadas
Materiales
3- 1 piezaMarcador de posición
- Marcador de posición
- 4 piezasMarcador de posición
Herramientas requeridas
15- Marcador de posición
- Marcador de posición
- Marcador de posición
- Marcador de posición
- Marcador de posición
- Marcador de posición
- Marcador de posición
- Marcador de posición
- Marcador de posición
- Marcador de posición
- Marcador de posición
- Marcador de posición
- Marcador de posición
- Marcador de posición
- Marcador de posición
Este plano hace
Blueprints relacionados
Estos blueprints comparten conocimiento — técnicas, materiales o principios

CC0 Dominio público
Este Blueprint se publica bajo CC0. Eres libre de copiar, modificar, distribuir y usar este trabajo para cualquier propósito, sin pedir permiso.
Apoya al Maker comprando productos a través de su Blueprint, donde gana una Comisión del Maker establecida por los vendedores, o crea una nueva iteración de este Blueprint e inclúyela como conexión en tu propio Blueprint para compartir ingresos.