Colaboración
ARTE
BELLEZA Y BIENESTAR
ARTESANÍA
CULTURA E HISTORIA
ENTRETENIMIENTO
MEDIO AMBIENTE
COMIDA Y BEBIDAS
INGENIERÍA INVERSA
CIENCIAS
DEPORTES
TECNOLOGÍA
TECNOLOGÍA VESTIBLE
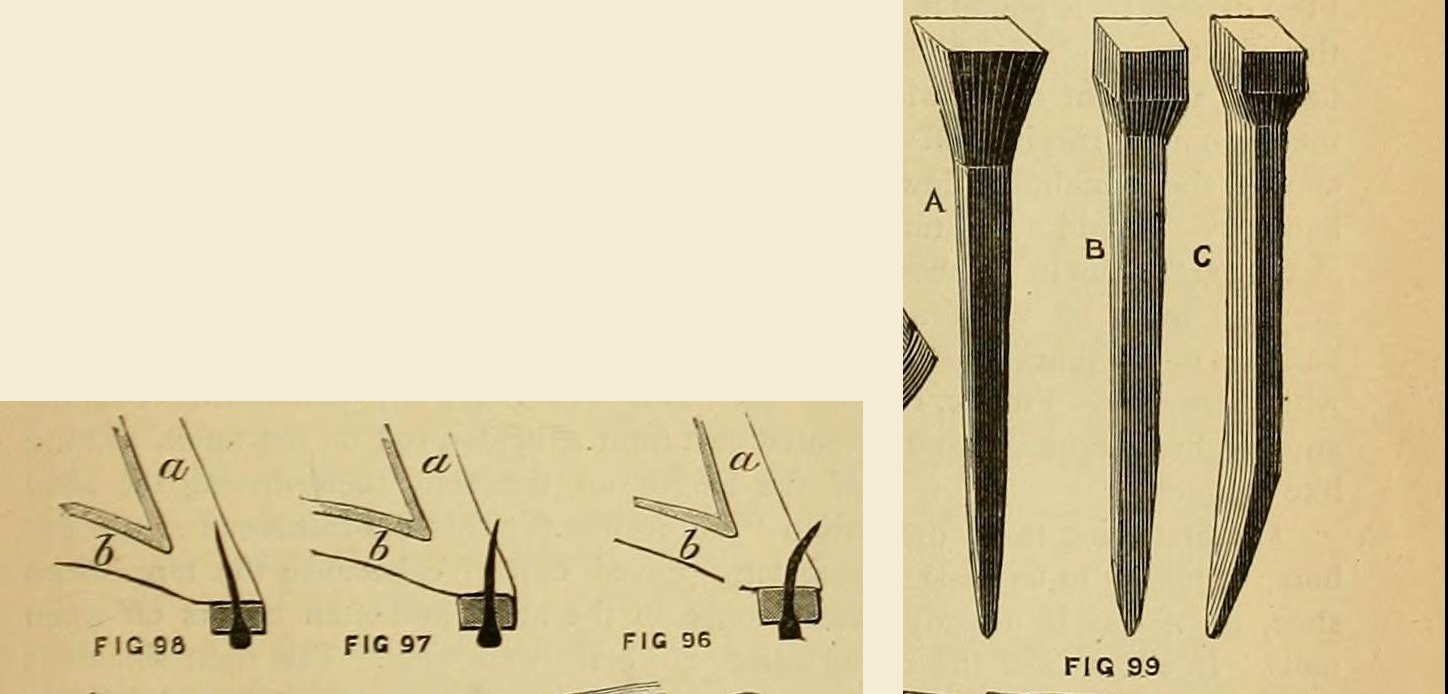


Hand-Forged Horseshoe Nails: Drawn from Nail Rod, Cut on the Sett, Headed in a Nail-Former, Point Set Cold (Edwinson, 1886)
How country smiths made their own horseshoe nails, from George Edwinson's farriery chapter in Amateur Work (1886): the best nail rod (or rod welded up from old nails) drawn to a point, cut off on the sett, headed in a nail-former with a shallow countersink, cooled slowly in the scale, then finished cold with the point bent slightly so it clenches in the right place.
Intermedio
A few minutes per nail once practised
Instrucciones
1
1
His lengths
His lengths
Cargando el cuaderno de Jupyter…
2
2
Read Edwinson
Read Edwinson
"The worthy smiths used to make their own horse-shoe nails, either from the very best nailing rods ... or from nail rods made by themselves."
3
3
Get nail rod
Get nail rod
Use the best nail rod, sized to the upper part of the nail head. Or make it: faggot old horseshoe nails with scraps of nail rod, bound with iron wire, weld the faggot in the forge and draw it out into rod.
Materiales para este paso:
 Varilla de hierro forjado1 pieza
 Alambre de hierro1 pieza
Herramientas necesarias:
 Fragua de herrero
 Yunque
 Martillo
 Tenazas de herrero
4
4
Draw and cut
Draw and cut
Heat the rod and draw the nail shank to shape on the anvil. Hold it on the sett and cut it off with one blow, nicking off just enough metal above the shank to form the head. Usual lengths 1 1/2, 1 3/4, 1 7/8, 2 and 2 1/2 in. (38-64 mm).
Herramientas necesarias:
Fragua de herreroYunqueMartillo Tajadera de yunque
5
5
Head it
Head it
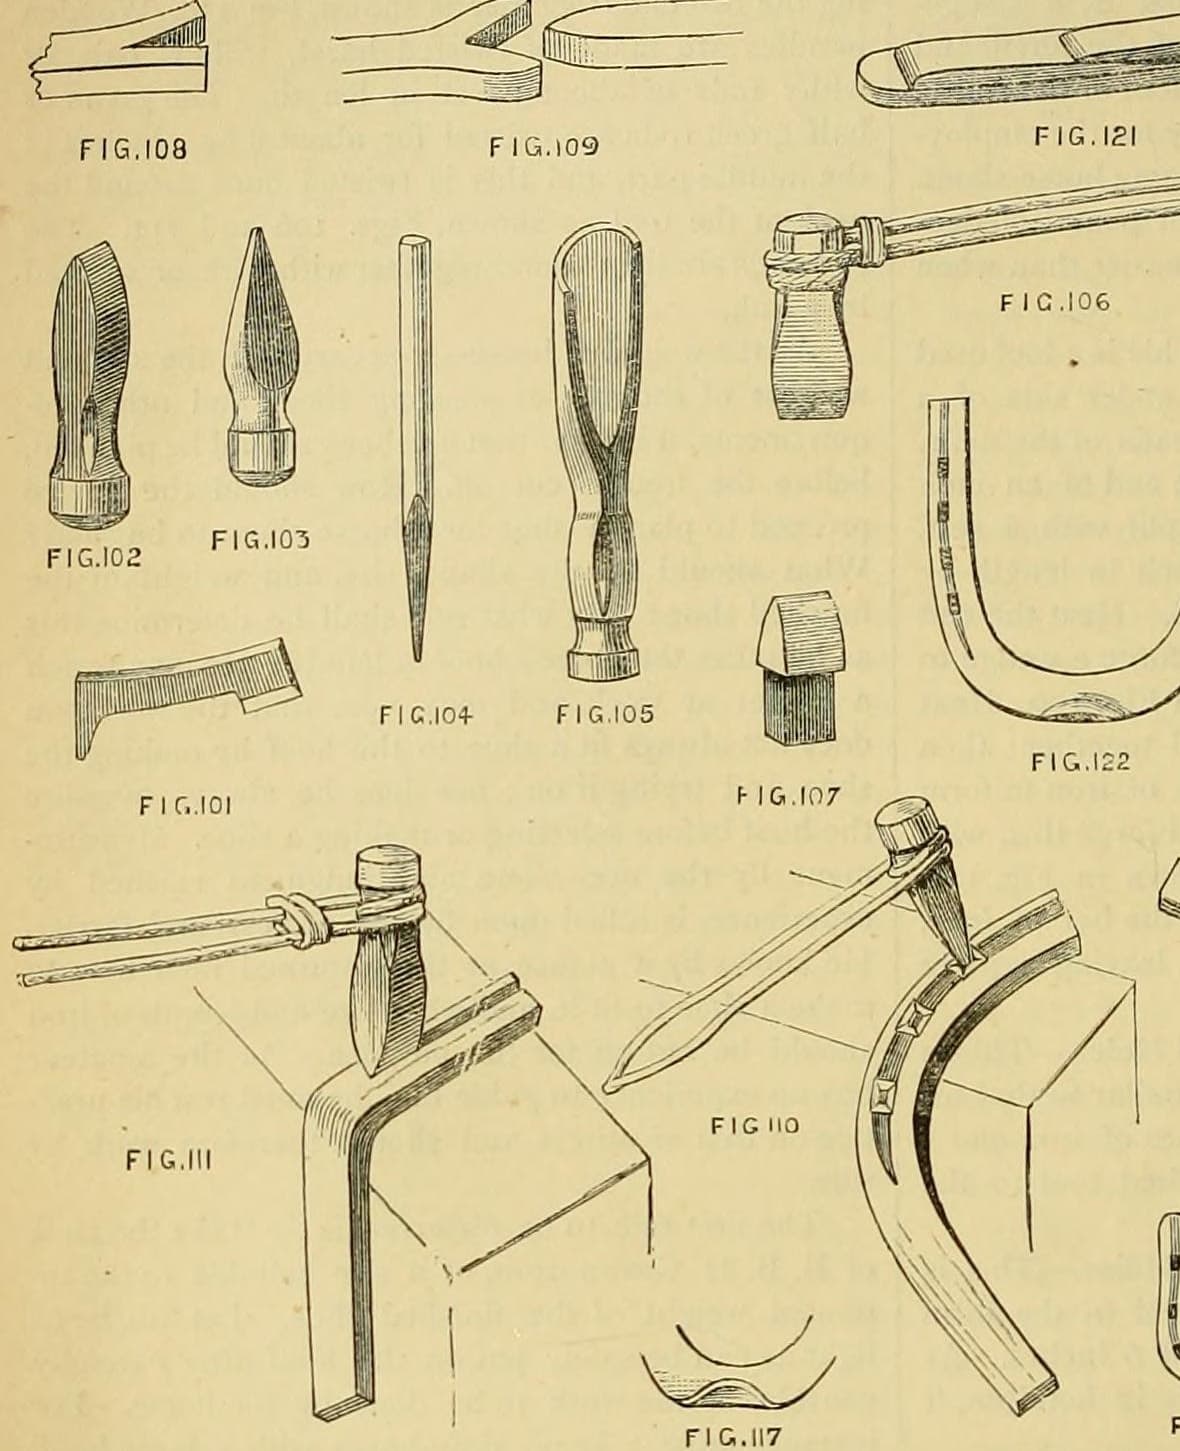
Drive the head into a nail-former with a shallow countersink, not a steep one: a tapered head wears loose and breaks off (his fig. 99, A old style, B right). Expert smiths shape the shoulders with the hammer and sett alone.
Herramientas necesarias:
 ClaveraMartillo
6
6
Cool slowly
Cool slowly
Let each nail fall among the scale at the foot of the anvil block and scatter them on scale or ashes. Never let them fall on iron or cool in a heap: they turn brittle.
Herramientas necesarias:
Yunque7
7
Finish cold
Finish cold
On a small anvil held in the vice, touch the heads into shape with a light hammer, sharpen the points by hammering, and bend each point a little (fig. 99 C) so it comes out at the right height on the hoof wall for the clench (fig. 100).
Herramientas necesarias:
 Tornillo de bancoYunqueMartillo
8
8
Troubleshooting
Troubleshooting
Horseshoe nail troubleshooting.
Flow
Loading...
9
9
History and honest limits
History and honest limits
From George Edwinson, "Smithing and Forging" VI, **Amateur Work, Illustrated**, vol. V (1886), pp. 509-511 and figs. 96-100 (checked on the archive.org scan amateurworkillus05lond), drawing in part on W. J. E. Crane, The Smithy and Forge. He gives no nail rod section; the metric figures and tools are ours.
Materiales
2- 1 piezaMarcador de posición
- 1 piezaMarcador de posición
Este plano hace
Blueprints relacionados
Estos blueprints comparten conocimiento — técnicas, materiales o principios
CC0 Dominio público
Este Blueprint se publica bajo CC0. Eres libre de copiar, modificar, distribuir y usar este trabajo para cualquier propósito, sin pedir permiso.
Apoya al Maker comprando productos a través de su Blueprint, donde gana una Comisión del Maker establecida por los vendedores, o crea una nueva iteración de este Blueprint e inclúyela como conexión en tu propio Blueprint para compartir ingresos.