Colaboración
ARTE
BELLEZA Y BIENESTAR
ARTESANÍA
CULTURA E HISTORIA
ENTRETENIMIENTO
MEDIO AMBIENTE
COMIDA Y BEBIDAS
INGENIERÍA INVERSA
CIENCIAS
DEPORTES
TECNOLOGÍA
TECNOLOGÍA VESTIBLE
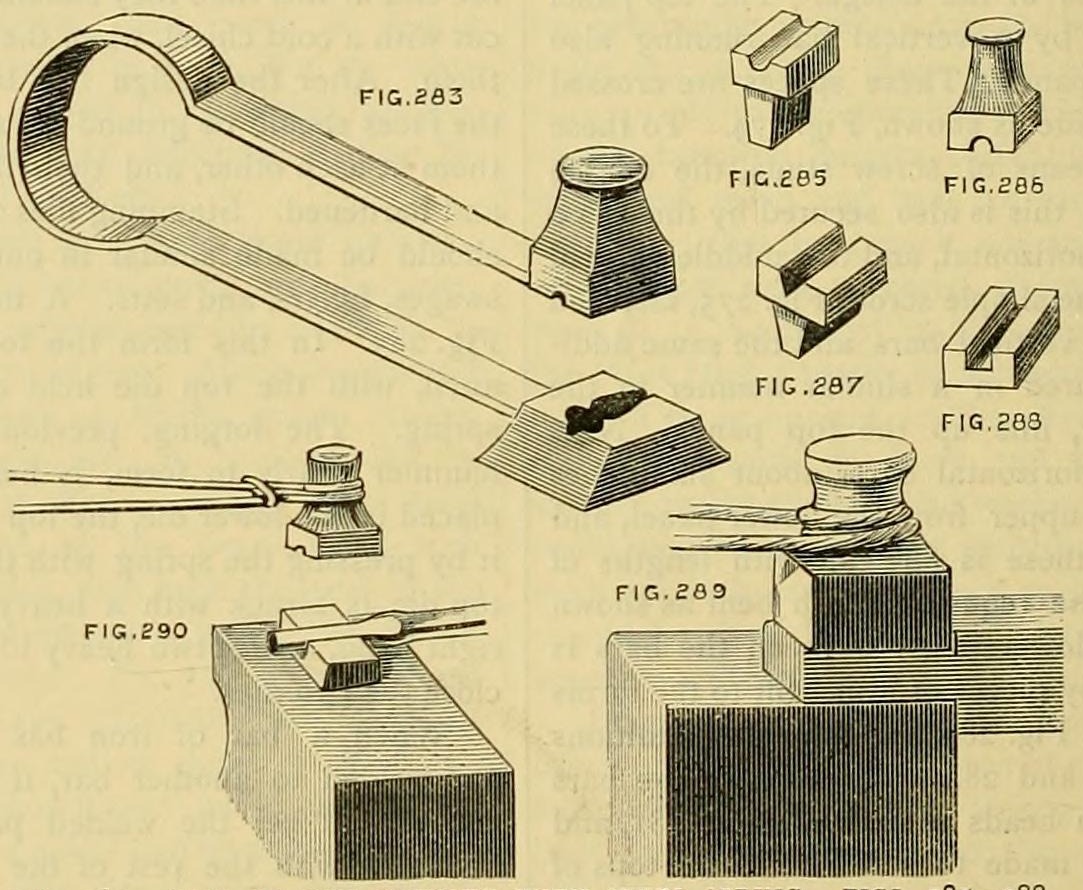


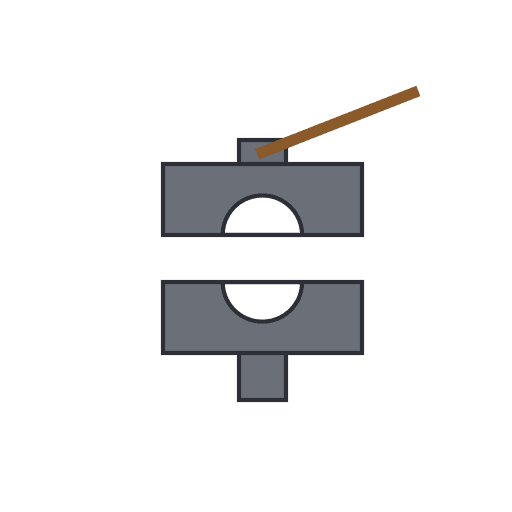
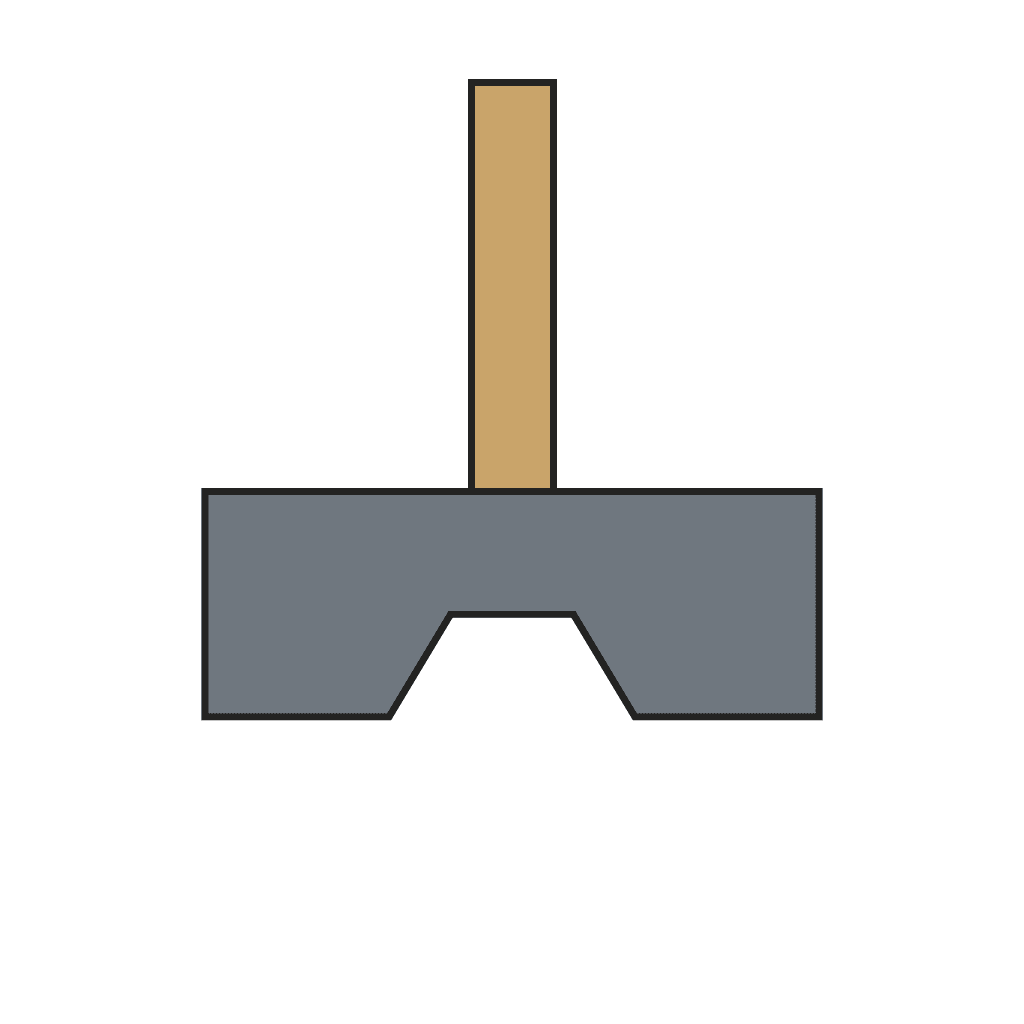
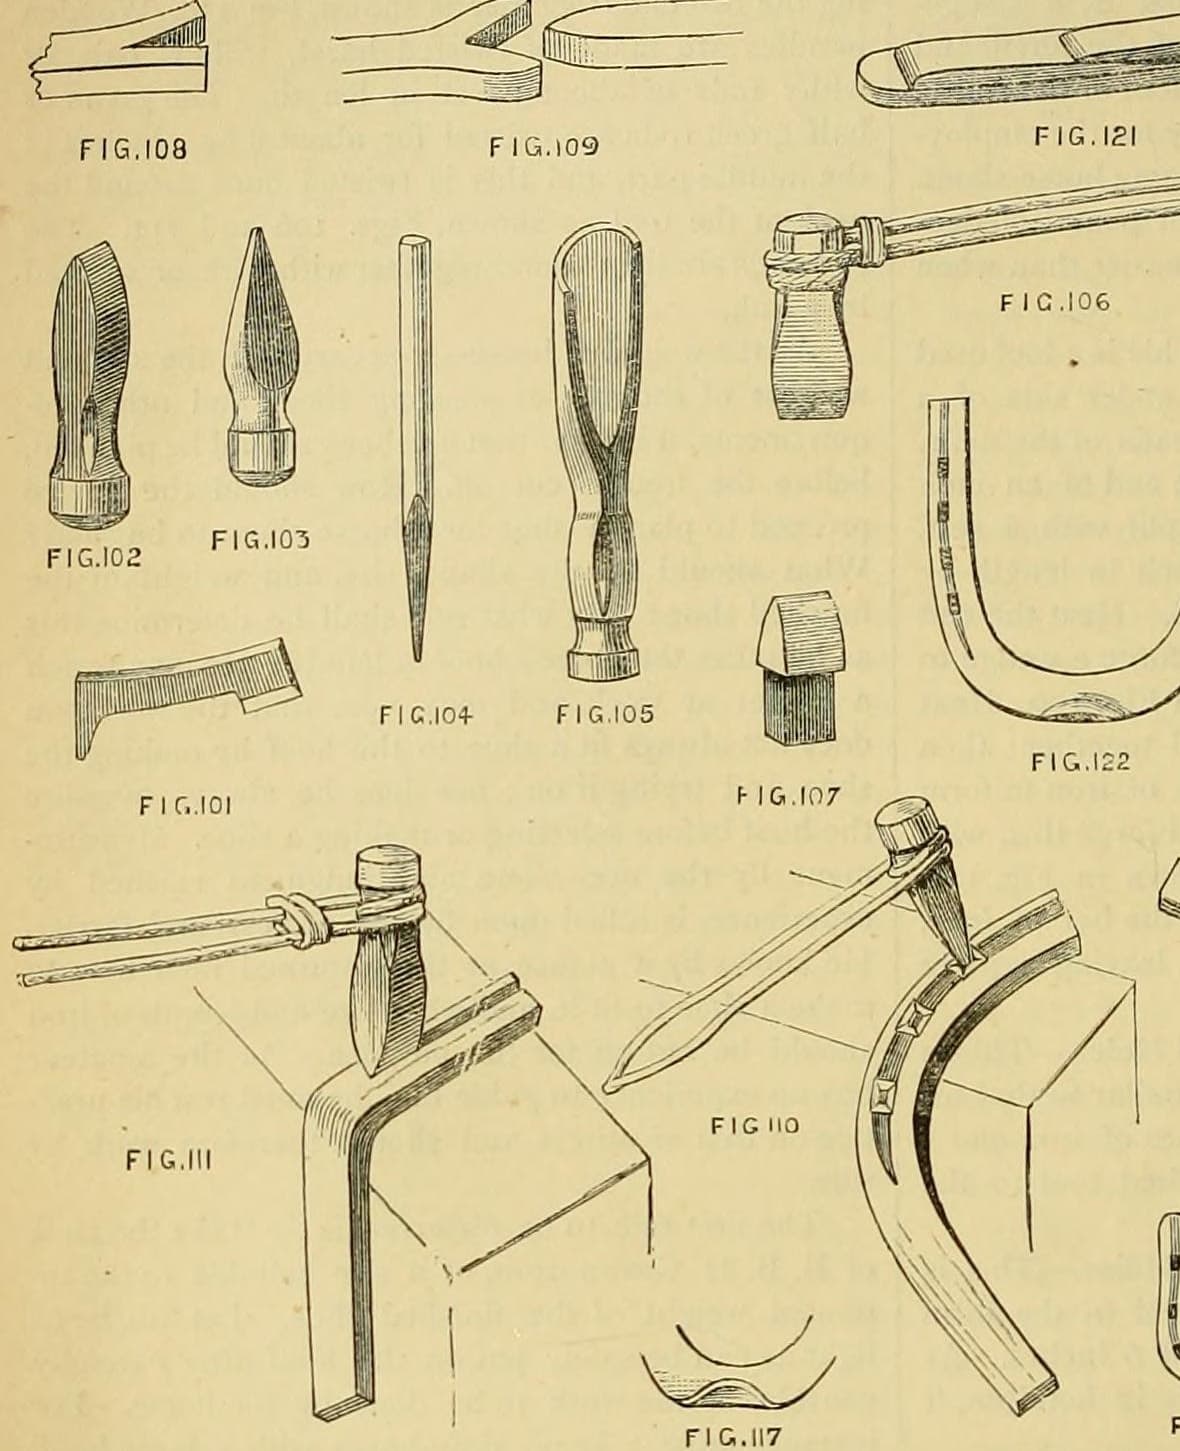
Top and Bottom Swages: Steel-Faced Iron Like a Fuller, Square Tang Below, Withy Handle Above, or Sprung Together (Edwinson, 1886)
Swages, the smith's top and bottom tools for bringing a weld back to round or square, from George Edwinson's smithing series in Amateur Work (1886): steel or steel-faced iron made like a fuller, the bottom tool tanged for the anvil's square hole, the top tool on a withy or iron-rod handle, or the pair coupled by a steel spring for single-handed work.
Avanzado
A day at the forge per pair
Instrucciones
1
1
Read Edwinson
Read Edwinson
"They may be made of steel throughout, or of steel-faced iron. The method of making them is similar to that for making fullers and setts."
2
2
Weld the blanks
Weld the blanks
As for a fuller: upset an iron bar, split it into a fork with a hot set, weld in a forged steel wedge. Or use steel throughout.
Materiales para este paso:
 Barra de hierro forjado1 pieza
 Acero al crisol1 pieza
 Bórax en polvo1 pieza
Herramientas necesarias:
 Fragua de herrero
 Yunque
 Mazo pesado
 Tajadera en caliente
 Tenazas de herrero
3
3
Bottom swage
Bottom swage
Forge the steel face into a block with a square tang that fits the square hole in the tail of the anvil, like a bottom set (his figs. 285-288).
Herramientas necesarias:
Fragua de herreroYunque MartilloTenazas de herrero
4
4
Top swage
Top swage
Forge the matching top tool with a neck for its handle.
Herramientas necesarias:
Fragua de herreroYunqueMartilloTenazas de herrero5
5
Cut the grooves
Cut the grooves
Form the working groove in each face to the section you need: round, half-round, oval, diagonal, square or rectangular. Groove sizes are ours: match the bars you forge.
Herramientas necesarias:
Fragua de herrero Fuller (degolladera)Yunque
 Limas (lima de mano)
6
6
Handle or spring
Handle or spring
Give the top tool a hazel-rod or iron-rod handle as for fullers and top sets. For single-handed work, couple the top and bottom tools with a steel spring (fig. 283).
Materiales para este paso:
 Varas de avellano (verdes, flexibles)1 pieza
 Barra redonda de acero dulce1 pieza
 Alambre de hierro1 pieza
 Fleje de acero para muelles1 pieza
Herramientas necesarias:
Fragua de herreroYunqueMartillo7
7
Grind and harden
Grind and harden
Grind the faces level so they fit each other, then heat the whole tool and harden it (his note for hand-worked dies).
Herramientas necesarias:
 Piedra de afilar de ruedaFragua de herrero
 Cubo de temple
8
8
Use them
Use them
Work the weld at a red heat. Hold the bar and the top swage; the striker hits the top tool with a light sledge. Pass the bar to and fro, turning it for round. After each heat gauge the weld in the swage block or with callipers.
Herramientas necesarias:
Fragua de herreroMazo pesado Calibre
9
9
Troubleshooting
Troubleshooting
Swage troubleshooting.
Flow
Loading...
10
10
History and honest limits
History and honest limits
From George Edwinson, "Smithing and Forging" XI, **Amateur Work, Illustrated**, vol. VI (1886-87), pp. 259-260 and figs. 283-290 (checked on the archive.org scan amateurworkillus06lond). The forging steps follow his fuller method (pp. 14-16). Groove sizes, the spring stock and the tools are ours.
Materiales
7- 1 piezaMarcador de posición
- 1 piezaMarcador de posición
- 1 piezaMarcador de posición
- Marcador de posición
- 1 piezaMarcador de posición
- 1 piezaMarcador de posición
- 1 piezaMarcador de posición
Herramientas requeridas
11- Marcador de posición
- Marcador de posición
- Marcador de posición
- Marcador de posición
- Marcador de posición
- Marcador de posición
- Marcador de posición
- Marcador de posición
- Marcador de posición
- Marcador de posición
- 1 vendor sell this, none ship to you yetMarcador de posición
Este plano hace

Blueprints relacionados
Estos blueprints comparten conocimiento — técnicas, materiales o principios
CC0 Dominio público
Este Blueprint se publica bajo CC0. Eres libre de copiar, modificar, distribuir y usar este trabajo para cualquier propósito, sin pedir permiso.
Apoya al Maker comprando productos a través de su Blueprint, donde gana una Comisión del Maker establecida por los vendedores, o crea una nueva iteración de este Blueprint e inclúyela como conexión en tu propio Blueprint para compartir ingresos.