ARTE
BELLEZA Y BIENESTAR
ARTESANÍA
CULTURA E HISTORIA
ENTRETENIMIENTO
MEDIO AMBIENTE
COMIDA Y BEBIDAS
INGENIERÍA INVERSA
CIENCIAS
DEPORTES
TECNOLOGÍA
TECNOLOGÍA VESTIBLE
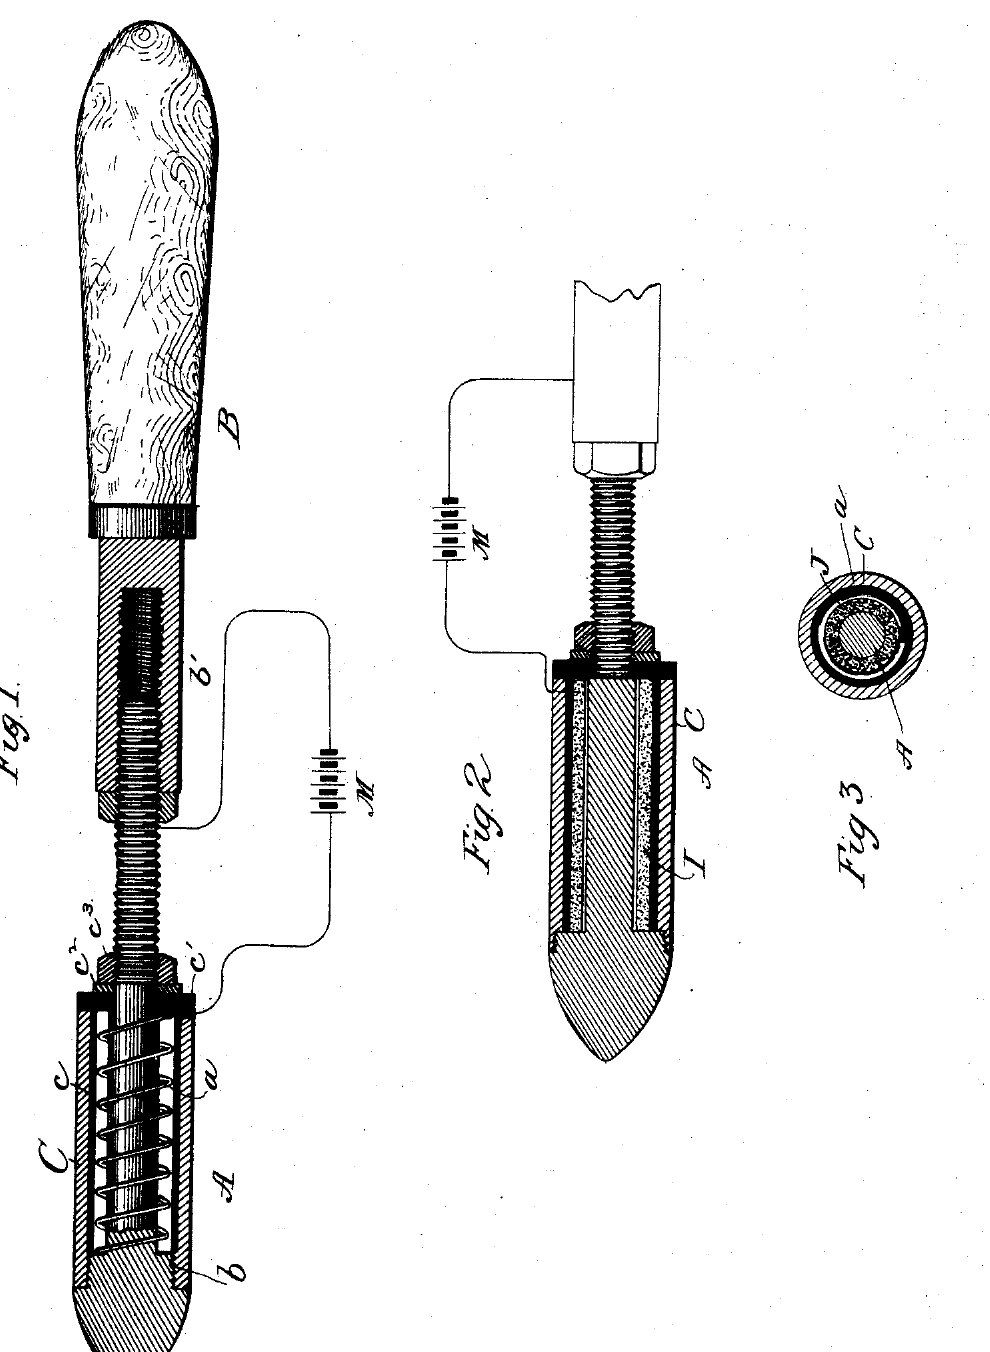


Electric Soldering Iron: Miner, 1890
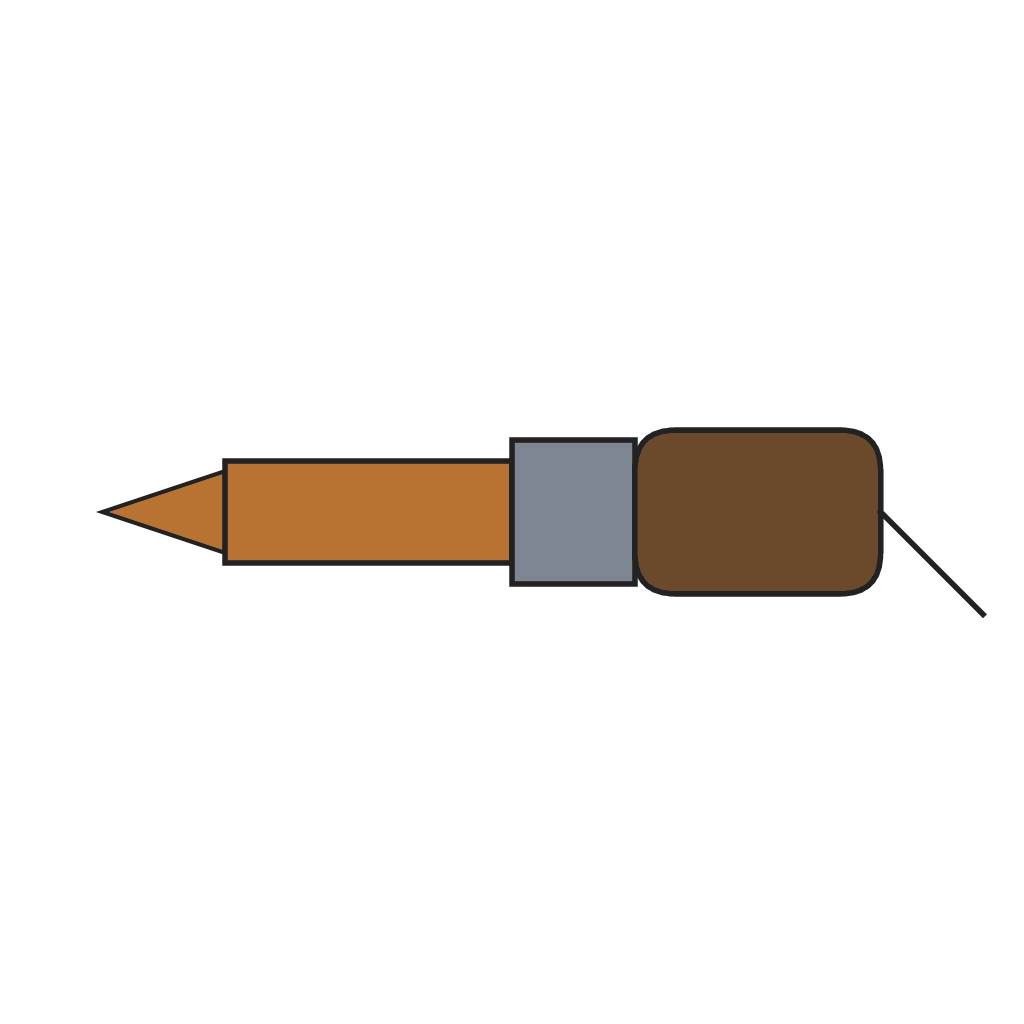
Earlier electric soldering irons heated a hollow copper head from inside, through finely divided carbon pressed against the tip, so the whole outside of the head lost heat to the air. Willard M. Miner of Plainfield, New Jersey, patented the alternative in 1890, US 421,185: keep the copper head solid, which holds its heat longer, and wind the heating resistance round the outside of it, under a shell that concentrates the heat on the copper and stops it escaping. The coil is German silver wire, wound round a reduced part of the head without touching it, with one end connected to the head and the other to the supply.
Intermedio
Workshop process
Instrucciones
1
1
Turn the head
Turn the head
Turn a solid copper head with its point. A little back from the point, cut the head down to a smaller diameter for some distance, leaving a shoulder, and thread a shank at its rear end.
Materiales para este paso:
 Barra redonda de cobre1 pieza
Herramientas necesarias:
 Torno de metal
2
2
Wind the coil
Wind the coil
Coil German silver wire round the reduced part of the head, the coil slightly larger than the head so the two do not touch. Connect one end of the coil to the head at the shoulder; the other end goes to the supply.
Materiales para este paso:
 Hilo de resistencia de alpaca1 as required
Herramientas necesarias:
 Alicates universales
3
3
Shell
Shell
Slip on the shell, of brass lined with non-conducting material. Close its inner end with an insulating disc held by a washer and nut on the threaded shank.
Materiales para este paso:
 Funda de latón forrada1 pieza
 Disco aislante de extremo1 pieza
Herramientas necesarias:
 Llave inglesa
4
4
Handle
Handle
Screw the shank into the metal socket in the handle, which takes the second connection.
Materiales para este paso:
 Listón de madera dura para mangos1 pieza
Materiales
5- 1 piezaMarcador de posición
- 1 as requiredMarcador de posición
- 1 piezaMarcador de posición
- 1 piezaMarcador de posición
- Marcador de posición
Herramientas requeridas
3- Marcador de posición
- Marcador de posición
- Marcador de posición
Este plano hace
Blueprints relacionados
Estos blueprints comparten conocimiento — técnicas, materiales o principios

CC0 Dominio público
Este Blueprint se publica bajo CC0. Eres libre de copiar, modificar, distribuir y usar este trabajo para cualquier propósito, sin pedir permiso.
Apoya al Maker comprando productos a través de su Blueprint, donde gana una Comisión del Maker establecida por los vendedores, o crea una nueva iteración de este Blueprint e inclúyela como conexión en tu propio Blueprint para compartir ingresos.