ARTE
BELLEZA Y BIENESTAR
ARTESANÍA
CULTURA E HISTORIA
ENTRETENIMIENTO
MEDIO AMBIENTE
COMIDA Y BEBIDAS
INGENIERÍA INVERSA
CIENCIAS
DEPORTES
TECNOLOGÍA
TECNOLOGÍA VESTIBLE
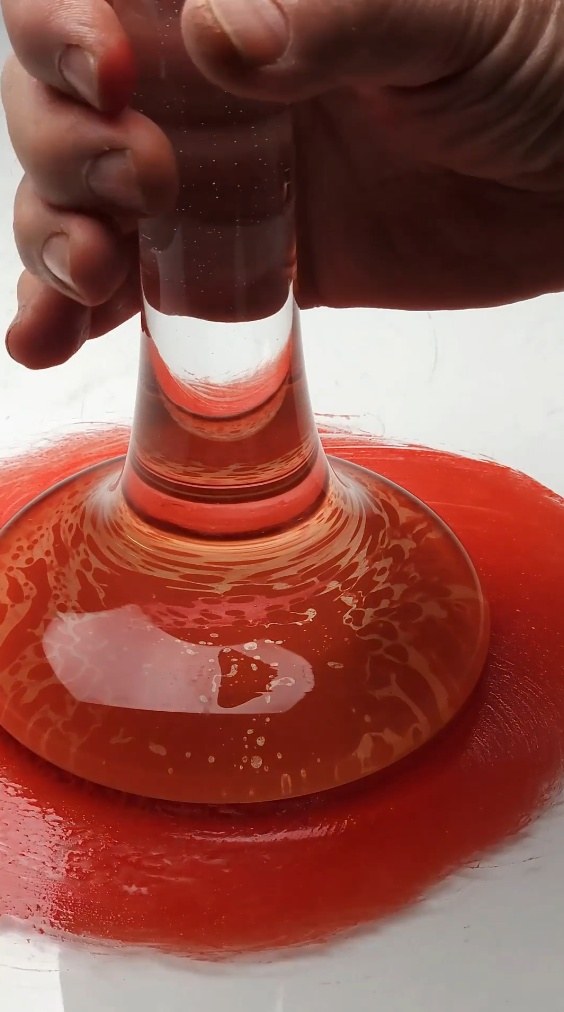


Glass Muller and Slab for Grinding Pigments
Painters and colourmen grind pigment into oil or gum with a muller, a heavy bell of glass or stone with a flat face, rubbed over a slab; Andrew Ure (1839) describes indigo and gold leaf ground this way. Gather glass rod into a solid bell in the flame, anneal it, then grind its face and a glass slab against each other with grit so they bite.
The picture: grinding a red pigment with a glass muller.
Intermedio
A day with annealing and grinding
Instrucciones
1
1
Gather the glass
Gather the glass
Melt the end of thick borosilicate rod in the torch and keep feeding rod into the gather, turning, until you have a heavy, bubble-free lump.
Materiales para este paso:
 Varilla de vidrio borosilicato4 piezas
Herramientas necesarias:
 Soplete de vidriero de mesa
 Gafas de seguridad
 Guantes resistentes al calor
2
2
Shape the bell
Shape the bell
Press the soft lump on the marver to a flat-faced bell and draw the top into a knob to hold. Keep it turning so it stays round.
Herramientas necesarias:
Soplete de vidriero de mesa Marver (placa de amasado del vidrio)Guantes resistentes al calor
3
3
Anneal slowly
Anneal slowly
A thick solid piece cracks if it cools fast: put it straight into the kiln at annealing heat, soak it well and cool very slowly.
Herramientas necesarias:
 Horno cerámico
4
4
Cut the slab
Cut the slab
Cut a square of thick glass sheet for the slab.
Materiales para este paso:
 Lámina de vidrio1 pieza
Herramientas necesarias:
 CortavidriosGafas de seguridad
5
5
Grind them together
Grind them together
Put wet grit on the slab and rub the muller face over it in figure-eights until both surfaces are evenly frosted and flat to each other. Wash clean.
Materiales para este paso:
 Agua2 litros
Herramientas necesarias:
 Granalla de carburo de silicio
6
6
Glass for the muller
Glass for the muller
Cargando el cuaderno de Jupyter…
Materiales
3- 4 piezasMarcador de posición
- 1 piezaMarcador de posición
- 2 litrosMarcador de posición
Herramientas requeridas
7- Marcador de posición
- Marcador de posición
- Marcador de posición
- Marcador de posición
- Marcador de posición
- Marcador de posición
- Marcador de posición
Este plano hace


Blueprints relacionados
Estos blueprints comparten conocimiento — técnicas, materiales o principios
CC0 Dominio público
Este Blueprint se publica bajo CC0. Eres libre de copiar, modificar, distribuir y usar este trabajo para cualquier propósito, sin pedir permiso.
Apoya al Maker comprando productos a través de su Blueprint, donde gana una Comisión del Maker establecida por los vendedores, o crea una nueva iteración de este Blueprint e inclúyela como conexión en tu propio Blueprint para compartir ingresos.