ARTE
BELLEZA Y BIENESTAR
ARTESANÍA
CULTURA E HISTORIA
ENTRETENIMIENTO
MEDIO AMBIENTE
COMIDA Y BEBIDAS
INGENIERÍA INVERSA
CIENCIAS
DEPORTES
TECNOLOGÍA
TECNOLOGÍA VESTIBLE
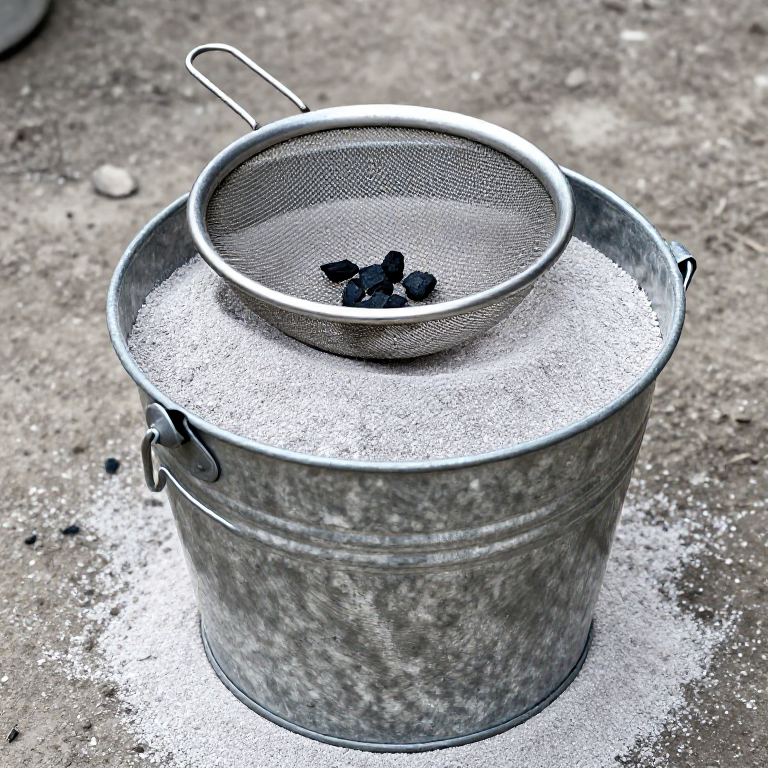

Hardwood Ash
The grey-white ash left when clean hardwood burns completely is the starting point for lye and soap, potash, ash glazes and nixtamal, and a garden lime. Its largest part is calcium carbonate, with potassium salts, and it is alkaline: wet ash stings the skin.
Only clean wood: never painted, treated, glued or mixed with rubbish. How much ash a load of wood gives varies with the species and how much bark is on it, so weigh both and find out.
Principiante
1 day, plus 3 days cooling
Instrucciones
1
1
Weigh the wood
Weigh the wood
Weigh dry, clean hardwood logs such as oak, beech, ash or maple. Note the weight.
Materiales para este paso:
 Troncos de madera dura (roble, arce, haya)20 kg
Herramientas necesarias:
 Báscula
2
2
Burn it down
Burn it down
Light a fire in a clean fire pit with tinder and kindling, and feed it the weighed logs. Keep it burning until no black charcoal is left, only grey-white ash.
Materiales para este paso:
 Haz de yesca1 pieza
 Yesca y palitos1 pieza
 Cerillas1 pieza
Herramientas necesarias:
 Hoguera
3
3
Cool it in metal
Cool it in metal
Shovel the ash into a metal bucket with a lid and stand it on bare ground, at least 3 m from any building. Leave it at least 3 days: ash hides embers that stay hot for days.
Herramientas necesarias:
 Pala
 Cubo metálico con tapa
 Guantes de trabajo de cuero
4
4
Sieve it
Sieve it
With a dust mask and gloves on, sieve the cold ash through a coarse sieve into a second bucket. Throw back any black bits for the next fire.
Herramientas necesarias:
 Tamiz grueso
 Cubo metálico
 Mascarilla antipolvoGuantes de trabajo de cuero
5
5
Weigh the ash
Weigh the ash
Weigh the sieved ash and divide by the wood's weight: that is your yield. Note the species.
Herramientas necesarias:
Báscula6
6
Keep it dry
Keep it dry
Store it in the lidded metal bucket in a dry place. Damp ash cakes, and rain washes the potassium out of it.
Herramientas necesarias:
Cubo metálico con tapaMateriales
4- Marcador de posición
- 1 piezaMarcador de posición
- 1 piezaMarcador de posición
- 1 piezaMarcador de posición
Herramientas requeridas
8- Marcador de posición
- Marcador de posición
- Marcador de posición
- Marcador de posición
- Marcador de posición
- Marcador de posición
- Marcador de posición
- Marcador de posición
Este plano hace

Blueprints relacionados
Estos blueprints comparten conocimiento — técnicas, materiales o principios


CC0 Dominio público
Este Blueprint se publica bajo CC0. Eres libre de copiar, modificar, distribuir y usar este trabajo para cualquier propósito, sin pedir permiso.
Apoya al Maker comprando productos a través de su Blueprint, donde gana una Comisión del Maker establecida por los vendedores, o crea una nueva iteración de este Blueprint e inclúyela como conexión en tu propio Blueprint para compartir ingresos.