Colaboración
ARTE
BELLEZA Y BIENESTAR
ARTESANÍA
CULTURA E HISTORIA
ENTRETENIMIENTO
MEDIO AMBIENTE
COMIDA Y BEBIDAS
INGENIERÍA INVERSA
CIENCIAS
DEPORTES
TECNOLOGÍA
TECNOLOGÍA VESTIBLE
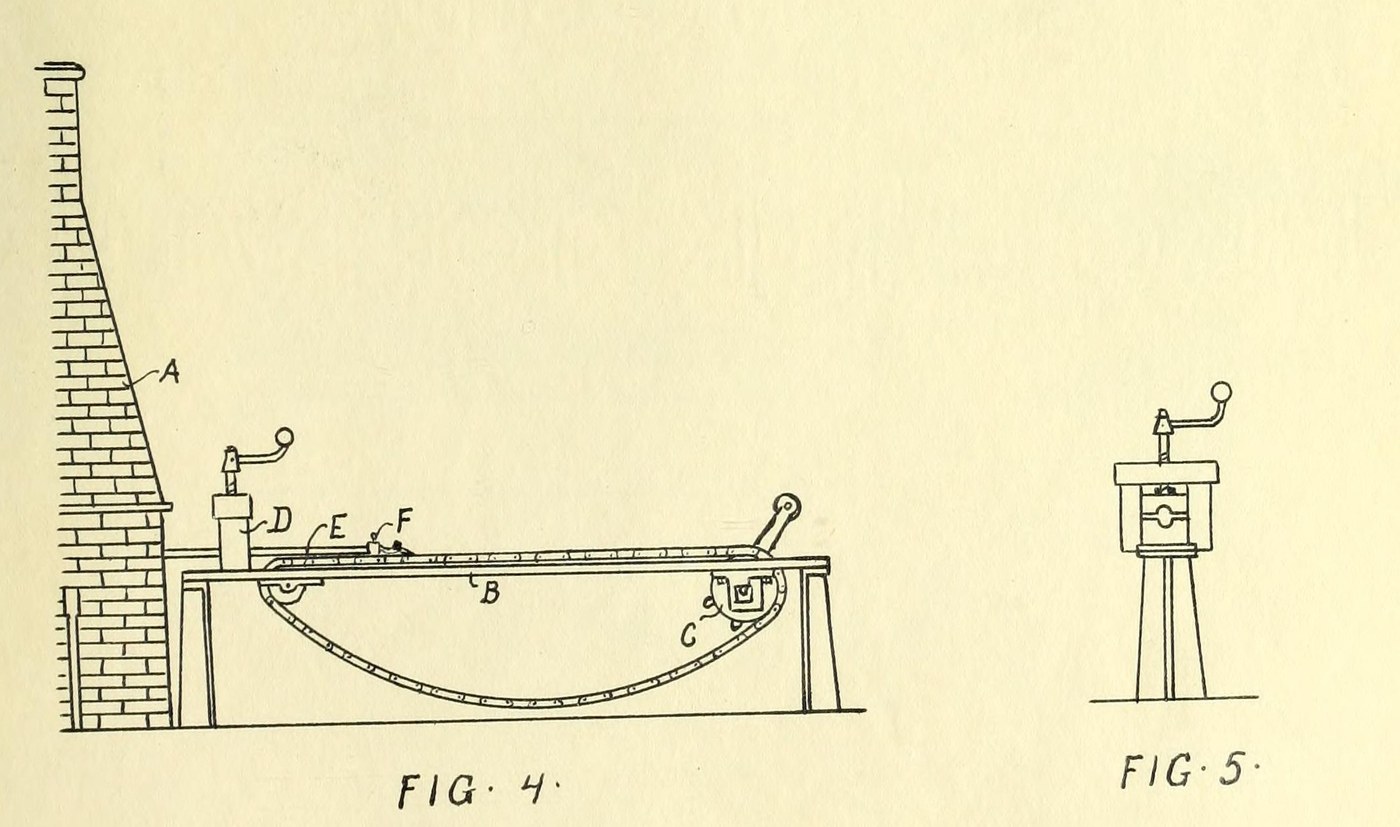


Iron Tube: Butt-Welded by Drawing Through Dies on a Draw Bench (Whitehouse, 1825)
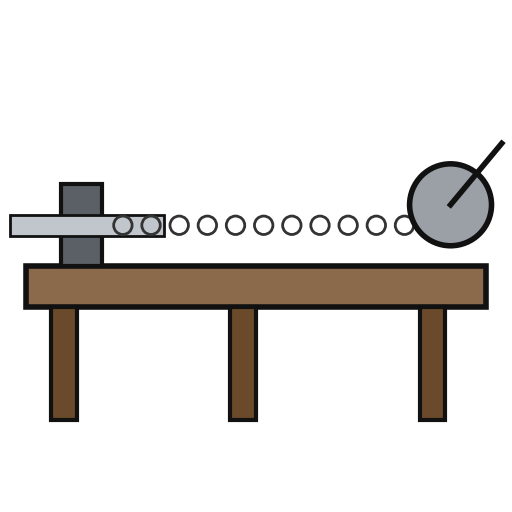
Cornelius Whitehouse's way of making welded iron tubes, the basis of butt-weld pipe ever since: a strip of flat iron is turned up into a tube with its edges meeting, heated nearly to fusion in a hollow fire, and pulled by the chain of a draw bench through a pair of dies, which press the hot edges together and weld them.
The tube is welded in two halves, one end at a time. Whitehouse made tubes 2 to 8 ft long in one piece, smooth inside and out.
Unknown: plate thickness, width and tube sizes. The source does not give them.
Source: Whitehouse's specification of 1825, quoted in C. D. Terry, Butt Weld Pipe (1907). Picture: Terry's Figs. 4 and 5.
Avanzado
Unknown
Instrucciones
1
1
Turn the plate over
Turn the plate over
Take a piece of flat iron (plough-plate iron) of a thickness and width to suit the intended bore. Bend up its sides ('turn it over') until the edges meet, or nearly so, and it forms a long tube. Ours: hammer and anvil for the bending.
Materiales para este paso:
 Barras de hierro forjado1 flat plough-plate iron
 Dimensiones desconocidas1 pieza
Herramientas necesarias:
 Martillo de forja
 Yunque plano
2
2
Heat in the hollow fire
Heat in the hollow fire
Put the tube into a hollow fire, urged by a blast, and heat it until the iron is on the point of fusion. Ours: a smith's forge as the hollow fire.
Herramientas necesarias:
 Fragua de herrero
 Tenazas de fragua
3
3
Draw it through the dies
Draw it through the dies
Clamp the end of the tube to the chain of the draw bench, driven by a hand winch or an engine. Draw it out of the fire through a pair of dies of the size wanted, set in a screw press and closed to their bearing, so that the hot edges are pressed together and welded. A pair of pinchers with a conical hole, held against a standard, may be used instead of the press and dies.
Herramientas necesarias:
 Banco de estirarTenazas de fragua
4
4
Weld the other half
Weld the other half
Open the clamp and take the tube off. Grip the other end, put the unwelded part into the fire, heat it, and draw it through the dies in the same way.
Herramientas necesarias:
Fragua de herreroBanco de estirarTenazas de fraguaMateriales
2- 1 flat plough-plate ironMarcador de posición
- 1 piezaMarcador de posición
Herramientas requeridas
5- Marcador de posición
- Marcador de posición
- Marcador de posición
- Marcador de posición
- Marcador de posición
Materiales de Blueprints conectados


Este plano hace
CC0 Dominio público
Este Blueprint se publica bajo CC0. Eres libre de copiar, modificar, distribuir y usar este trabajo para cualquier propósito, sin pedir permiso.
Apoya al Maker comprando productos a través de su Blueprint, donde gana una Comisión del Maker establecida por los vendedores, o crea una nueva iteración de este Blueprint e inclúyela como conexión en tu propio Blueprint para compartir ingresos.