
Colaboración
ARTE
BELLEZA Y BIENESTAR
ARTESANÍA
CULTURA E HISTORIA
ENTRETENIMIENTO
MEDIO AMBIENTE
COMIDA Y BEBIDAS
INGENIERÍA INVERSA
CIENCIAS
DEPORTES
TECNOLOGÍA
TECNOLOGÍA VESTIBLE
Turner's Pole Lathe with Puppets, Screw Centre and Treadle (Moxon, 1680)
Woody

Creado por

Woody

14. noviembre 2026NO
2
0
0
0
0

Turner's Pole Lathe with Puppets, Screw Centre and Treadle (Moxon, 1680)

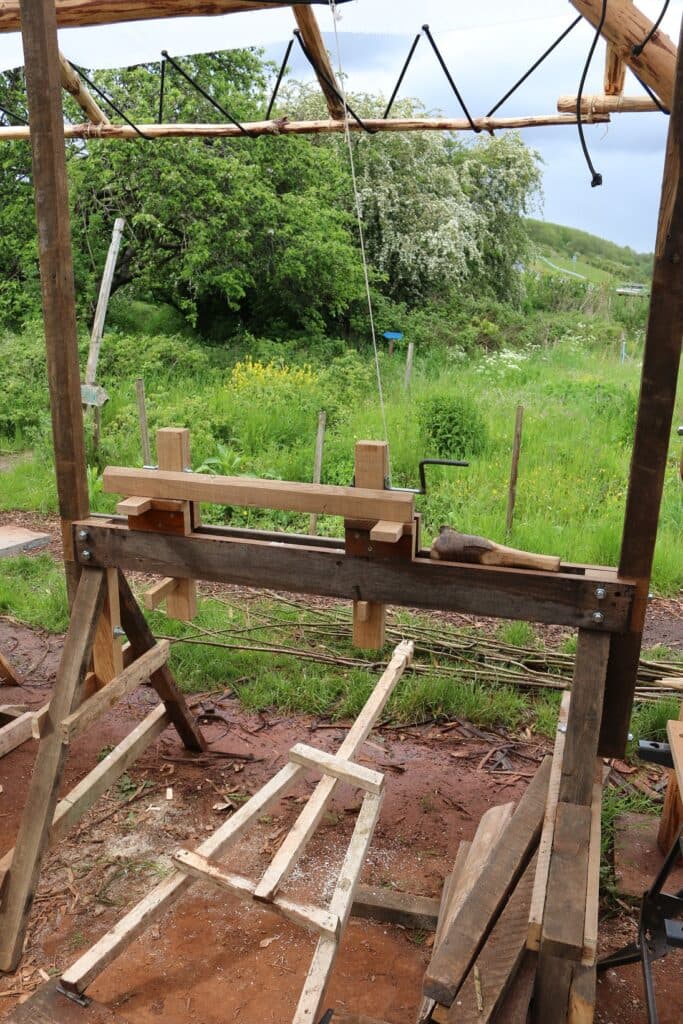
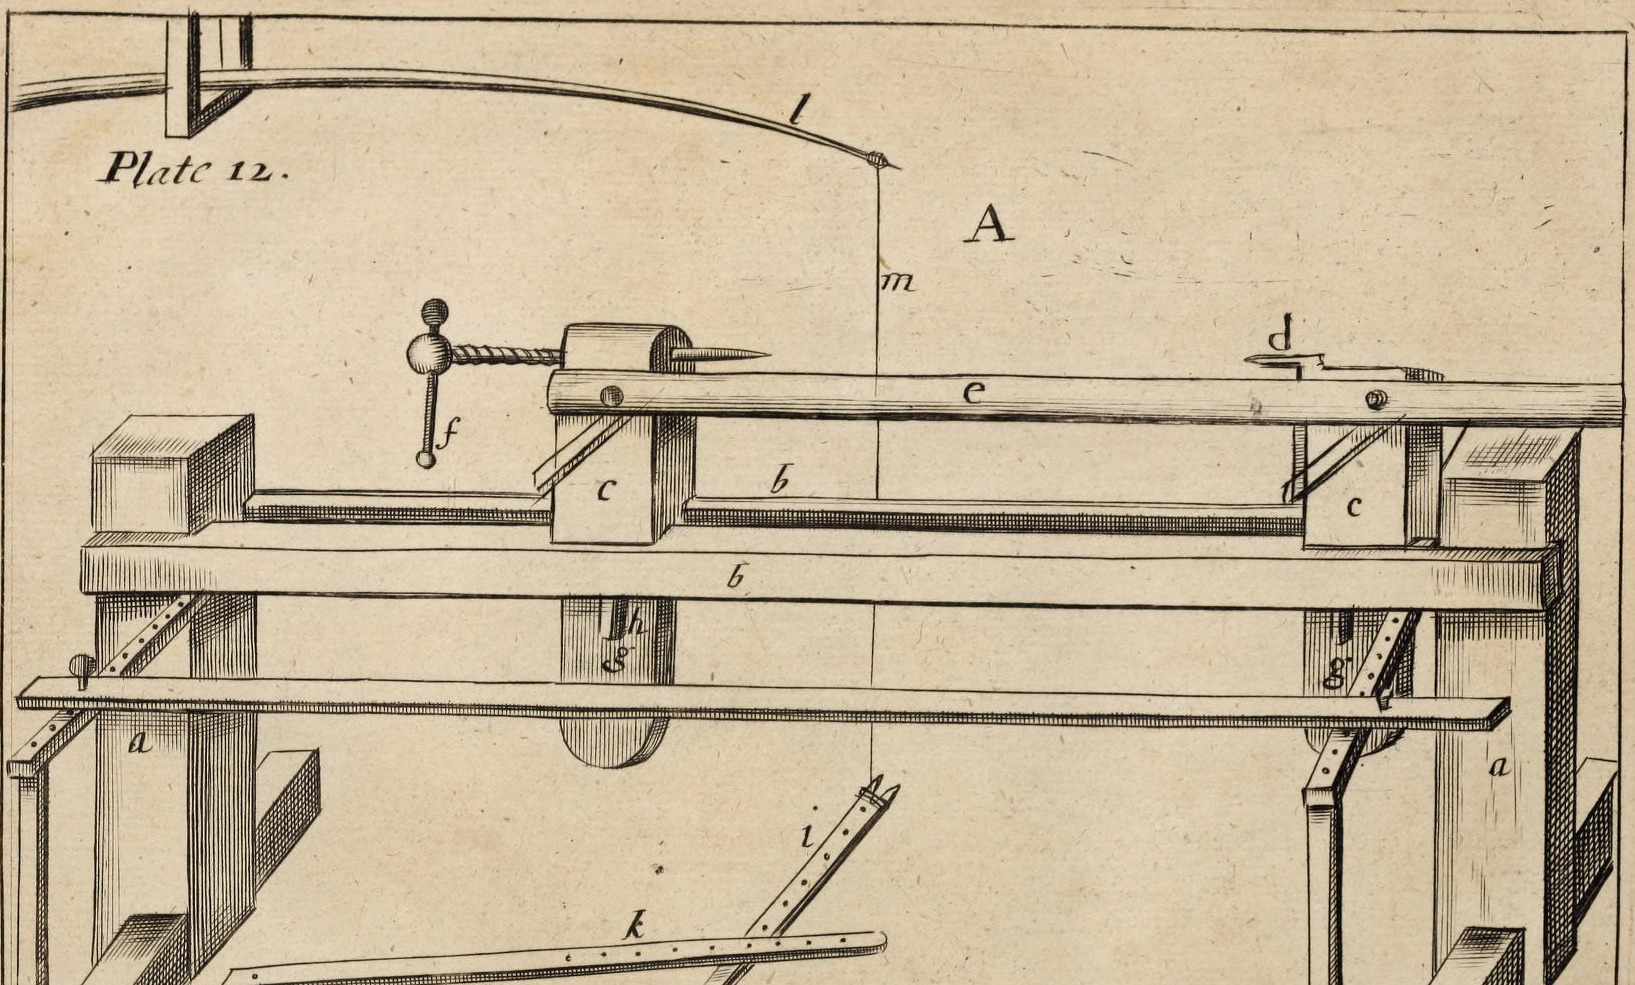
The workshop pole lathe of Joseph Moxon's Mechanick Exercises: legs and twin cheeks bolted square, sliding puppets wedged through the bed, a fixed steel-pointed pike and an adjustable screw centre, a hinged treadle with a cross-treadle, and a fir pole pinned to the ceiling for the spring.
Avanzado
Two to three days

Instrucciones

1

His sizes

Cargando el cuaderno de Jupyter…
2

Read Mechanick Exercises

"The Lathe is described in Plate 12. A. This Machine is so vulgarly known..."
3

Legs and cheeks

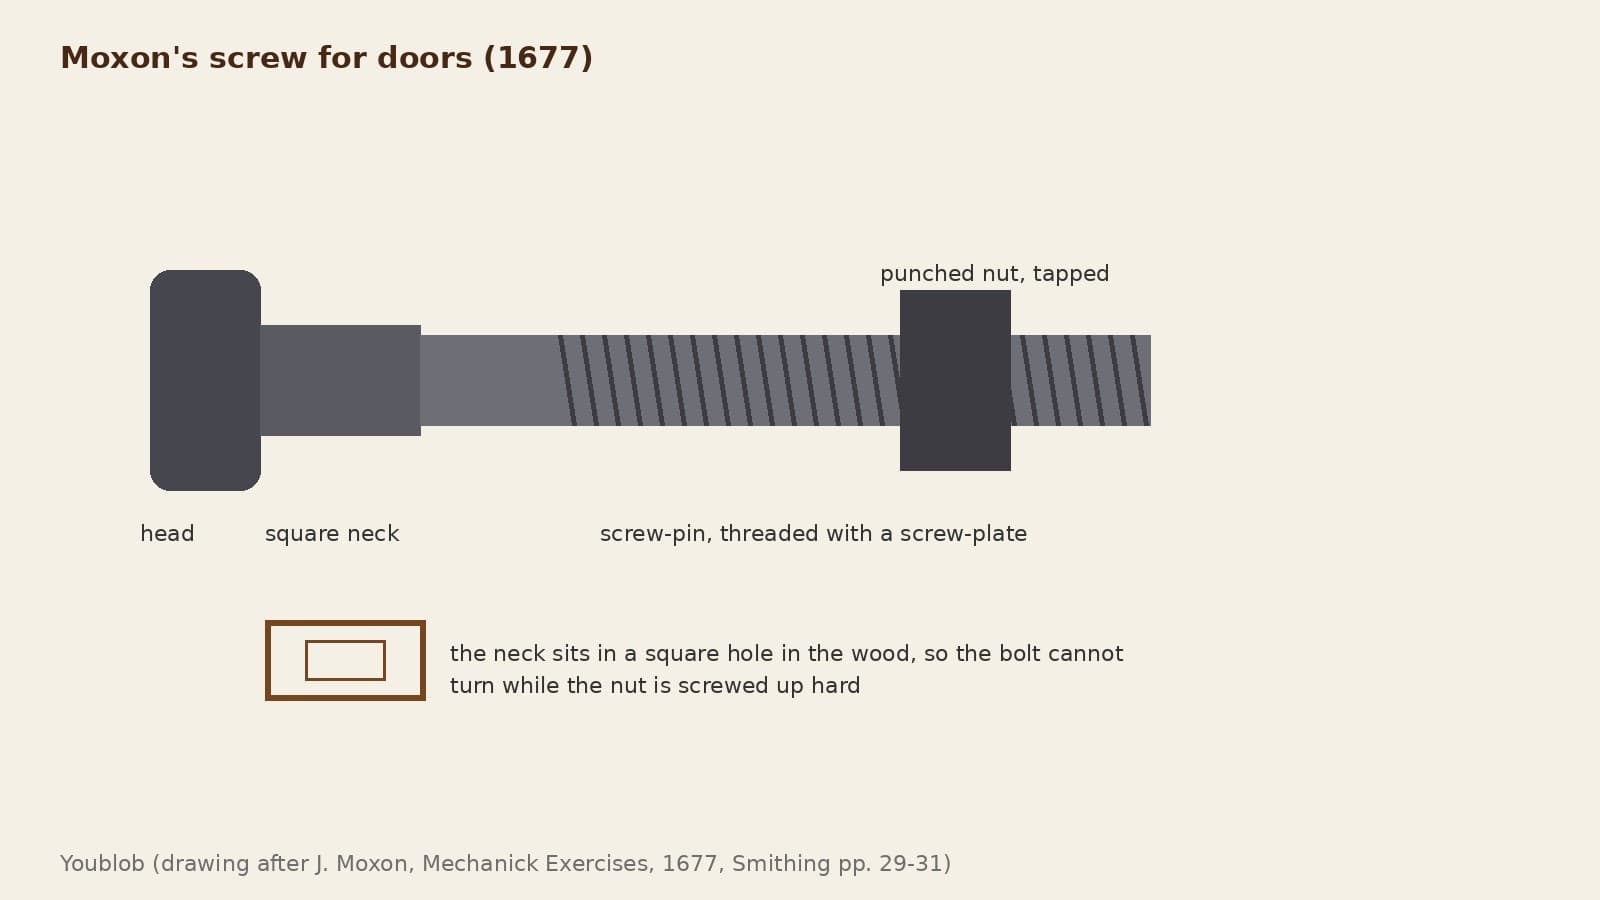
Set up two legs about 2 ft 10 in (86 cm) high, plumb, each with a tenon on top as thick as the gap you want between the two cheeks. Lay a cheek each side of the tenons, level, and fix them: pinned, or better with an iron bolt whose square neck sits in a square hole in the near cheek, drawn up by a nut. Brace legs and cheeks to the floor and walls so nothing trembles.

Materiales para este paso:

Tabla de roble blancoTabla de roble blanco1 pieza
Tornillo de carruajeTornillo de carruaje1 pieza

Herramientas necesarias:

SerruchoSerrucho
Formón de mortajaFormón de mortaja
Mazo de maderaMazo de madera
Berbiquí y barrenaBerbiquí y barrena
4

Puppets

Make two (or two or three pairs of) square puppets, strong rather than weak and as short as your work allows: the centres must stand a little more than half the work's diameter above the cheeks. Give each a tenon at the foot that slides in the gap between the cheeks, with a mortise through it below the cheeks for a tapering wedge, driven with a mallet to clamp the puppet down.

Materiales para este paso:

Tabla de roble blancoTabla de roble blanco1 pieza
Cuña de madera duraCuña de madera dura1 pieza

Herramientas necesarias:

SerruchoSerrucho
Formón de mortajaFormón de mortaja
Mazo de maderaMazo de madera
5

Pike and screw centre

Near the top of one puppet fix a strong iron pike with a tempered steel point. Through the other fit an iron screw in a nut in the puppet, also with a steel point, both points in one straight line facing each other. Put an iron handle 7-8 in long with a knob at each end through the screw head. Cut the puppets to square shoulders just below the pikes to carry the rest.

Materiales para este paso:

Barra de hierro forjadoBarra de hierro forjado1 pieza
Barra cuadrada de acero para herramientasBarra cuadrada de acero para herramientas1 pieza

Herramientas necesarias:

Fragua de herreroFragua de herrero
YunqueYunque
Juego de machos y terrajasJuego de machos y terrajas
Cubo de templeCubo de temple
6

Rest and oil horn

Make the rest a square piece 1-1.5 in thick, 2-2.5 in broad, a little longer than the gap between the puppets. Hang a horn tip down on the outside of the right-hand puppet near the top, filled with oil, with a wooden cover and button carrying an iron wire that reaches nearly to the bottom, to oil the centre holes.

Materiales para este paso:

Tabla de roble blancoTabla de roble blanco1 pieza
Cuerno de vacunoCuerno de vacuno1 pieza
Alambre de hierroAlambre de hierro1 pieza
Aceite de máquinaAceite de máquina1 pieza

Herramientas necesarias:

SerruchoSerrucho

Berbiquí y barrenaBerbiquí y barrena
7

Treadle and cross-treadle

Make a treadle about 2.5 in broad, 1 in thick and 3 ft (up to 4 ft) long. Nail its back end to the floor with a piece of leather, 1-1.5 ft behind the lathe and midway between the legs, so the front reaches 1.5-2 ft past the front of the lathe. Cut a square notch 1.5 in wide and 2 in long in the far end for winding the string. Fix an iron pin about 0.5 in thick, standing 1.5-2 in up, in the middle; under the cheeks fix a cross-treadle with a row of holes 2-3 in apart to take the pin.

Materiales para este paso:

Tabla de roble blancoTabla de roble blanco1 pieza
Correa de cueroCorrea de cuero1 pieza
Clavos de hierroClavos de hierro1 pieza
Barra de hierro forjadoBarra de hierro forjado1 pieza

Herramientas necesarias:

SerruchoSerrucho
MartilloMartillo
Berbiquí y barrenaBerbiquí y barrena
8

Pole and string

Use a fir pole, thick or thin to suit the work; if it is too stiff, thin its upper and under sides with a draw-knife. Pin the thick end to a ceiling timber with one nail so it pivots. About a foot away nail two cheeks to the joists with a batten across their foot to carry the pole. Run the string from the pole's thin end, round the work, to the treadle.

Materiales para este paso:

Palo de maderaPalo de madera1 pieza
CordelCordel1 pieza
Clavos de hierroClavos de hierro1 pieza
Tabla de roble blancoTabla de roble blanco1 pieza

Herramientas necesarias:

Cuchilla de dos mangosCuchilla de dos mangos
MartilloMartillo
9

Troubleshooting

Pole lathe troubleshooting.

Flow

Loading...
10

History and honest limits

From Joseph Moxon, **Mechanick Exercises**, Numb. X, Turning (1680), pp. 176-185 and Plate 12 (checked on the archive.org scan mechanickexercis00moxo). He gives no sizes for cheeks, puppets or pole; metric and the wood choices are ours.

Materiales

12

Herramientas requeridas

10

CC0 Dominio público

Este Blueprint se publica bajo CC0. Eres libre de copiar, modificar, distribuir y usar este trabajo para cualquier propósito, sin pedir permiso.

Apoya al Maker comprando productos a través de su Blueprint, donde gana una Comisión del Maker establecida por los vendedores, o crea una nueva iteración de este Blueprint e inclúyela como conexión en tu propio Blueprint para compartir ingresos.

Discusión

(0)

Iniciar sesión para unirte a la discusión

Cargando comentarios...