ARTE
BELLEZA Y BIENESTAR
ARTESANÍA
CULTURA E HISTORIA
ENTRETENIMIENTO
MEDIO AMBIENTE
COMIDA Y BEBIDAS
INGENIERÍA INVERSA
CIENCIAS
DEPORTES
TECNOLOGÍA
TECNOLOGÍA VESTIBLE
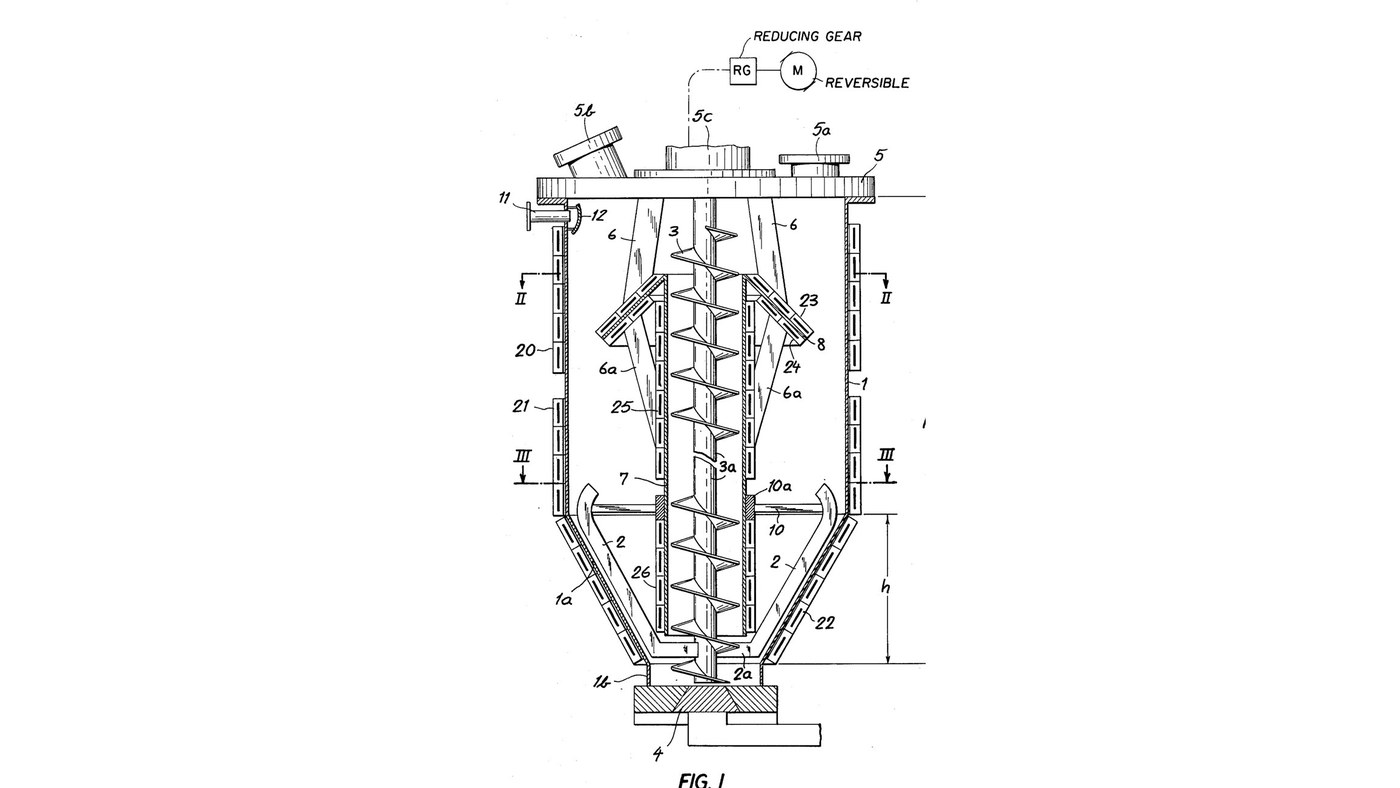


Resin Mixing and Degassing Station: Vacuum Vessel with Worm and Apron
W. Hedrich's mixer (US 4,049,244, 1977) for reactive resins that must be mixed and freed of gas before they set. In a vessel under vacuum a worm lifts the resin up a central tube and spills it over a cone-shaped apron in a thin layer, where the gas escapes; vanes on the worm sweep the funnel bottom and keep it circulating. Peltier elements on the vessel, tube and apron heat or cool each zone. Reversed, the worm drives the batch out through the bottom valve.
The patent gives no sizes, vacuum, speeds or temperatures; it describes an industrial vessel. The picture: the patent's Fig. 1.
Avanzado
5 days
Instrucciones
1
1
Fit the vessel's neck valve and vacuum pipe
Fit the vessel's neck valve and vacuum pipe
Use a metal vessel, cylindrical above with a funnel bottom about one third of its height, ending in a short neck. Fit the discharge valve (4) on the neck, and a side vacuum pipe (11) near the top with a baffle plate (12) inside to keep solids out of the vacuum line. Ours: TIG welder.
Materiales para este paso:
 Tanque de mezcla cerrado1 pieza
 Válvula de bola1 pieza
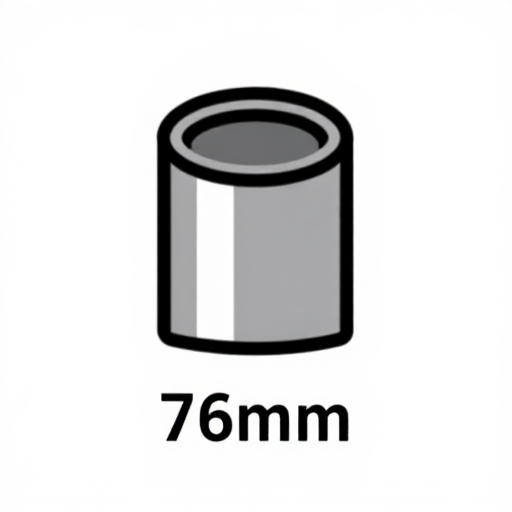 Tubo de acero inoxidable1 pieza
 Chapa de acero inoxidable1 pieza
Herramientas necesarias:
 Soldadora TIG
 Llave inglesa
2
2
Make the mixing tube and apron
Make the mixing tube and apron
Join a downward-flaring cone apron (8) to the upper end of a tube (7), braced by struts (6a). Hang the tube on struts (6) from the cover.
Materiales para este paso:
Tubo de acero inoxidable1 piezaChapa de acero inoxidable1 piezaHerramientas necesarias:
Soldadora TIG3
3
Fit the cover's inlet, window and bearing
Fit the cover's inlet, window and bearing
Fit the removable cover (5) with an inlet fitting (5a) that seals vacuum-tight, a viewing window (5b) with a watch glass to watch the degassing, and a bearing (5c) for the worm shaft; seal it to the vessel.
Materiales para este paso:
 Tapa de recipiente1 pieza
 Racor roscado para manguera1 pieza
 Vidrio de reloj1 pieza
 Rodamiento de bolas1 pieza
 Junta de estanqueidad1 pieza
Herramientas necesarias:
Llave inglesa4
4
Fit the worm and its vanes
Fit the worm and its vanes
Pass the worm (3) down through the tube so it just sticks out at the top and reaches into the neck close to the valve. Below the tube, fix agitating vanes (2) on arms (2a) so they sweep close to the funnel wall, steadied by struts (10) on a bearing (10a) riding on the tube.
Materiales para este paso:
 Tornillo transportador1 pieza
 Pala agitadora2 piezas
 Casquillo metálico1 pieza
Herramientas necesarias:
Llave inglesa5
5
Mount the reversible drive on the cover
Mount the reversible drive on the cover
Mount a reversible variable-speed motor (M) with reduction gearing (RG) on the cover, driving the worm shaft: one way lifts resin up the tube, the other drives it out of the valve.
Materiales para este paso:
 Motor eléctrico1 pieza
 Caja reductora1 pieza
Herramientas necesarias:
Llave inglesa6
6
Fit the Peltier elements
Fit the Peltier elements
Fit Peltier elements in electrical contact with the metal in separately switched sets: round the top of the vessel (20), its lower cylinder (21) and its funnel (22), and along the tube and on the apron (23-26), best on the apron's upper face. Reversing a set's polarity swaps heating for cooling.
Materiales para este paso:
 Módulo Peltier1 pieza
Herramientas necesarias:
Llave inglesa7
7
Connect the vacuum and run a batch
Connect the vacuum and run a batch
Connect the vacuum pipe to a vacuum pump. With the vessel under vacuum, add the resin components one after another through the inlet; the worm lifts the mix over the apron in a thin layer, and the funnel stays full while it circulates. Reverse the worm with the valve open to empty it.
Herramientas necesarias:
 Bomba de vacío
Materiales
15- 1 piezaMarcador de posición
- 1 piezaMarcador de posición
- 1 piezaMarcador de posición
- 1 piezaMarcador de posición
- 1 piezaMarcador de posición
- 1 piezaMarcador de posición
- 1 piezaMarcador de posición
- Marcador de posición
- 1 piezaMarcador de posición
- 1 piezaMarcador de posición
- 2 piezasMarcador de posición
- 1 piezaMarcador de posición
- 1 piezaMarcador de posición
- 1 piezaMarcador de posición
- 1 piezaMarcador de posición
Este plano hace

CC0 Dominio público
Este Blueprint se publica bajo CC0. Eres libre de copiar, modificar, distribuir y usar este trabajo para cualquier propósito, sin pedir permiso.
Apoya al Maker comprando productos a través de su Blueprint, donde gana una Comisión del Maker establecida por los vendedores, o crea una nueva iteración de este Blueprint e inclúyela como conexión en tu propio Blueprint para compartir ingresos.