ARTE
BELLEZA Y BIENESTAR
ARTESANÍA
CULTURA E HISTORIA
ENTRETENIMIENTO
MEDIO AMBIENTE
COMIDA Y BEBIDAS
INGENIERÍA INVERSA
CIENCIAS
DEPORTES
TECNOLOGÍA
TECNOLOGÍA VESTIBLE



Sawing a Curve: Coping, Fret and Bow Saws
A wide blade cannot turn. To saw a curve you need a narrow one, and a narrow blade has no stiffness of its own — so it is held in a frame that keeps it in tension, exactly like a hacksaw blade.
That gives the family: a COPING saw for tight curves in wood, a FRET or PIERCING saw for very fine work and metal, a BOW saw for long curves in thick stock. All three work the same way and all three break blades for the same reason — twisting.
The other thing they share is that the blade can be turned in the frame, so the frame can be swung out of the way of the work rather than the work having to be turned.
Intermedio
3 hours
Instrucciones
1
1
The narrower the blade, the tighter the curve
The narrower the blade, the tighter the curve
A blade can only follow a curve whose radius is large enough that the blade does not bind in its own kerf. A 3 mm coping saw blade turns a radius of a few centimetres; a 1 mm fret blade turns almost on the spot.
Trying to force a wide blade round a tight curve jams the back of it against the kerf wall, which is exactly the binding the set is there to prevent. The blade twists, and a twisted thin blade snaps.
If a curve is too tight for the blade you have, the answer is a series of straight relief cuts in from the waste side, so the waste falls away in pieces and the blade never has to turn far. That is the standard solution and it is faster than fighting it.
Materiales para este paso:
 Tabla de madera blanda seca1 pieza
Herramientas necesarias:
 Segueta (sierra de marquetería)
 Segueta de joyero
 Lupa de relojero
2
2
Which way the teeth point, and why it differs
Which way the teeth point, and why it differs
A coping saw is normally fitted with the teeth pointing TOWARD the handle, so it cuts on the pull. A thin blade in tension tracks better than one being pushed, which would buckle it.
A fret saw and a jeweller's saw are the same — teeth toward the handle, cutting on the down stroke when held vertically over a bench pin. A bow saw, with a stiffer blade and a heavy frame, is usually set to cut on the push.
The blade can be rotated in its pins so the frame clears the work. Set it before you start: discovering halfway through a cut that the frame has hit the workpiece means backing all the way out, and the kerf never quite lines up again.
Herramientas necesarias:
Segueta (sierra de marquetería)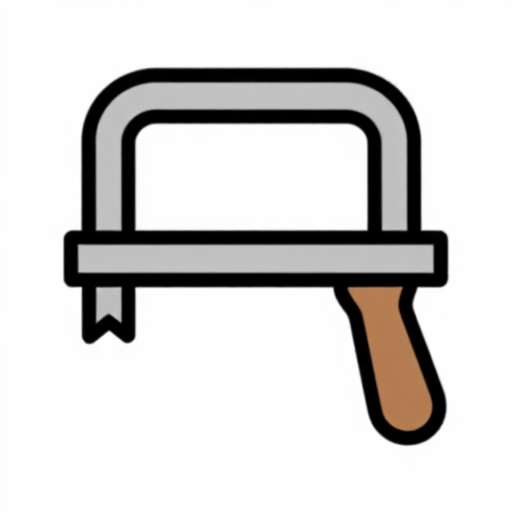 Sierra de joyero
 Bastidor de sierra de madera
3
3
Let the blade turn, and keep it vertical
Let the blade turn, and keep it vertical
Steer by rotating the whole saw gradually as you stroke, not by pushing sideways. Sideways pressure bends the blade and the cut comes out undercut on one face — square on top, sloping underneath.
Keep the frame upright and your eye over the blade. With a frame saw it is very easy to drift off vertical without noticing, and a piece that fits its neighbour on the top face but not underneath is the usual result.
Cut on the WASTE side and leave the line, as always. A curve cut slightly fat is easily faired with a rasp or a file — the published rasp rung covers exactly this — and a curve cut fine cannot be recovered at all.
Materiales para este paso:
Tabla de madera blanda seca1 pieza Tabla de madera dura1 pieza
Herramientas necesarias:
Segueta (sierra de marquetería) Tope de aserrado
4
4
Internal cutouts: thread the blade through a hole
Internal cutouts: thread the blade through a hole
To cut a shape out of the middle of a panel, drill a hole in the waste, unhook one end of the blade, thread it through the hole, and hook it back into the frame.
This is the reason frame saws have removable blades and it is the only way to make an internal cut without sawing in from the edge. Drill the hole hard against the inside of your line so the entry is inside the waste and leaves no mark on the finished edge.
For metal, this is how a jeweller's saw pierces a design — hence PIERCING saw. Use a bench pin, keep the blade vertical, let the saw's own weight do the work, and expect to break blades while learning. They are consumable, and a beginner getting through a few is normal rather than a sign of doing it wrong.
Materiales para este paso:
Tabla de madera dura1 pieza Placa de acero dulce1 pieza
Herramientas necesarias:
Segueta (sierra de marquetería)Sierra de joyeroSegueta de joyero Gafas de seguridad transparentes
Materiales
3- 1 piezaMarcador de posición
- 1 piezaMarcador de posición
- 1 piezaMarcador de posición
Herramientas requeridas
7- Marcador de posición
- Marcador de posición
- Marcador de posición
- Marcador de posición
- Marcador de posición
- Marcador de posición
- Marcador de posición
Blueprints relacionados
Estos blueprints comparten conocimiento — técnicas, materiales o principios


CC0 Dominio público
Este Blueprint se publica bajo CC0. Eres libre de copiar, modificar, distribuir y usar este trabajo para cualquier propósito, sin pedir permiso.
Apoya al Maker comprando productos a través de su Blueprint, donde gana una Comisión del Maker establecida por los vendedores, o crea una nueva iteración de este Blueprint e inclúyela como conexión en tu propio Blueprint para compartir ingresos.