Colaboración
ARTE
BELLEZA Y BIENESTAR
ARTESANÍA
CULTURA E HISTORIA
ENTRETENIMIENTO
MEDIO AMBIENTE
COMIDA Y BEBIDAS
INGENIERÍA INVERSA
CIENCIAS
DEPORTES
TECNOLOGÍA
TECNOLOGÍA VESTIBLE
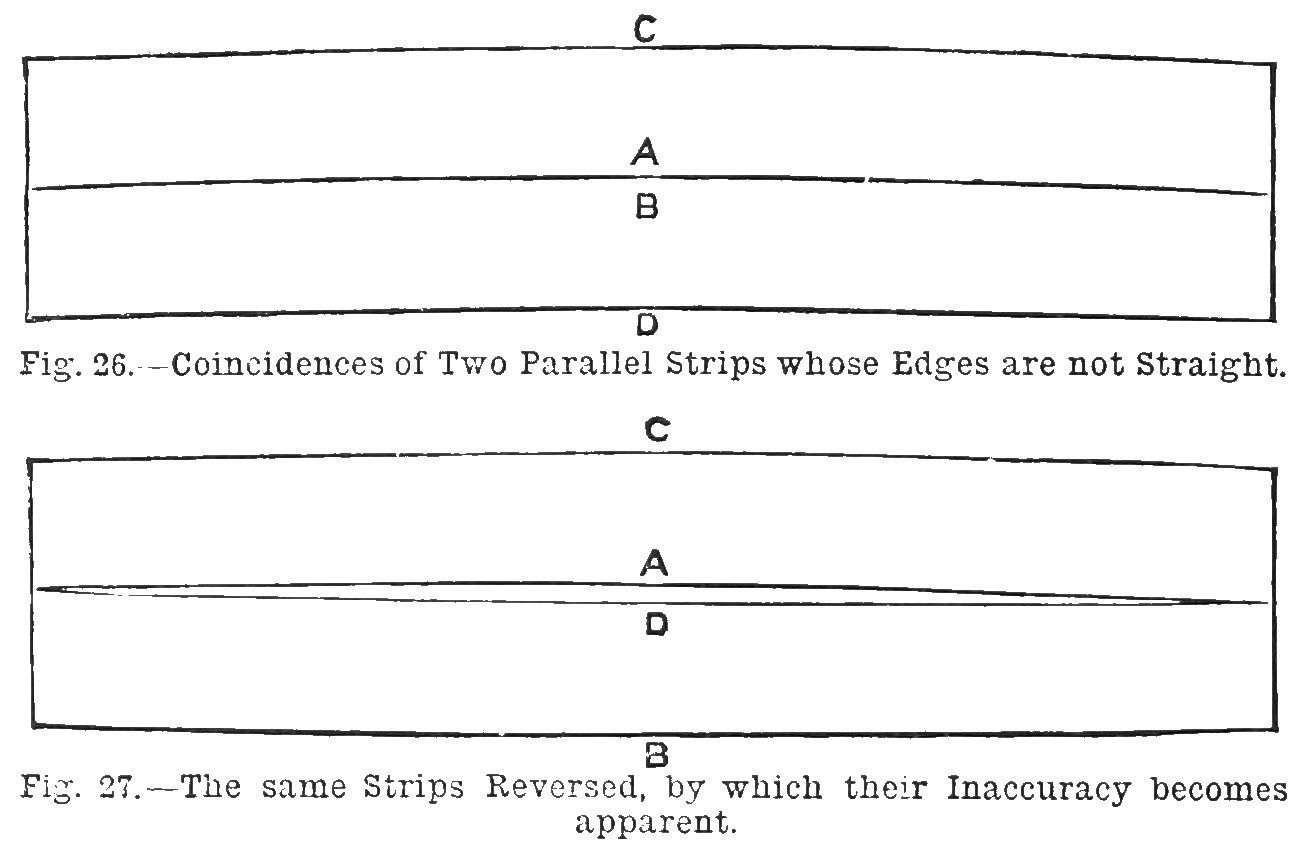


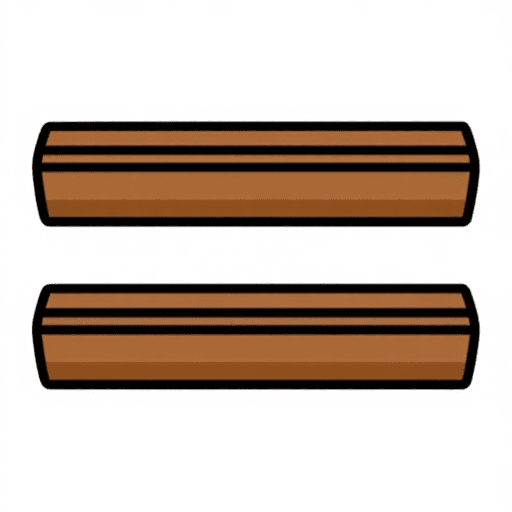
Winding Sticks: a Pair of Parallel Mahogany Strips Planed Together (Work, 1889)
Two parallel wooden strips laid across a board to show twist (winding). Carpenters and joiners made their straightedges in pairs as winding strips: if two parallel strips still meet edge to edge when their edges and ends are swapped, three edges have been checked against each other and the strips are true.
Straight-grained mahogany is used for strips under three feet. The two are planed together, then tried against each other and reversed until no difference shows.
Source: J. H., 'Home-Made Tools', Work, 26 October 1889, pp. 499-500. Picture: Figs. 26-27.
Intermedio
Unknown (the stuff is left to stand for days or weeks first)
Instrucciones
1
1
Read the source
Read the source
"Carpenters, joiners, pattern makers, and cabinet makers usually make their straightedges in pairs as 'winding strips;' and it is clear that if two winding strips are in the first place parallel, and then coincident when the positions of edges and ends are changed, there is obtained really the contact of three edges." (Work, 26 October 1889.)
2
2
Rough out and let stand
Rough out and let stand
Rough out two strips of well-seasoned, straight-grained mahogany (for strips under three feet; long ones are made of yellow pine). Jack them over and let them stand for a few days or even weeks, because fresh-cut strips curve and warp. Length, width and thickness are not given (unknown).
Materiales para este paso:
 Listón de madera dura2 mahogany strips
Herramientas necesarias:
 Cepillo de carpintero
 Dimensiones desconocidas
3
3
Plane them together
Plane them together
Plane both to gauged thickness and width and square the ends. Screw the two side by side, then finish the edges together with a trying plane sharpened keenly and set very fine. Gauge to width with a fine-toothed gauge, check them parallel with calipers, and keep the edges square to the faces with a try square.
Herramientas necesarias:
 Tornillos para maderaCepillo de carpintero
 Gramil
 Calibre
 Escuadra fija
4
4
Test the edges
Test the edges
To test an edge without a straightedge, lay the strip on a board, scribe a fine line along the edge, turn the strip over and bring the opposite edge to the line: any error shows at twice its size. Plane off the high parts, still checking with calipers and square.
Herramientas necesarias:
 Tabla de madera dura
 Cuchillo de marcarCepillo de carpinteroCalibreEscuadra fija
5
5
Unfasten and try them against each other
Unfasten and try them against each other
Take the screws out. Lay the strips edge to edge by opposite edges in turn, then change ends and try the opposite edges again, correcting with the trying plane until no difference shows (woodworkers test by chalking the edges and laying them together). Most of the work should already have been done while they were joined.
Herramientas necesarias:
 Tiza de marcarCepillo de carpinteroCalibreEscuadra fija
6
6
Varnish the faces
Varnish the faces
Protect the broad faces and the ends with shellac varnish, but not the edges, which are chalked in use. Chalking wears the edges hollow and wood always warps a little, so re-correct winding strips every few months, and keep them for testing winding only.
Materiales para este paso:
 Barniz de goma laca1 faces and ends
Materiales
2- 2 mahogany stripsMarcador de posición
- 1 faces and endsMarcador de posición
Herramientas requeridas
9- Marcador de posición
- Marcador de posición
- Marcador de posición
- Marcador de posición
- 1 vendor sell this, none ship to you yetMarcador de posición
- Marcador de posición
- Marcador de posición
- Marcador de posición
- Marcador de posición
Este plano hace
CC0 Dominio público
Este Blueprint se publica bajo CC0. Eres libre de copiar, modificar, distribuir y usar este trabajo para cualquier propósito, sin pedir permiso.
Apoya al Maker comprando productos a través de su Blueprint, donde gana una Comisión del Maker establecida por los vendedores, o crea una nueva iteración de este Blueprint e inclúyela como conexión en tu propio Blueprint para compartir ingresos.