ARTE
BELLEZA Y BIENESTAR
ARTESANÍA
CULTURA E HISTORIA
ENTRETENIMIENTO
MEDIO AMBIENTE
COMIDA Y BEBIDAS
INGENIERÍA INVERSA
CIENCIAS
DEPORTES
TECNOLOGÍA
TECNOLOGÍA VESTIBLE
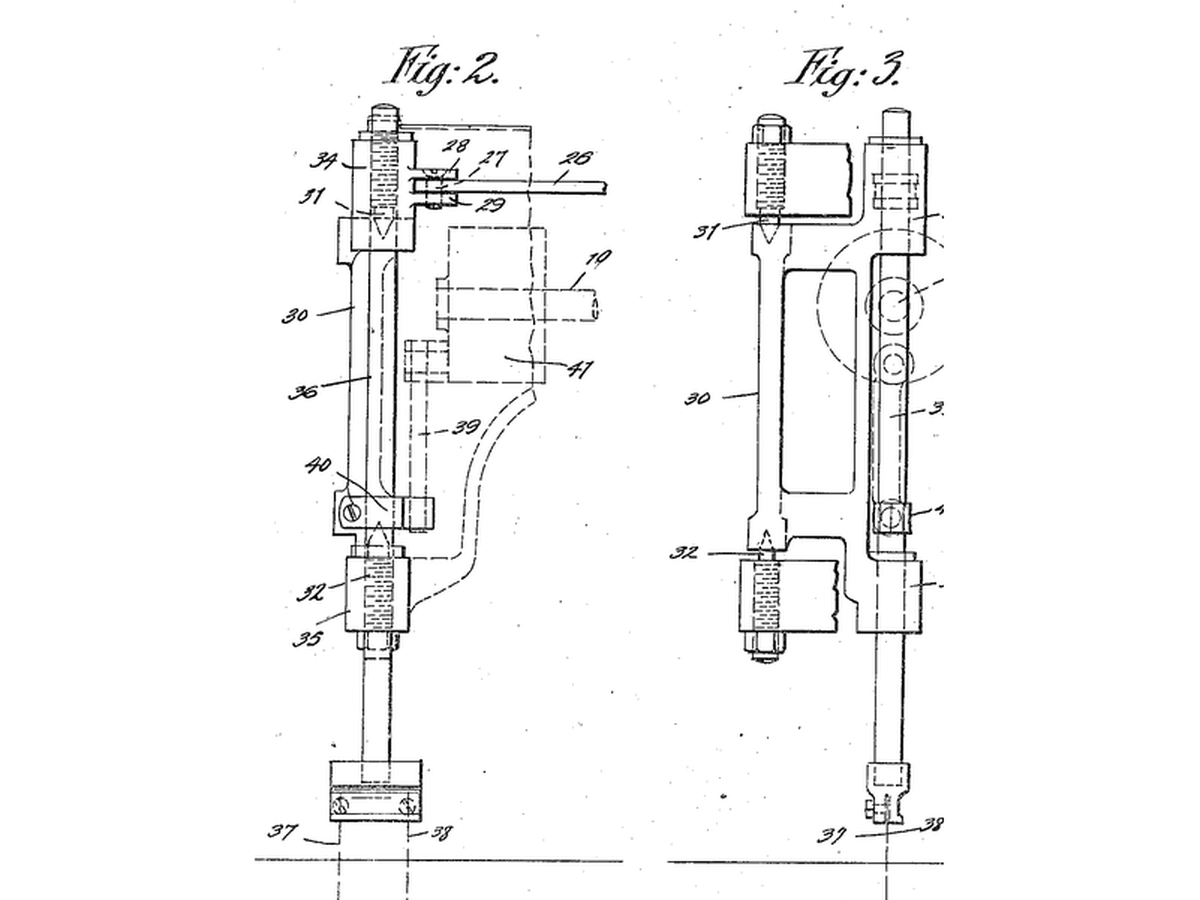


Zigzag Stitch Mechanism
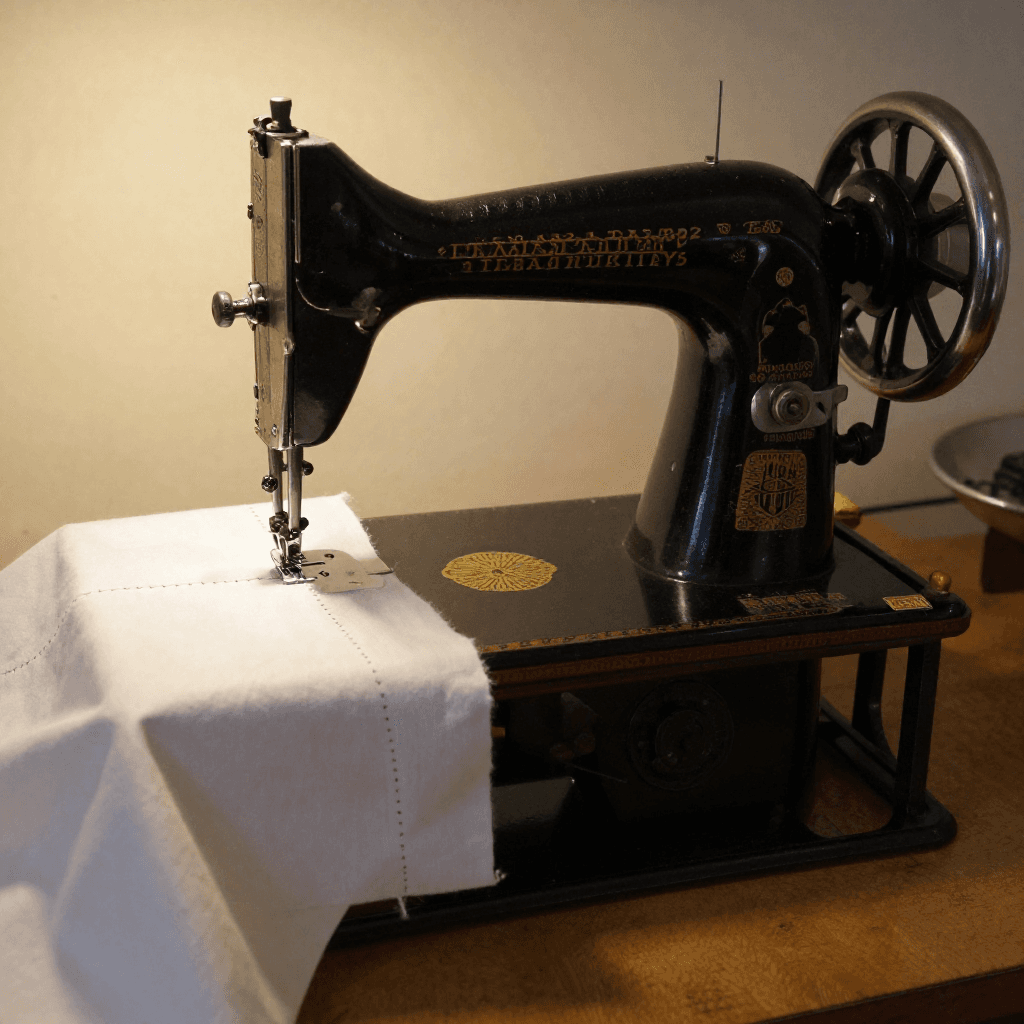
The lock-stitch machine already published sews a straight line, and a straight line of thread cannot stretch - which is why early machines could not sew knitted cloth, finish a raw edge, or work a buttonhole. The next rung is a mechanism that swings the needle bar sideways between stitches, driven by a cam turning with the main shaft.
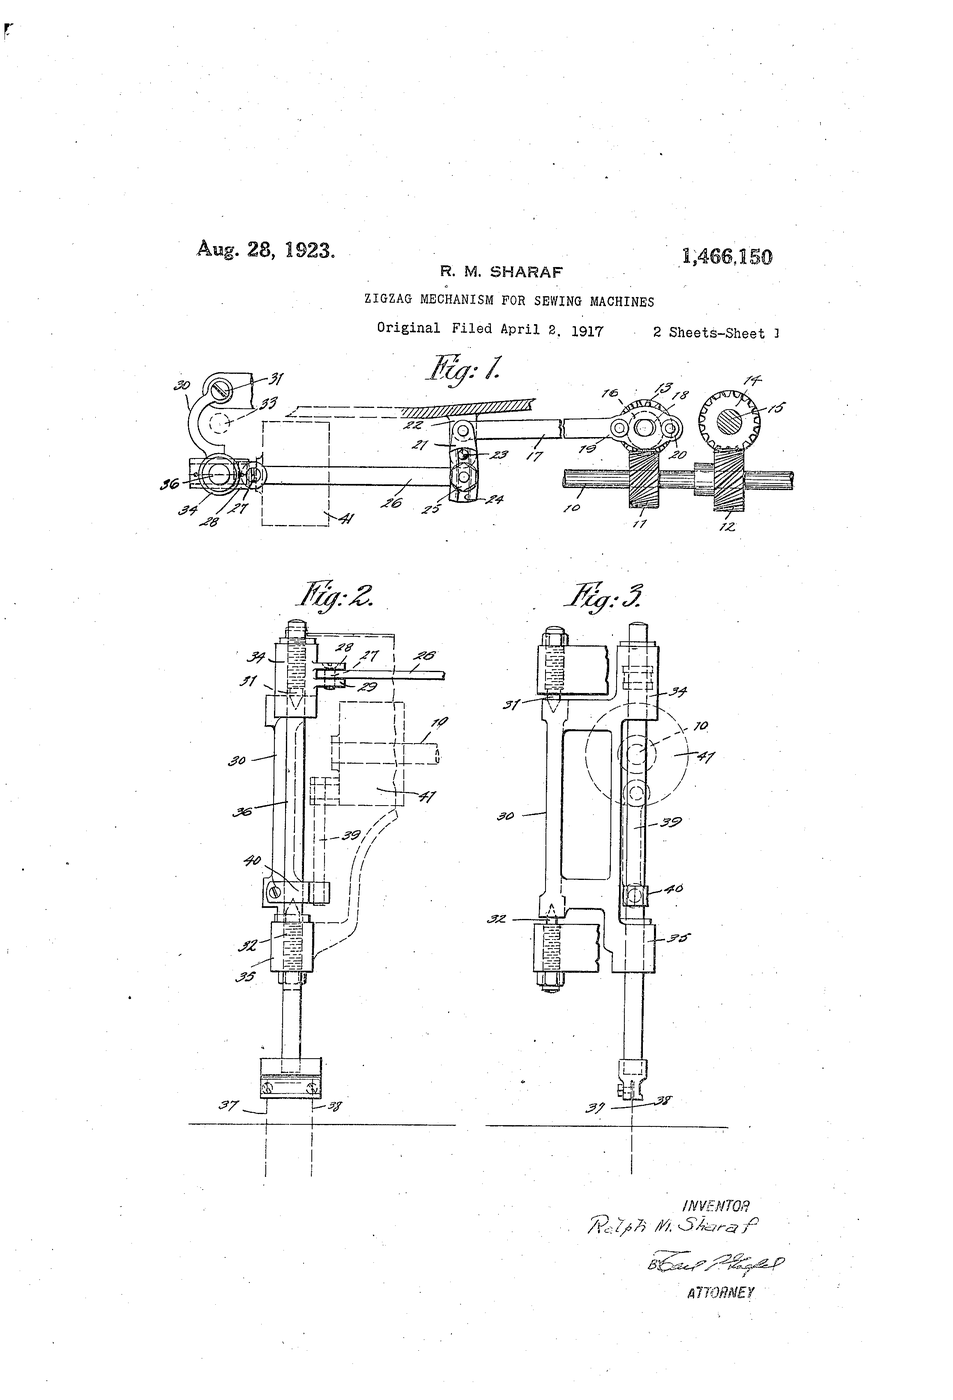
**US 1,466,150**, "Zigzag mechanism for sewing machines", Ralph M. Sharaf, filed 2. April 1917, granted 28. August 1923: a cam-driven vibration of the needle bar while the machine stitches, with the throw adjustable. Domestic zigzag machines followed in the 1950s.
**You build the motion in wood** - a cam, a follower and a pen drawing the needle's path - then sew both stitches on jersey and pull them until something gives.
Intermedio
3 hours
Instrucciones
1
1
Cut a cam
Cut a cam
From 18 mm plywood cut a 60 mm disc and drill its pivot hole 5 mm off centre: that offset is half the zigzag width. Cut a second disc with a 10 mm offset for a wider stitch.
Materiales para este paso:
 Tablero contrachapado1 pieza
Herramientas necesarias:
 Serrucho
 Taladro inalámbrico
 Regla
2
2
Follower and needle bar
Follower and needle bar
Screw a pivoted arm to the board so one end rides on the cam's edge and the other carries a dowel - the needle bar. A spring keeps the follower against the cam. Tape a marker to the dowel.
Materiales para este paso:
 Tornillos de máquina4 piezas
 Surtido de muelles de compresión1 juego
 Varilla de madera (tarugo)1 pieza
Herramientas necesarias:
 Pistola de cola caliente
 Tornillo de banco
 Rotulador permanente
3
3
Draw the stitch
Draw the stitch
Pull a strip of graph paper steadily under the pen while turning the cam by hand, one turn per stitch. Measure the width of the trace; swap cams and repeat. Lock the follower to draw a straight line for comparison.
Materiales para este paso:
 Papel milimetrado1 hoja
Herramientas necesarias:
Regla Cinta de carrocero
4
4
Sew the real thing
Sew the real thing
Cut six 200 x 50 mm jersey strips. Join them in pairs with a 100 mm seam: straight stitch, zigzag 3 mm, zigzag 5 mm, all at 2.5 mm stitch length.
Materiales para este paso:
 Hilo10 metros
Herramientas necesarias:
 Máquina de coser
 Tijeras de sastre
 Lote de tejido de punto para camisetas
5
5
Pull until it gives
Pull until it gives
Mark 100 mm across each seam. Pull each pair apart steadily by hand and note the marked length when the thread snaps - or when it does not, and the cloth simply stretches.
Herramientas necesarias:
Regla Cinta métrica
6
6
Thread geometry and your results
Thread geometry and your results
Cargando el cuaderno de Jupyter…
7
7
History & Context
History & Context
**What the patent specifies:** a cam-driven mechanism that vibrates the needle bar laterally during stitching, with adjustable throw. **Modern build (derived):** a plywood cam and follower drawing the path, plus real seams for the test.
The same sideways swing gave overcast edges, buttonholes and decorative stitches, and cam stacks later let a machine select a pattern. Its limits: a zigzag uses more thread, can tunnel thin cloth if the tension is wrong, and the needle bar's sideways travel puts a limit on machine speed.
Materiales
6- 1 piezaMarcador de posición
- 4 piezasMarcador de posición
- Marcador de posición
- 1 piezaMarcador de posición
- 1 hojaMarcador de posición
- 10 metrosMarcador de posición
Herramientas requeridas
11- Marcador de posición
- 1 vendor sell this, none ship to you yetMarcador de posición
- Marcador de posición
- Marcador de posición
- Marcador de posición
- Marcador de posición
- Marcador de posición
- Marcador de posición
- Marcador de posición
- Marcador de posición
- 1 vendor sell this, none ship to you yetMarcador de posición
Blueprints relacionados
Estos blueprints comparten conocimiento — técnicas, materiales o principios
CC0 Dominio público
Este Blueprint se publica bajo CC0. Eres libre de copiar, modificar, distribuir y usar este trabajo para cualquier propósito, sin pedir permiso.
Apoya al Maker comprando productos a través de su Blueprint, donde gana una Comisión del Maker establecida por los vendedores, o crea una nueva iteración de este Blueprint e inclúyela como conexión en tu propio Blueprint para compartir ingresos.