Building a Camera Obscura — Projecting the Sun and Eclipses Safely
A camera obscura (Latin for 'dark chamber') is the simplest optical device possible: a dark box with a small hole in one wall. Light from an outside scene passes through the pinhole and projects an inverted image on the opposite wall. The principle was described by the Chinese philosopher Mozi in the 5th century BC and by Aristotle, and was used extensively by the Arab polymath Ibn al-Haytham (Alhazen) around 1020 AD in his groundbreaking Book of Optics. For astronomers, the camera obscura serves a critical purpose: it projects an image of the Sun onto a screen inside the box, allowing safe observation of sunspots and solar eclipses without looking at the Sun directly. Galileo used a camera obscura to study sunspots, and astronomers throughout history have used them to time the phases of eclipses. This blueprint builds a portable camera obscura from a wooden box, suitable for projecting sunspot detail and safely observing solar eclipses.
Consignes
Understand the pinhole principle
Understand the pinhole principle
Build the box
Build the box
Matériaux pour cette étape :
 Hardwood Block1 pièce
Outils nécessaires :
 Hand Saw
Make the pinhole plate
Make the pinhole plate
Install the viewing screen
Install the viewing screen
Add a viewing port
Add a viewing port
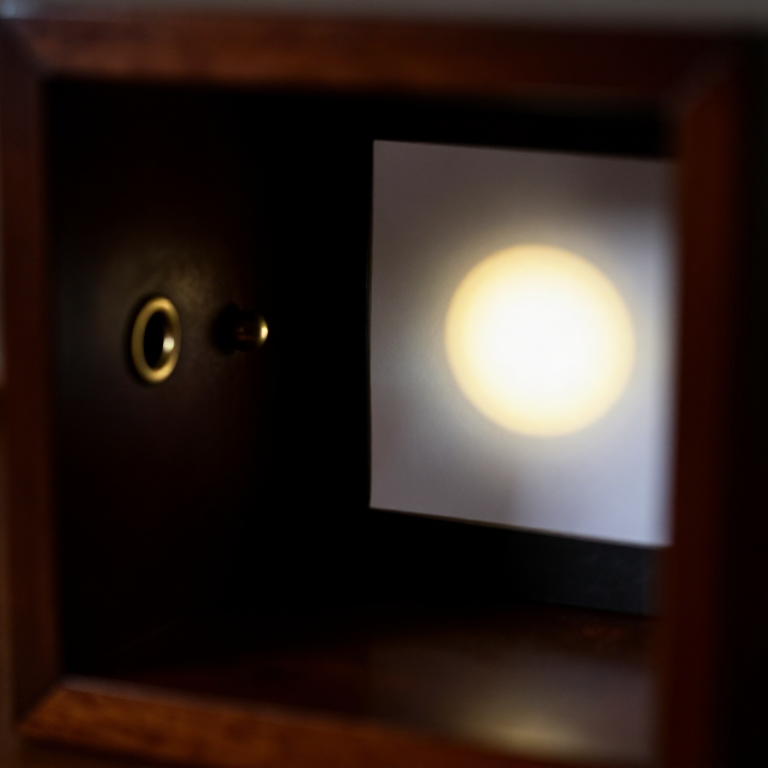
Project the Sun
Project the Sun
Observe sunspots
Observe sunspots
Upgrade with a lens for a brighter image
Upgrade with a lens for a brighter image
Matériaux pour cette étape :
 Convex Lens1 pièce
Observe a solar eclipse
Observe a solar eclipse
Record and measure
Record and measure
Matériaux
2- 1 pièceEspace réservé
- 1 pièceEspace réservé
Matériaux des Blueprints connectés
Blueprints liés
Ces blueprints partagent des connaissances — techniques, matériaux ou principes
Related blueprints
Other builds that share materials, tools, or techniques with this one.


CC0 Domaine public
Ce blueprint est publié sous CC0. Vous êtes libre de copier, modifier, distribuer et utiliser ce travail pour tout usage, sans demander la permission.
Soutenez le Maker en achetant des produits via son Blueprint où il perçoit une Commission Maker définie par les Vendeurs, ou créez une nouvelle itération de ce Blueprint et incluez-le comme connexion dans votre propre Blueprint pour partager les revenus.