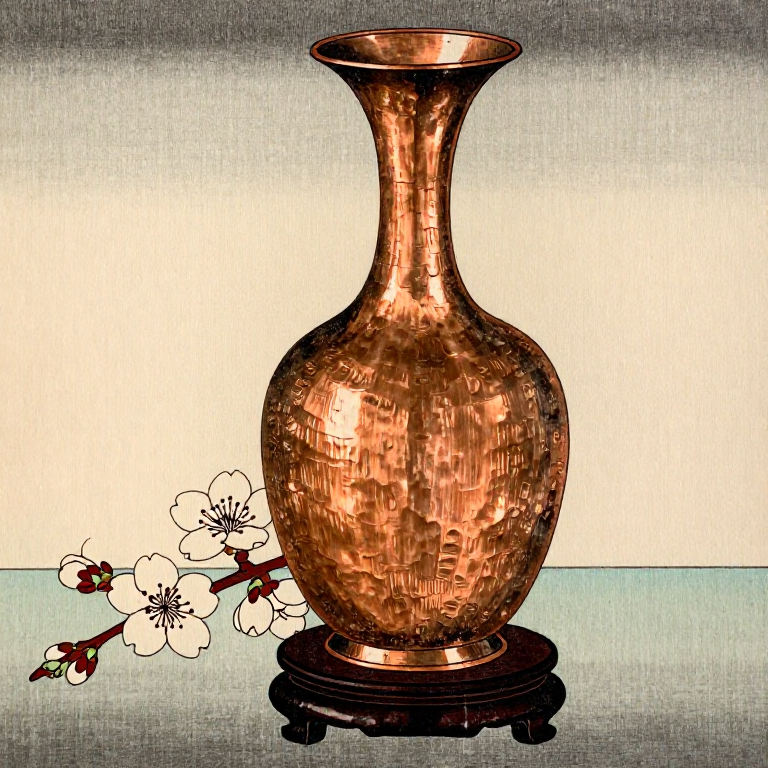
Raising a Copper Flower Vase by Hammering — Tsuiki Copperware
Consignes
Prepare and Anneal the Copper Disc
Prepare and Anneal the Copper Disc
Cut a circular disc from copper sheet, 25-30cm in diameter and 1-1.5mm thick. The disc diameter should be roughly 2.5 times the intended height of the finished vase. Mark concentric circles on the surface at 2cm intervals using a compass — these guide lines help maintain symmetry during raising. Anneal the disc by heating it evenly with a torch until it reaches dull red (approximately 500-600 degrees C), then quench it in water. This recrystallizes the copper's grain structure, making it soft and malleable. After quenching, pickle the disc in dilute acid to remove the black copper oxide scale, then rinse and dry it.
Matériaux pour cette étape :
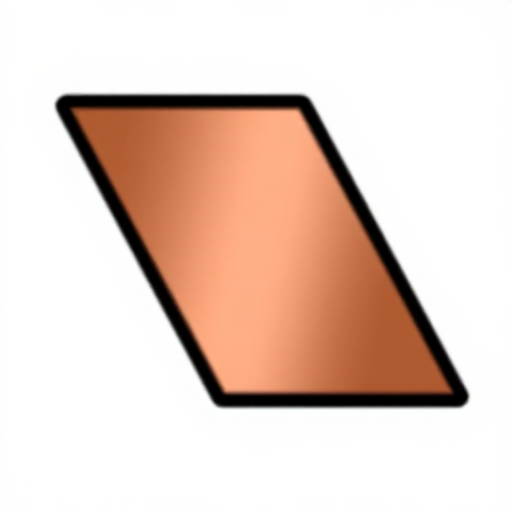 Copper Sheet1 disc, 25-30cm diameter cm
 Acid Pickle Solution (Sparex #2, 10 oz)1 litre pièce
Outils nécessaires :
 Forge Hammer (Cross-Peen)Forge Hammer (Cross-Peen)
 Leather Strap
Begin Raising Over the Stake
Begin Raising Over the Stake
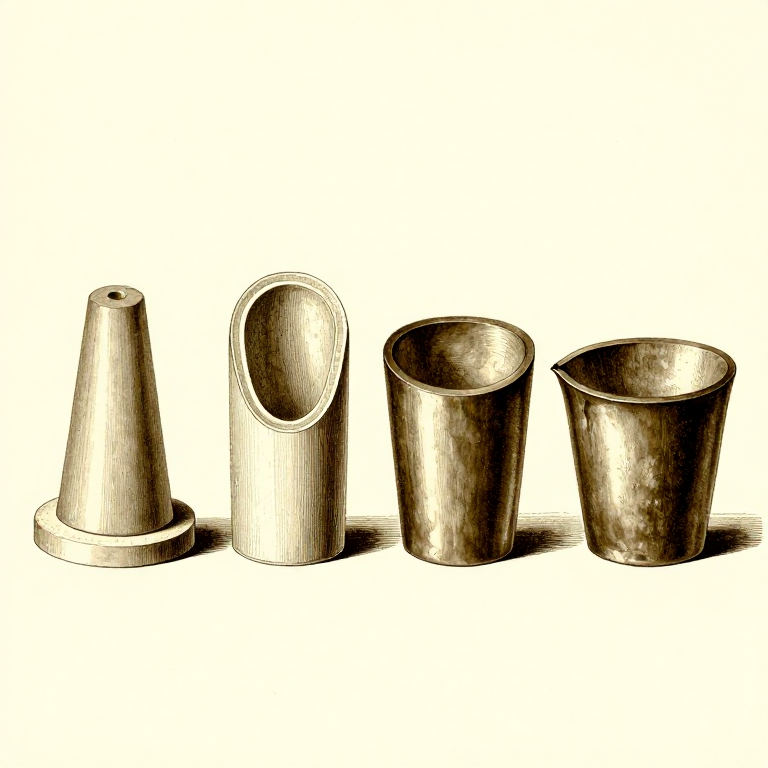
Clamp a rounded steel raising stake in a vise so it protrudes horizontally. Hold the copper disc against the stake at a slight angle, with the edge tilted upward. Strike the copper just below the point of contact with the stake using the raising hammer, working in concentric courses from the outer edge toward the centre. Each hammer blow compresses the metal against the stake, causing the edge to rise upward. Complete one full revolution before moving to the next inner course. After each complete pass, the disc takes on a shallow bowl shape. Copper work-hardens after 20-30% deformation, so anneal the piece whenever it becomes stiff and springy.
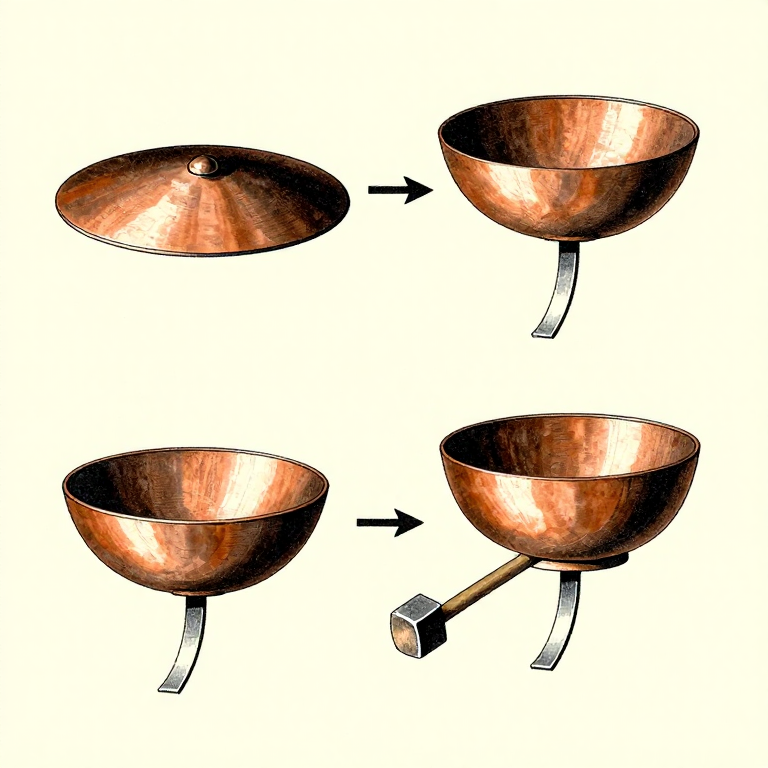
Continue Raising to Full Height
Continue Raising to Full Height
Continue the raising process over progressively narrower stakes as the vessel deepens. Each raising course lifts the walls higher and reduces the diameter. A typical vase requires 6-10 complete raising passes with annealing between each pass. The walls will thicken during raising as the diameter decreases — this is normal and desirable as it strengthens the vessel. To form the narrow neck of the vase, use a stake with a small-radius head and concentrate the raising blows on the upper portion. Check symmetry frequently by rotating the piece and viewing it at eye level. Correct any lopsidedness early, as asymmetry compounds with each subsequent pass.
Planish and Refine the Form
Planish and Refine the Form
Once the vase reaches its final shape, planish the surface by placing it over a smooth stake and striking with a flat-faced planishing hammer. Each planishing blow flattens one raising mark. Work systematically in tight overlapping courses, rotating the vase with each blow. Planishing both smooths the surface and hardens the copper, giving the finished piece structural rigidity. For a traditional tsuiki finish, leave subtle hammer marks visible rather than polishing to a mirror surface — the faceted texture catches light and is considered part of the artistic expression.
Finish the Rim and Patinate
Finish the Rim and Patinate
True the rim by filing it level, then either leave it as a clean-cut edge or fold it inward for strength. A folded rim adds visual weight and prevents the sharp edge from cutting flowers or the arranger's hands. For the final surface treatment, traditional Japanese coppersmiths apply a patina using rokusho, a chemical compound of copper acetate and salt. Dissolve rokusho in boiling water, immerse the cleaned copper vase, and the surface develops a rich brown to dark green patina depending on immersion time and concentration. Alternatively, a liver of sulfur (potassium polysulfide) solution produces warm brown to black tones. Seal the patina with a thin coat of clear lacquer or Renaissance wax to prevent further oxidation.
Matériaux
2- 1 disc, 25-30 cm diameter pièceEspace réservé
- 1 litre pièceEspace réservé
Outils requis
5- Espace réservé
- Espace réservé
- Espace réservé
- Espace réservé
Related blueprints
Other builds that share materials, tools, or techniques with this one.

CC0 Domaine public
Ce blueprint est publié sous CC0. Vous êtes libre de copier, modifier, distribuer et utiliser ce travail pour tout usage, sans demander la permission.
Soutenez le Maker en achetant des produits via son Blueprint où il perçoit une Commission Maker définie par les Vendeurs, ou créez une nouvelle itération de ce Blueprint et incluez-le comme connexion dans votre propre Blueprint pour partager les revenus.