Collaboration
ART
BEAUTÉ ET BIEN-ÊTRE
ARTISANAT
CULTURE ET HISTOIRE
DIVERTISSEMENT
ENVIRONNEMENT
NOURRITURE ET BOISSONS
INGÉNIERIE INVERSE
SCIENCES
SPORTS
TECHNOLOGIE
TECHNOLOGIE PORTABLE
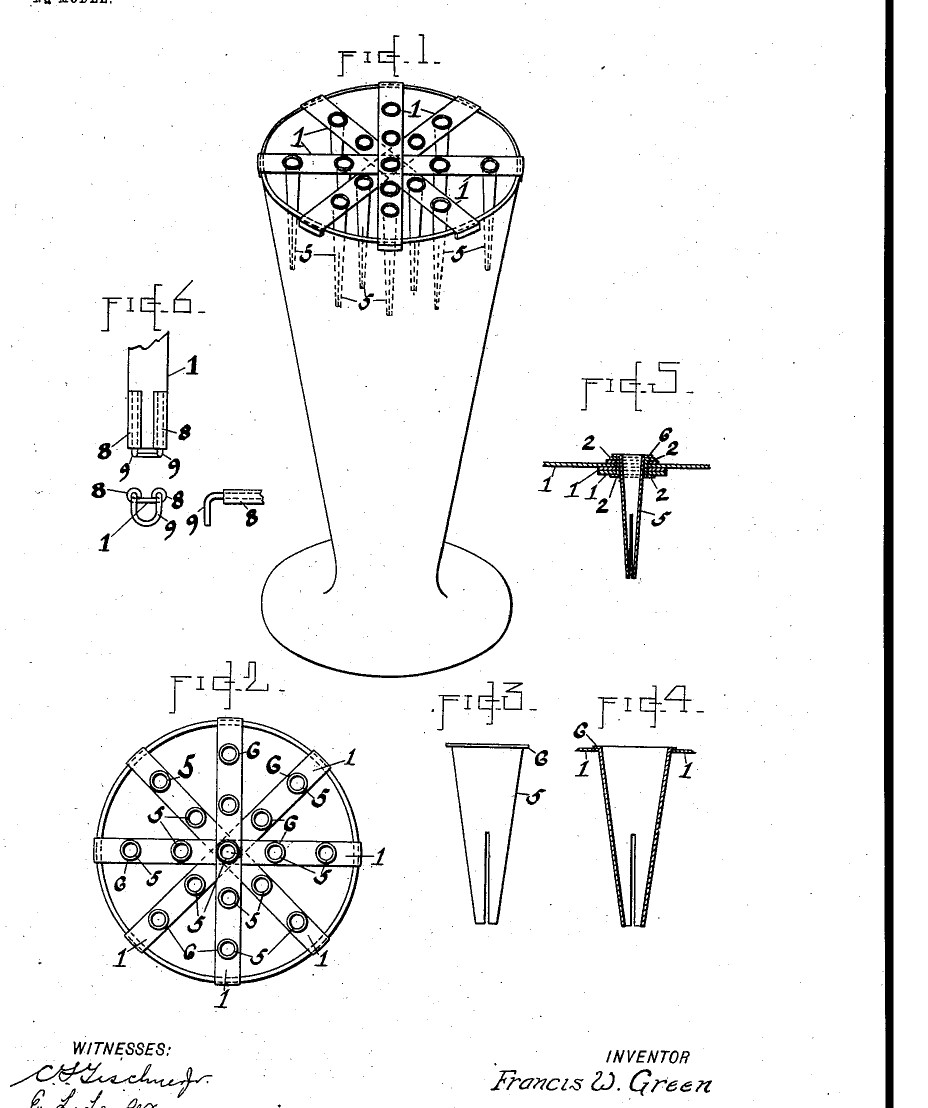


Flower Holder for a Vase: Crossed Brass Strips Carrying Slit Spring Cones That Grip Each Stem (Green, 1903)
Francis W. Green of Brooklyn received US 720,132, dated 10 February 1903, for a holder that sits on the mouth of a vase and holds each flower separately, at the height you choose. Metal strips cross at the centre and hook over the rim; small cones of sheet metal, slit at the bottom, hang in holes along the strips and grip each stem like a spring, so a bunch can be arranged "as may suit the individual taste of the user".
We make it from brass. All sizes are ours.
Débutant
About 3 hours
Consignes
1
1
Cone blank
Cone blank
Chargement du notebook Jupyter…
2
2
Read US 720,132
Read US 720,132
"The stems of the sprays or flowers may be inserted and forced downward through the conical holder until the head of the flower or spray is at the desired position in the holder."
3
3
Make the frame
Make the frame
Cut four brass strips a little longer than your vase's mouth is wide. Drill each at its centre and rivet all four together crossed at equal angles with a short piece of brass tube flared at both ends, his hollow rivet 2. Bend the ends down to make ears that rest over the rim of the vase.
Matériaux pour cette étape :
 Bande de laiton1 pièce
 Tube en laiton1 pièce
Outils nécessaires :
 Scie à métaux
 Perceuse à colonne
 Jeu de forets
 Pointeau
 Marteau à panne bombée
 Pince plate
 Étau d'établi
4
4
Punch the holes
Punch the holes
Drill holes along each strip, spaced so the flowers will stand apart, just big enough for a cone's narrow part to pass and its lip to rest on the strip.
Outils nécessaires :
Perceuse à colonneJeu de forets Jeu de limes
5
5
Make the cones
Make the cones
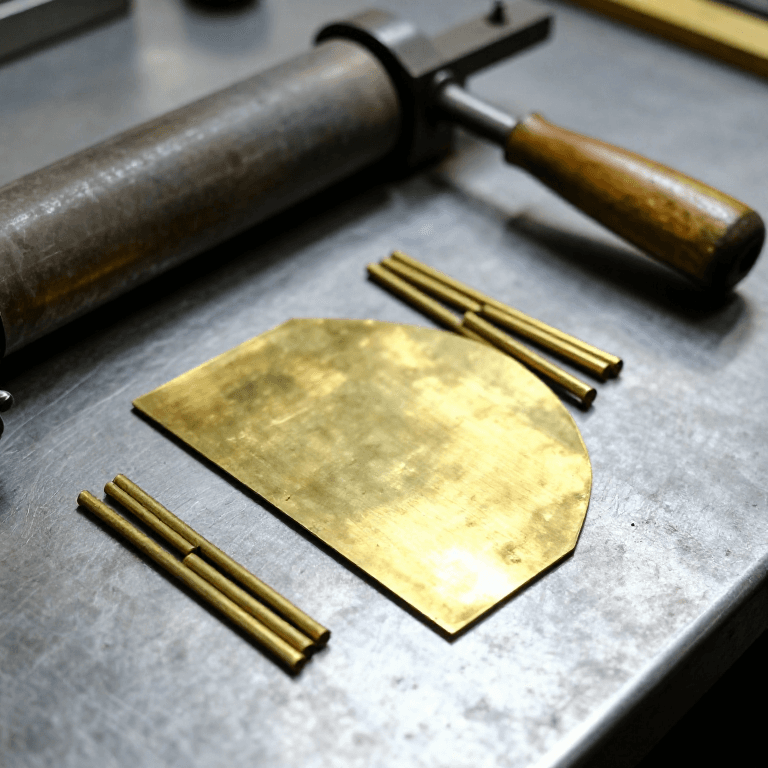
Mark the notebook's blank on brass sheet, cut it out, roll it round a tapered rod or nail into a cone small end down, overlap the seam and solder it. Turn the wide end out into a small lip 6. Slit the narrow end up a short way with a saw so it springs.
Matériaux pour cette étape :
 Feuille de laiton1 pièce
 Soudure étain-plomb1 pièce
 Flux1 pièce
Outils nécessaires :
 Cisaille à tôle
 Pince à becs ronds
 Fer à souder électrique
 Bocfil de bijoutierJeu de limes
6
6
Fit the cones
Fit the cones
Drop a cone into each hole and solder its lip to the strip, or make the hole a little small and press the cone in until the lip sits on the strip, as he allows.
Matériaux pour cette étape :
Soudure étain-plomb1 pièceFlux1 pièceOutils nécessaires :
Fer à souder électriquePince plate7
7
Arrange flowers
Arrange flowers
Set the frame on the vase. Push each stem down through a cone until the flower is at the height you want: the slit end grips it. Lift a flower out and put another in without disturbing the rest.
8
8
Troubleshooting
Troubleshooting
Flower holder troubleshooting.
Flow
Loading...
9
9
History and honest limits
History and honest limits
**Francis W. Green** of Brooklyn, US 720,132, dated 10 February 1903, filed 28 November 1902. He claimed "a frame adapted to rest over the mouth of a vase or other receptacle and provided with a number of vertically-disposed tapering spring flower-holders open at both ends". Not built: his adjustable frame ends (Fig. 6). He gives no sizes and does not limit the material: brass, all sizes and the solder are ours.
Matériaux
5- 1 pièceEspace réservé
- 1 pièceEspace réservé
- 1 pièceEspace réservé
- 2 piècesEspace réservé
- 2 piècesEspace réservé
Outils requis
12- Espace réservé
- Espace réservé
- Espace réservé
- Espace réservé
- Espace réservé
- Espace réservé
- Espace réservé
- Espace réservé
- Espace réservé
- Espace réservé
- Espace réservé
- Espace réservé
Ce plan fabrique

Blueprints liés
Ces blueprints partagent des connaissances — techniques, matériaux ou principes
CC0 Domaine public
Ce blueprint est publié sous CC0. Vous êtes libre de copier, modifier, distribuer et utiliser ce travail pour tout usage, sans demander la permission.
Soutenez le Maker en achetant des produits via son Blueprint où il perçoit une Commission Maker définie par les Vendeurs, ou créez une nouvelle itération de ce Blueprint et incluez-le comme connexion dans votre propre Blueprint pour partager les revenus.