ART
BEAUTÉ ET BIEN-ÊTRE
ARTISANAT
CULTURE ET HISTOIRE
DIVERTISSEMENT
ENVIRONNEMENT
NOURRITURE ET BOISSONS
INGÉNIERIE INVERSE
SCIENCES
SPORTS
TECHNOLOGIE
TECHNOLOGIE PORTABLE
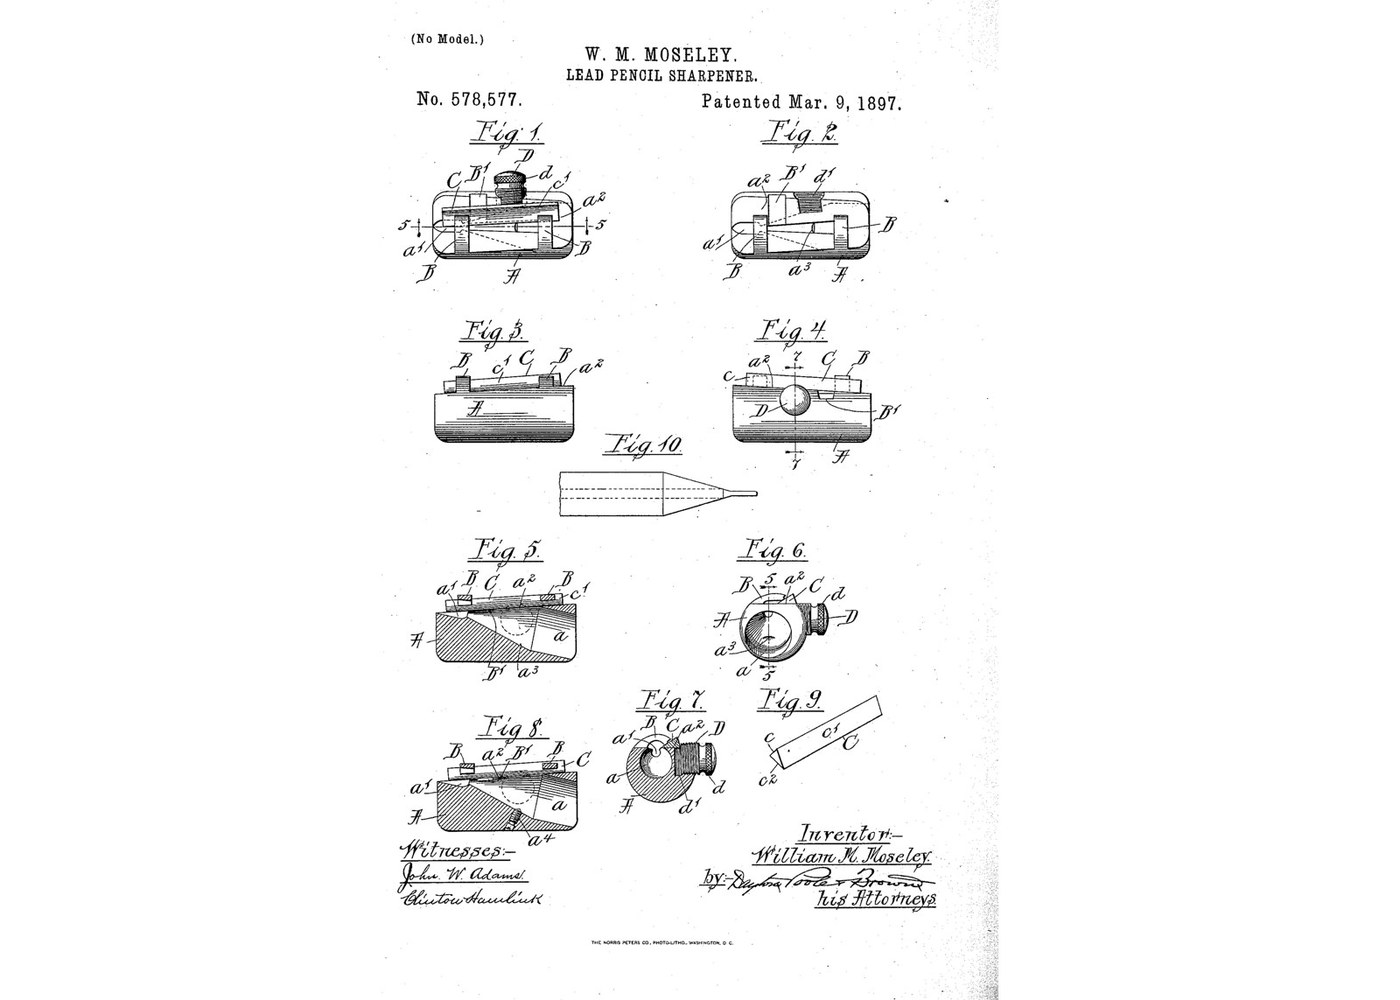


Pencil Sharpener: Conical Bore and a Reversible Triangular Blade (Moseley 1897)
The pocket pencil sharpener: twist the pencil in a conical hole and a blade along its side shaves the wood and lead to a point. Moseley made the body from plain round rod by drilling the cone at a slant, so the flat seat for the blade could be cut close to the rod's surface. His blade is longer than it needs to be: when the part that meets the lead wears, slide it along or turn it end for end.
Source: William M. Moseley, US 578,577 (1897). Unknown: the metals and the sizes. Moseley gives the body as metal, hard rubber or the like, and no sizes or angles, so these are linked to unknown heads. Lathe and mill are ours. Picture: the patent's drawing.
Intermédiaire
1 day
Consignes
1
1
Turn the body from rod
Turn the body from rod
Cut a length of round rod and round its ends. In one end, bore a cone tapering inwards, its axis set at an angle to the rod's axis. Unknown: the metal, the sizes and the angle.
Matériaux pour cette étape :
 Métal inconnu1 as required
Outils nécessaires :
 Tour à métaux
 Jeu d'outils de tournage (HSS)
 Pied à coulisse
 Dimensions inconnues
2
2
Cut the blade seat and the stop arms
Cut the blade seat and the stop arms
Mill one side of the rod flat to make the blade seat, roughly parallel with the side of the cone, so it breaks into the bore. Leave two ribs standing across it as stop arms, and undercut them so the blade's edge slips under. Give their free ends oblique faces matching the blade. Cut away a clearance space in front of the blade so shavings do not clog. Drill and tap a hole for the clamping stud.
Outils nécessaires :
 Fraiseuse
 Jeu de limes
 Jeu de tarauds et filièresDimensions inconnues
3
3
Make the blade and the clamping stud
Make the blade and the clamping stud
Make a triangular blade: a back, and two converging faces meeting in the cutting edge, longer than the cone. Turn a threaded stud with a knurled head for the finger.
Matériaux pour cette étape :
Métal inconnu1 as requiredOutils nécessaires :
Jeu de limesTour à métauxJeu de tarauds et filièresDimensions inconnues4
4
Clamp the blade and sharpen
Clamp the blade and sharpen
Lay the blade with one face on the seat and the other against the arms, edge projecting into the bore, and screw the stud down. Twist a pencil in the cone. When the part of the edge that meets the lead wears, slide the blade along; when that is used up, turn it end for end.
Outils nécessaires :
 Lunettes de sécurité
Matériaux
1- 1 as requiredEspace réservé
Outils requis
8- Espace réservé
- Espace réservé
- Espace réservé
- Espace réservé
- Espace réservé
- Espace réservé
- Espace réservé
- Espace réservé
Ce plan fabrique
Blueprints liés
Ces blueprints partagent des connaissances — techniques, matériaux ou principes
CC0 Domaine public
Ce blueprint est publié sous CC0. Vous êtes libre de copier, modifier, distribuer et utiliser ce travail pour tout usage, sans demander la permission.
Soutenez le Maker en achetant des produits via son Blueprint où il perçoit une Commission Maker définie par les Vendeurs, ou créez une nouvelle itération de ce Blueprint et incluez-le comme connexion dans votre propre Blueprint pour partager les revenus.