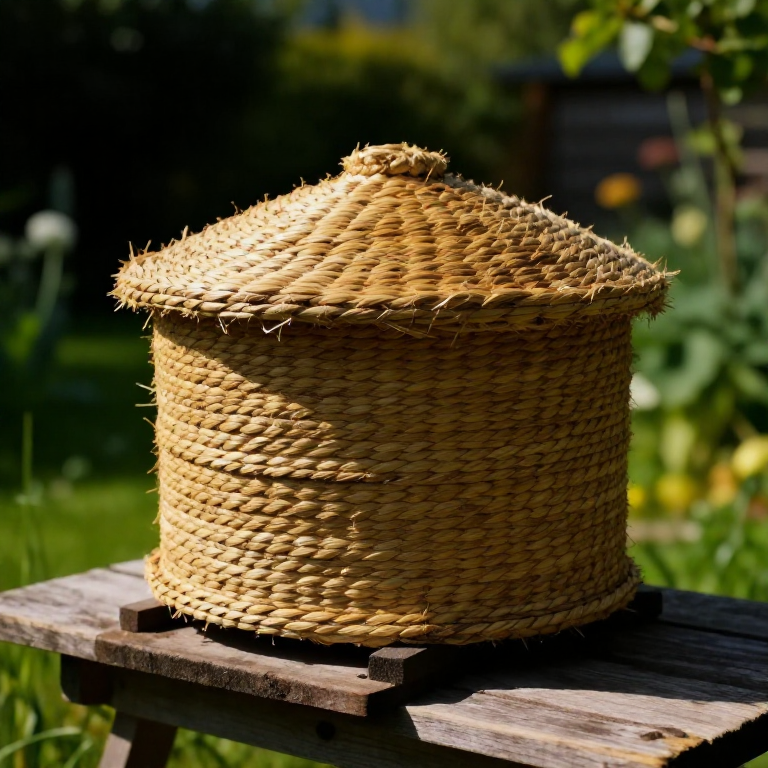
Making a Coiled-Straw Bee Skep — The Traditional Beehive Before Wooden Boxes
Consignes
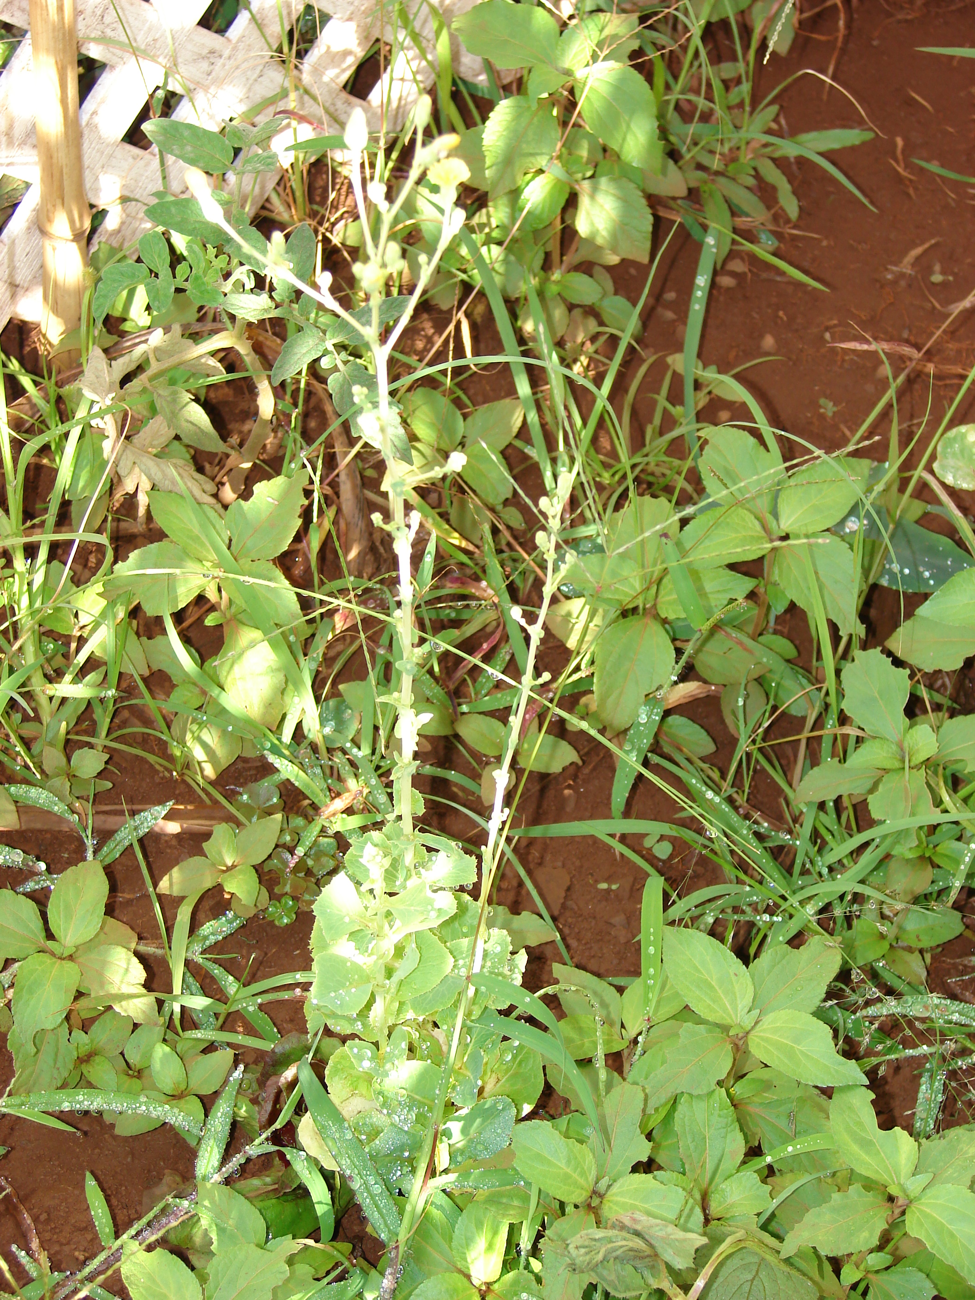
Harvest and clean long rye straw
Harvest and clean long rye straw
Matériaux pour cette étape :
 Rye Straw1 botte
Outils nécessaires :
 Knife
KnifeSplit and soak the binding cane
Split and soak the binding cane
Matériaux pour cette étape :
 Split Cane1 botte
 Water3 litres
Outils nécessaires :
KnifeMake the girth gauge
Make the girth gauge
Outils nécessaires :
 Skep Girth Gauge
Bind the crown
Bind the crown
Matériaux pour cette étape :
Rye Straw1 botteSplit Cane1 mètreOutils nécessaires :
 Awl
AwlFeed straw into an even rope
Feed straw into an even rope
Matériaux pour cette étape :
Rye Straw1 botteOutils nécessaires :
Skep Girth GaugeSew the first coils to the crown
Sew the first coils to the crown
Matériaux pour cette étape :
Split Cane1 mètreOutils nécessaires :
AwlSpiral outward to start the dome
Spiral outward to start the dome
Matériaux pour cette étape :
Rye Straw1 botteSplit Cane1 mètreOutils nécessaires :
AwlBuild the domed wall downward
Build the domed wall downward
Matériaux pour cette étape :
Rye Straw1 botteSplit Cane1 mètreOutils nécessaires :
AwlSkep Girth GaugeKeep the courses even
Keep the courses even
Matériaux pour cette étape :
Rye Straw1 botteOutils nécessaires :
AwlWiden to the finished base
Widen to the finished base
Matériaux pour cette étape :
Rye Straw1 botteSplit Cane1 mètreOutils nécessaires :
AwlCut the flight entrance
Cut the flight entrance
Outils nécessaires :
KnifeFinish and lock the base coil
Finish and lock the base coil
Matériaux pour cette étape :
Split Cane1 mètreOutils nécessaires :
AwlTrim the skep clean
Trim the skep clean
Outils nécessaires :
KnifeClom the outside for weatherproofing
Clom the outside for weatherproofing
Matériaux pour cette étape :
 Cow Dung2 kg
 Ball Clay1 kg
Cure the finished skep
Cure the finished skep
Matériaux
6- 1 botteEspace réservé
- 6 mètresEspace réservé
Matériaux des Blueprints connectés
Blueprints liés
Ces blueprints partagent des connaissances — techniques, matériaux ou principes
Related blueprints
Other builds that share materials, tools, or techniques with this one.


CC0 Domaine public
Ce blueprint est publié sous CC0. Vous êtes libre de copier, modifier, distribuer et utiliser ce travail pour tout usage, sans demander la permission.
Soutenez le Maker en achetant des produits via son Blueprint où il perçoit une Commission Maker définie par les Vendeurs, ou créez une nouvelle itération de ce Blueprint et incluez-le comme connexion dans votre propre Blueprint pour partager les revenus.