
Collaboration
ART
BEAUTÉ ET BIEN-ÊTRE
ARTISANAT
CULTURE ET HISTOIRE
DIVERTISSEMENT
ENVIRONNEMENT
NOURRITURE ET BOISSONS
INGÉNIERIE INVERSE
SCIENCES
SPORTS
TECHNOLOGIE
TECHNOLOGIE PORTABLE
Wishbone-Mast Ice Yacht: 16 ft Backbone, Twin-Pole Mast and Double Lateen Booms (Boy Mechanic, 1919)
Woody

Créé par

Woody

13. novembre 2026NO
8
0
0
0
0

Wishbone-Mast Ice Yacht: 16 ft Backbone, Twin-Pole Mast and Double Lateen Booms (Boy Mechanic, 1919)

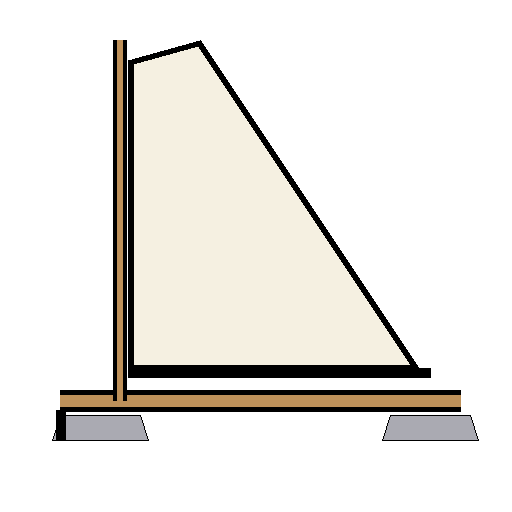
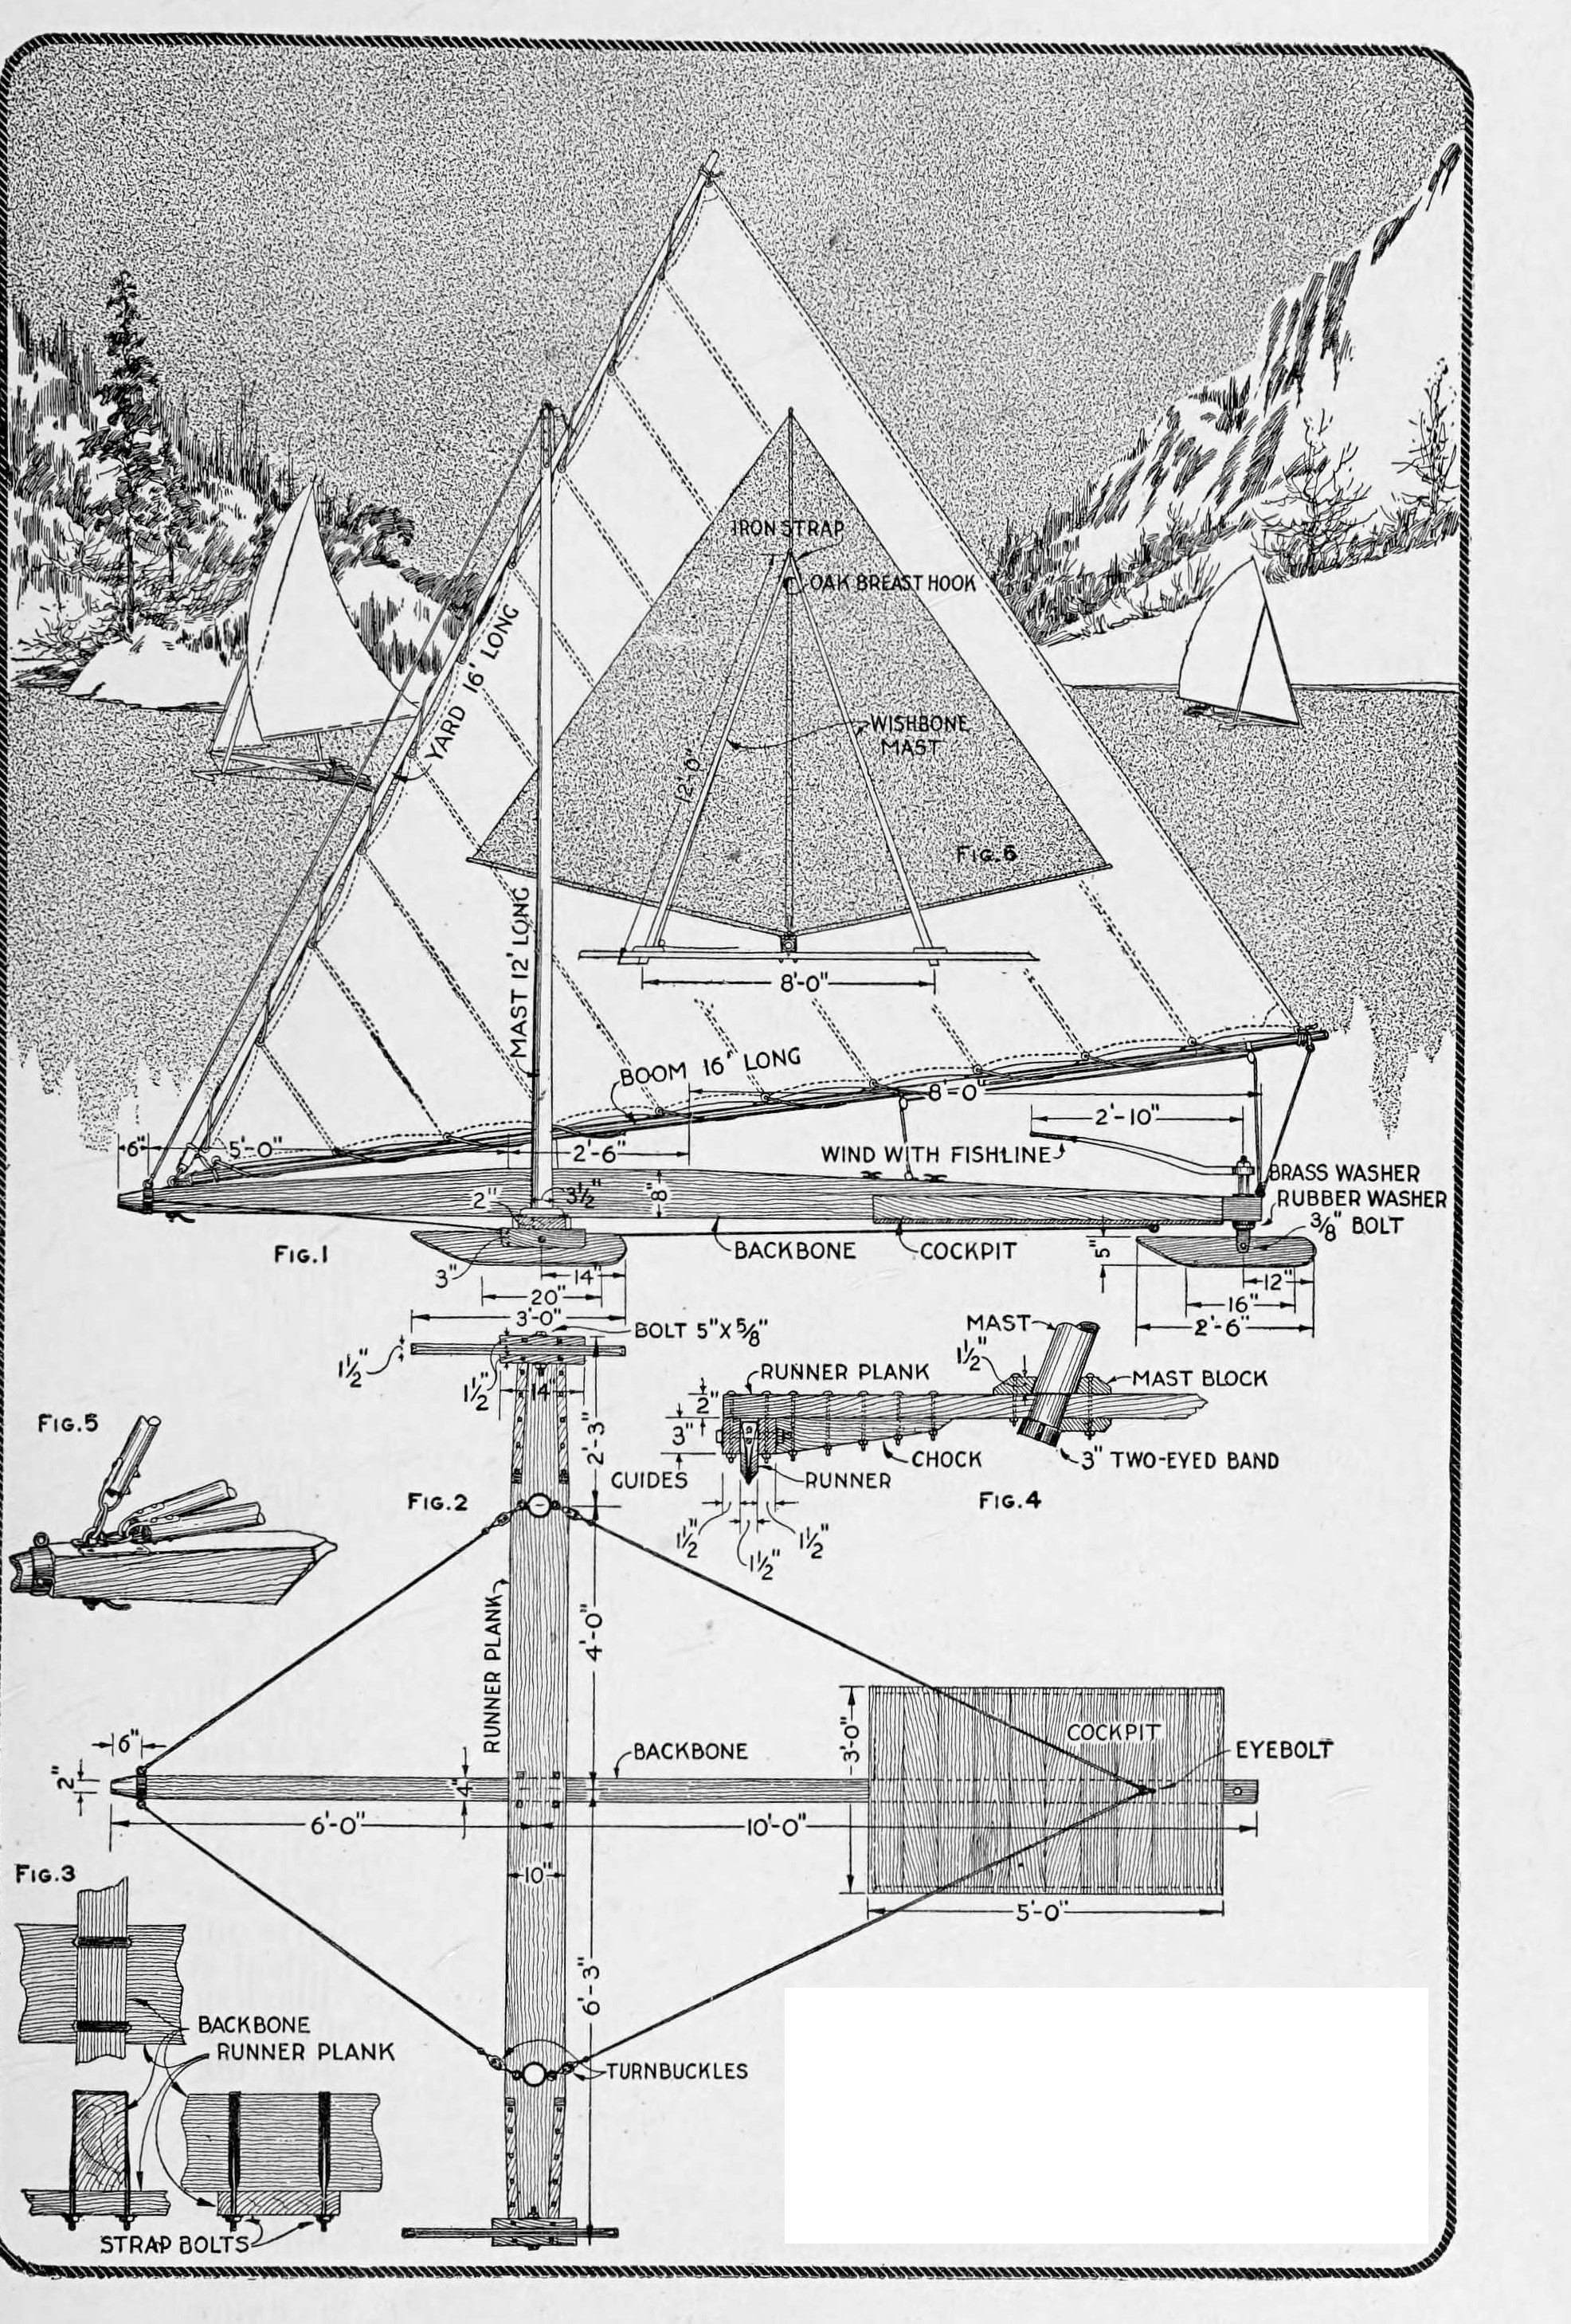
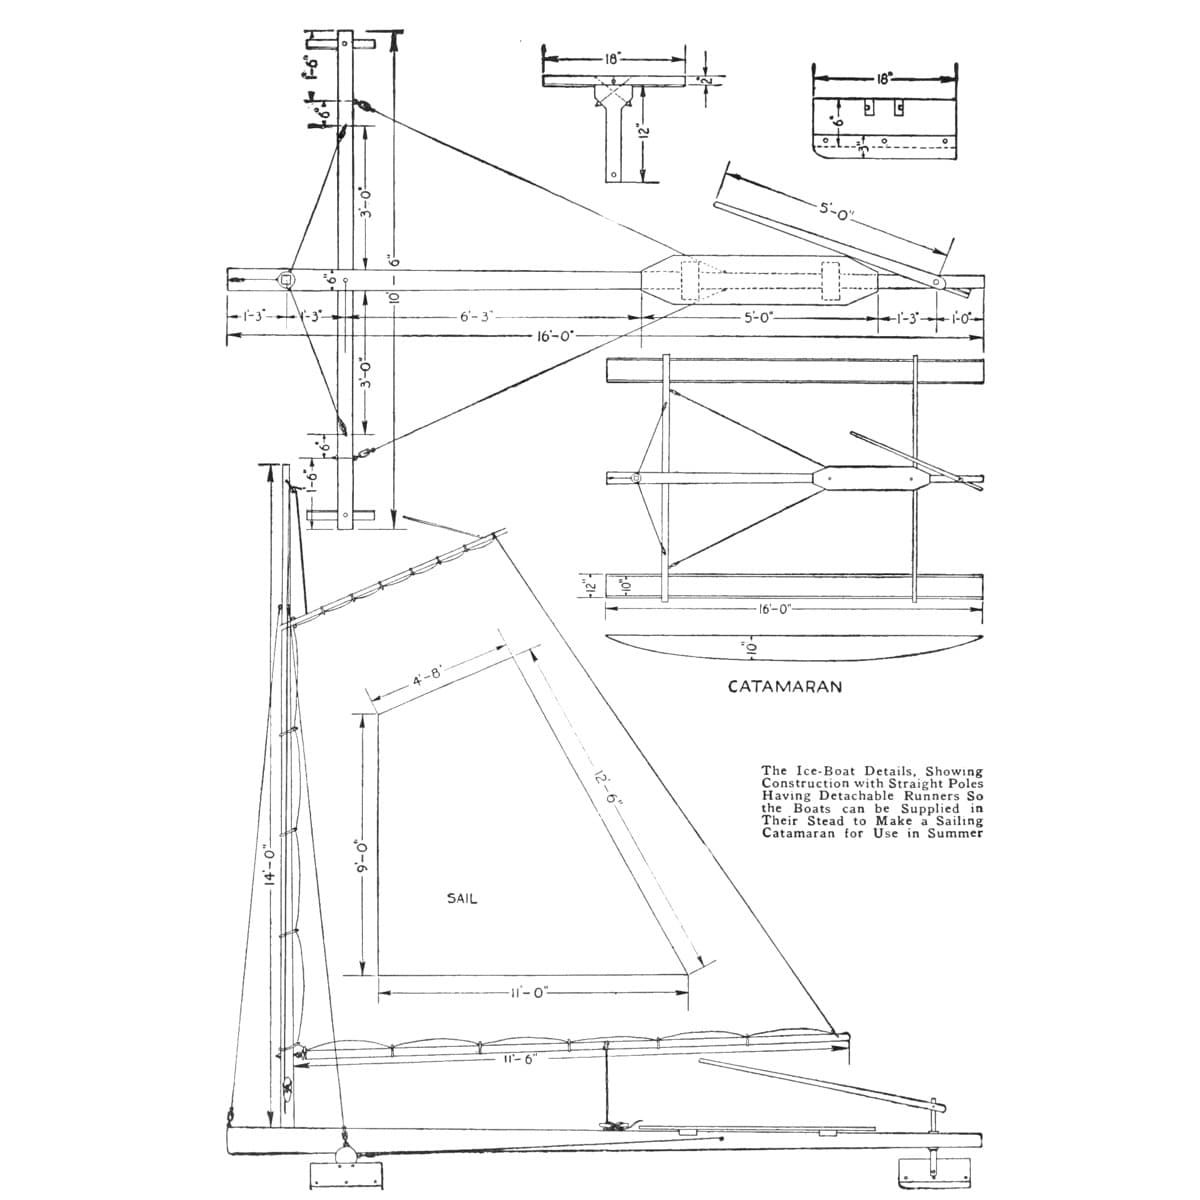
John F. Pjerrou's ice yacht from The Boy Mechanic, Book 3 (1919), for one or two passengers: a 16 ft spruce backbone on a 12 ft 6 in runner plank, oak runners shod with half-round iron, a mast of two 12 ft poles joined at the head, and two lateen sails on a yard and two 16 ft booms that spread into a V when running before the wind. It takes down for storage.
Avancé
Several weeks

Consignes

1

Main sizes and the mast's height

Chargement du notebook Jupyter…
2

Read The Boy Mechanic, Book 3

"The dimensions given are for a small yacht, and care must be taken, in adapting the design, to maintain proper proportions for stability and safety."
3

Make the backbone and runner plank

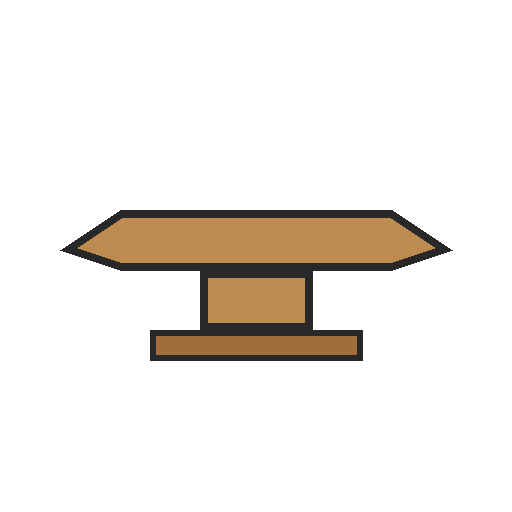
Use only the best straight-grained spruce or white pine. Backbone: 4 in thick, 16 ft long and 8 in high at the centre, with a ridge 8 in high and 2 ft 6 in long; taper it from the middle, 5 ft 6 in from the forward end, to 4 in at each end, and fit a three-eye metal ring at the bow (Figs. 1, 5). Runner plank: 2 in thick, 10 in wide, 12 ft 6 in long, tapered to 8 in at the ends. Set the backbone on the plank at right angles, 6 ft from the bow, and clamp them with two strap bolts, washers and nuts (Figs. 2, 3).

Matériaux pour cette étape :

Bois de pinBois de pin2 pièces
Anneau métalliqueAnneau métallique1 pièce
Étrier en UÉtrier en U2 pièces
Rondelle plateRondelle plate4 pièces
Écrou hexagonalÉcrou hexagonal4 pièces

Outils nécessaires :

Scie égoïneScie égoïne
RabotRabot
PlanePlane
Vilebrequin et mècheVilebrequin et mèche
Clé à moletteClé à molette
Mètre rubanMètre ruban
CrayonCrayon
4

Fit the guides and forward runners

Bolt guides of straight-grained oak, 1-1/2 by 3 by 14 in, to the plank ends with 5/16 in carriage bolts, and bolt oak chocks at each tapered edge (Fig. 4). Make the forward runners of oak, 1-1/2 by 5 by 36 in, shaped at the ends as drawn, and shoe them with half-round strap iron held by screws with carefully countersunk heads. Pivot them on 5/8 in bolts (5 in long in Fig. 1), nuts to the inner side, with washers and jam nuts, or rivet the bolt ends slightly so the nuts cannot work loose.

Matériaux pour cette étape :

Planche de chêne blancPlanche de chêne blanc3 pièces
Boulon de carrosserieBoulon de carrosserie8 pièces
Fer demi-rondFer demi-rond2 pièces
Vis à boisVis à bois1 pièce
Rondelle plateRondelle plate4 pièces
Écrou hexagonalÉcrou hexagonal4 pièces

Outils nécessaires :

Scie égoïneScie égoïne
RabotRabot
Vilebrequin et mècheVilebrequin et mèche
Chignole à mainChignole à main
Jeu de fraises à lamerJeu de fraises à lamer
Scie à métauxScie à métaux
Clé à moletteClé à molette
5

Make the stern runner and steering

Make the stern runner of oak, 1-1/2 by 5 by 30 in, shod like the others. Pivot it on a 3/8 in bolt in a hanger of heavy iron strip bent into a U and riveted to a vertical shaft. Put a heavy rubber washer, protected by a metal one, on the shaft; thread its upper end for a washer and nut, slip a section of pipe over the shaft, and clamp the steering handle (2 ft 10 in in Fig. 1) on a squared part of the shaft. The hanger may be forged, or made by a blacksmith.

Matériaux pour cette étape :

Planche de chêne blancPlanche de chêne blanc1 pièce
Fer demi-rondFer demi-rond1 pièce
Plat en acier douxPlat en acier doux1 pièce
Barre ronde en acier douxBarre ronde en acier doux1 pièce
Rivets en ferRivets en fer2 pièces
Boulon de carrosserieBoulon de carrosserie1 pièce
Rondelle en caoutchoucRondelle en caoutchouc1 pièce
Rondelle plateRondelle plate2 pièces
Écrou hexagonalÉcrou hexagonal2 pièces
Tube d'acier galvaniséTube d'acier galvanisé1 pièce

Outils nécessaires :
ForgeForge
EnclumeEnclume
MarteauMarteau
Étau d'établiÉtau d'établi
Scie à métauxScie à métaux
Chignole à mainChignole à main
Limes (lime à main)Limes (lime à main)
Clé à moletteClé à molette
6

Build the cockpit

Fix a cockpit 5 ft long and 3 ft wide, with 4 in coaming, to the lower side of the backbone toward the stern; fasten its floor to the backbone with lag screws and fasten the coaming securely. Square corners are easiest; rounded ends with steamed, bent coaming are better. Larger craft may carry it on ribs.

Matériaux pour cette étape :

Planche de pinPlanche de pin4 pièces
Tire-fond (coach screw)Tire-fond (coach screw)6 pièces
Vis à boisVis à bois1 pièce

Outils nécessaires :

Scie égoïneScie égoïne
Vilebrequin et mècheVilebrequin et mèche
Clé à moletteClé à molette
Mètre rubanMètre ruban
7

Square up and stay the frame

Line up runners, plank and backbone at right angles so the craft tracks true. Hold them with four 1/4 in wire-rope stays with turnbuckles, from eyes on the bow band and on the bands at the plank ends to an eyebolt below the cockpit (Fig. 2). Loop each rope end and clamp the eye with steel clamps made for the purpose (wire-rope clips); metal thimbles in the loops make a better finish.

Matériaux pour cette étape :

Câble d'acierCâble d'acier1 pièce
RidoirRidoir4 pièces
Dé à coudreDé à coudre8 pièces
Serre-câbleSerre-câble8 pièces
Piton à œilPiton à œil1 pièce

Outils nécessaires :

Scie à métauxScie à métaux
Clé à moletteClé à molette
Mètre rubanMètre ruban
8

Make the wishbone mast

Shape two poles of hickory or ash, 3-1/2 in thick at the base and 2 in at the top (12 ft in Fig. 6). Join them carefully at the masthead, bolt them together into an oak breast hook, and reinforce the joint with an iron strap with an eye at its upper end for the forward stay. Step the lower ends in sockets in the runner plank, about 8 ft apart, reinforced with oak mast blocks, and fit their projecting ends with 3 in two-eyed bands for the stays (Figs. 4, 6).

Matériaux pour cette étape :

Perche en boisPerche en bois2 pièces
Planche de chêne blancPlanche de chêne blanc1 pièce
Plat en acier douxPlat en acier doux1 pièce
Boulon de carrosserieBoulon de carrosserie2 pièces
Écrou hexagonalÉcrou hexagonal2 pièces

Outils nécessaires :

PlanePlane
RabotRabot
Scie égoïneScie égoïne
Vilebrequin et mècheVilebrequin et mèche
Ciseaux à boisCiseaux à bois
ForgeForge
EnclumeEnclume
MarteauMarteau
9

Make the yard and booms

Make the yard and two booms of hickory or ash, each 16 ft long, 2-3/4 in at the middle tapering to 1-1/2 in at the ends, with metal rings on the ends against splitting. Bolt loops to their forward ends to engage an eyebolt and ring on the backbone at the bow; set the eyebolt in a slotted plate of 3/16 in sheet iron, fastened by a lever nut (Fig. 5).

Matériaux pour cette étape :

Perche en boisPerche en bois3 pièces
Anneau métalliqueAnneau métallique6 pièces
Piton à œilPiton à œil1 pièce
Tôle d'acier douxTôle d'acier doux1 pièce
Plat en acier douxPlat en acier doux1 pièce
Boulon de carrosserieBoulon de carrosserie3 pièces
Écrou hexagonalÉcrou hexagonal3 pièces

Outils nécessaires :

PlanePlane
RabotRabot
Scie à métauxScie à métaux
Chignole à mainChignole à main
Limes (lime à main)Limes (lime à main)
Étau d'établiÉtau d'établi
10

Sew the sails

Make two lateen sails of 8-oz unbleached cotton duck: lap the breadths about 1 in and stitch along the edge (or fold 1 in and double-stitch), the seams parallel to the leech. Reinforce each corner with a triangular patch of duck and bind the edges with 1/4 in tarred rope, using a sailor's palm, a diamond-pointed needle and sail twine, well waxed (the wax is ours: beeswax). Along the yard and boom edges punch holes, set two 3/4 in brass grommet rings in each, one each side, and overcast them with buttonhole stitch. Sew in reef points of 1/8 in cotton rope, whipped at the ends.

Matériaux pour cette étape :

Toile de cotonToile de coton1 pièce
Fil à voileFil à voile1 pièce
Cire d'abeilleCire d'abeille1 pièce
Cordage goudronnéCordage goudronné1 pièce
Œillet en laitonŒillet en laiton40 pièces
Corde de cotonCorde de coton1 pièce

Outils nécessaires :
Paumelle de voilierPaumelle de voilier
Aiguille à voileAiguille à voile
PerforatricePerforatrice
CiseauxCiseaux
Mètre rubanMètre ruban
11

Set up and rig

Fit the forward ring and strap bolts, the runners and steering, then step the mast, clamp the masthead and fit the bands; set the bottom stays and the masthead stay with the turnbuckles. Lace the sails to yard and booms and fix the forward ends at the bow. Run a 3/8 in halyard from the yard through a pulley at the masthead and a second on the runner plank to cleats by the cockpit, and haul up so the sails set. Lash the main sheets to the boom ends, through pulleys at the stern of the backbone and on the booms about 1 ft and 5 ft from their ends, then to cleats at the cockpit; the second boom needs a duplicate set. Taking down is the reverse.

Matériaux pour cette étape :

CordeCorde1 pièce
PouliePoulie6 pièces
TaquetTaquet4 pièces
Vis à boisVis à bois1 pièce

Outils nécessaires :

Clé à moletteClé à molette
Chignole à mainChignole à main
12

Finish

Smooth the masts, yard and booms, sandpaper them lightly and give them several coats of spar varnish; paint the other woodwork. He gives the metal fittings two coats of red lead "or other good paint for use on metals exposed to the weather": red lead is a lead poison, so use the other paint.

Matériaux pour cette étape :

Papier abrasifPapier abrasif1 pièce
Vernis marineVernis marine1 pièce
Peinture à l'huilePeinture à l'huile1 pièce

Outils nécessaires :

Brosse largeBrosse large
13

Sailing and troubleshooting

Ice yacht sailing.

Flow

Loading...
14

History and honest limits

From "A Wishbone-Mast Ice Yacht" by John F. Pjerrou, in **The Boy Mechanic, Book 3**, Popular Mechanics, 1919 (Project Gutenberg 71856; checked on the archive.org scan boymechanic0003unse, pp. 17-20). He gives no sail outline sizes. The tools, the metric figures and the choice of the non-lead paint he allows are ours.

Matériaux

35

Outils requis

21

Blueprints liés

Ces blueprints partagent des connaissances — techniques, matériaux ou principes
CC0 Domaine public

Ce blueprint est publié sous CC0. Vous êtes libre de copier, modifier, distribuer et utiliser ce travail pour tout usage, sans demander la permission.

Soutenez le Maker en achetant des produits via son Blueprint où il perçoit une Commission Maker définie par les Vendeurs, ou créez une nouvelle itération de ce Blueprint et incluez-le comme connexion dans votre propre Blueprint pour partager les revenus.

Commentaires

(0)

Se connecter pour participer à la discussion

Chargement des commentaires...